This is a question asked by almost all users who have just bought a Mac. Out of habit, you press the buttons that you used to use for language switching on Windows, but you don’t get any results.
We’ll explain how to change the input language in macOS.

By default, Mac is set to the language of the region it was purchased in. However, you can change it, as well as set a specific language for a particular application.
How to Add a New Language (Keyboard Layout) on Mac:
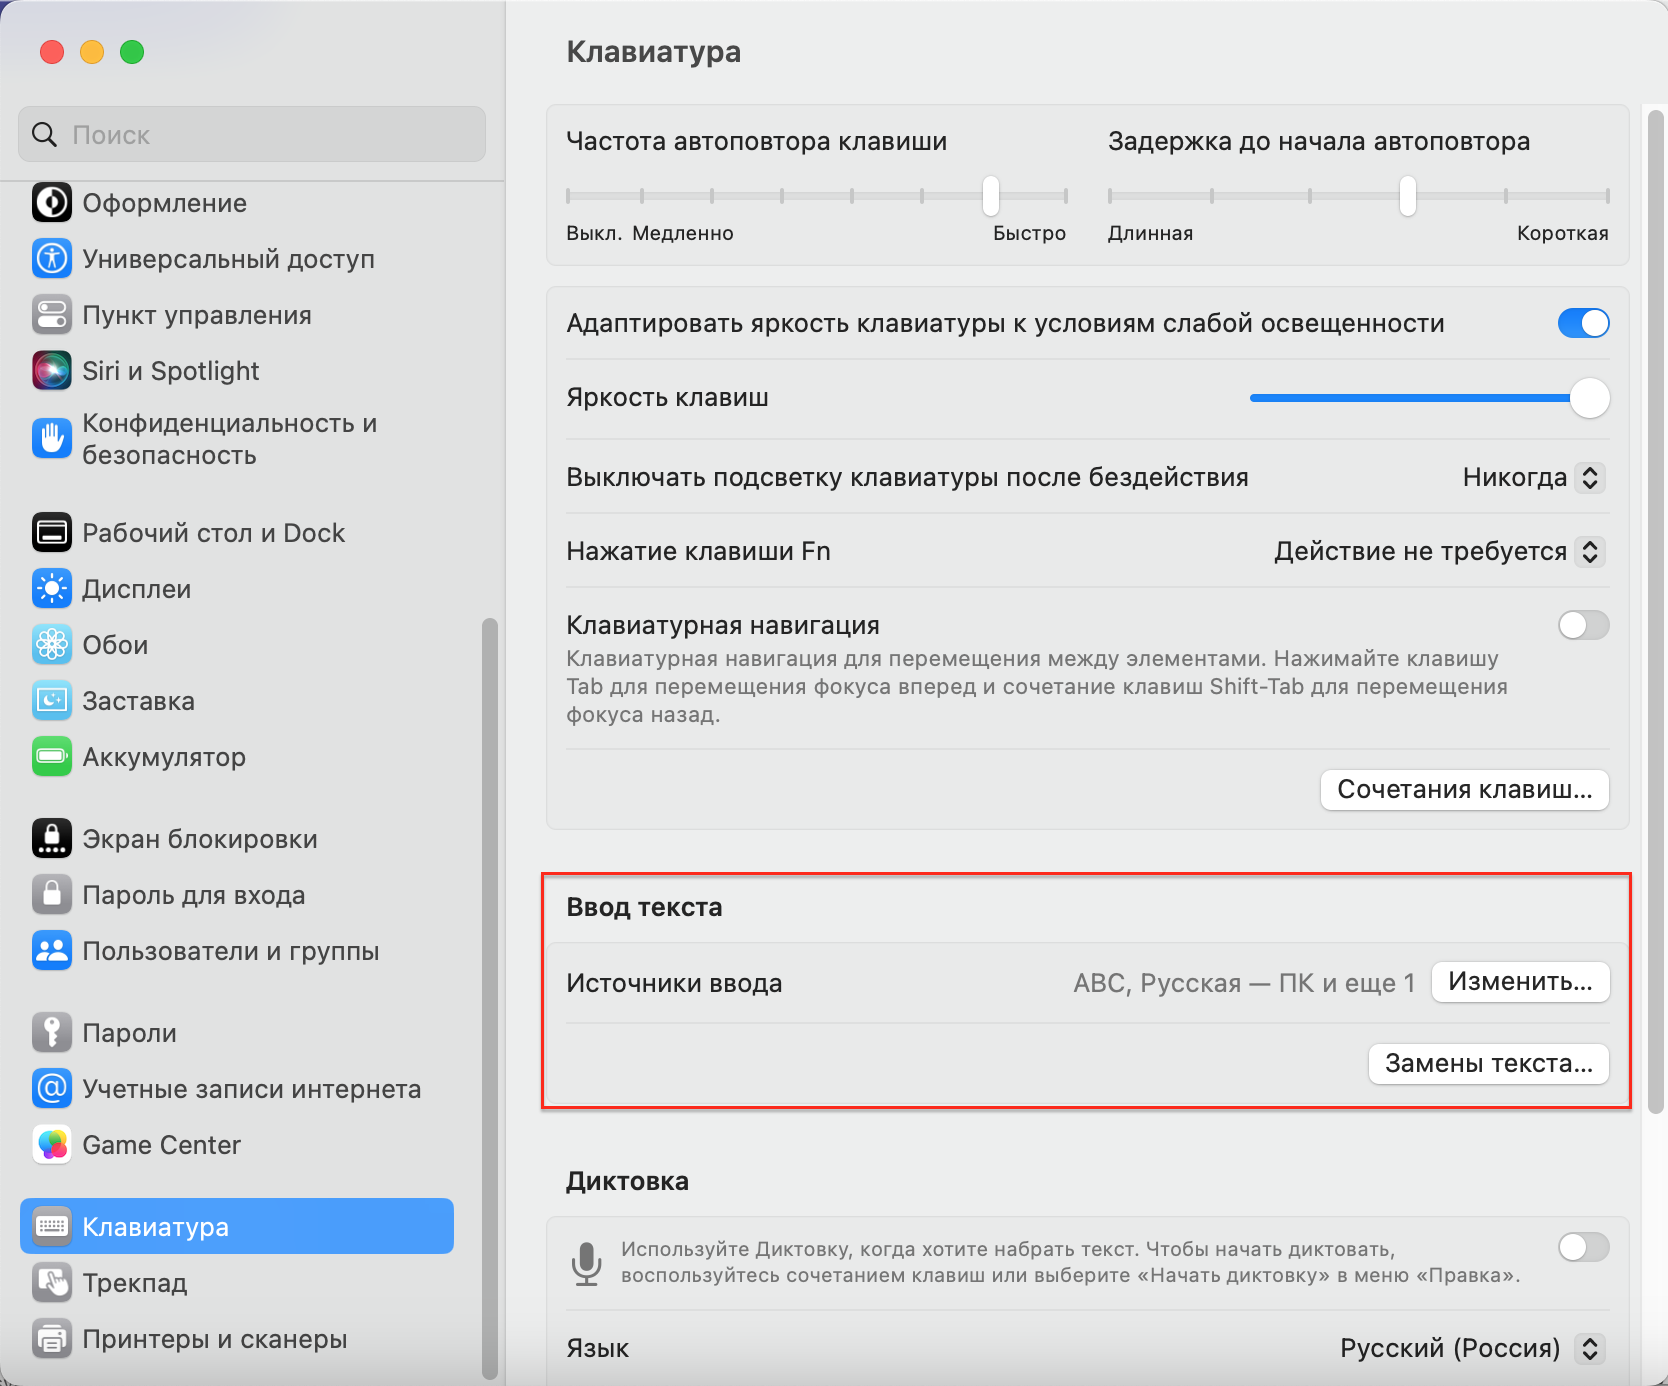
• Open “System Preferences” and scroll down to the “Keyboard” section.
• In the “Input Sources” block, click “Add”.
• Click the plus button in the lower-left corner to add a language (minus to remove).
• Select a language from the list and click “Add”.
Afterwards, the selected language will automatically appear in the list of available languages in the input menu. You can quickly switch between them using a single key or their combination.
How to Set Language Switching to Fn in macOS:
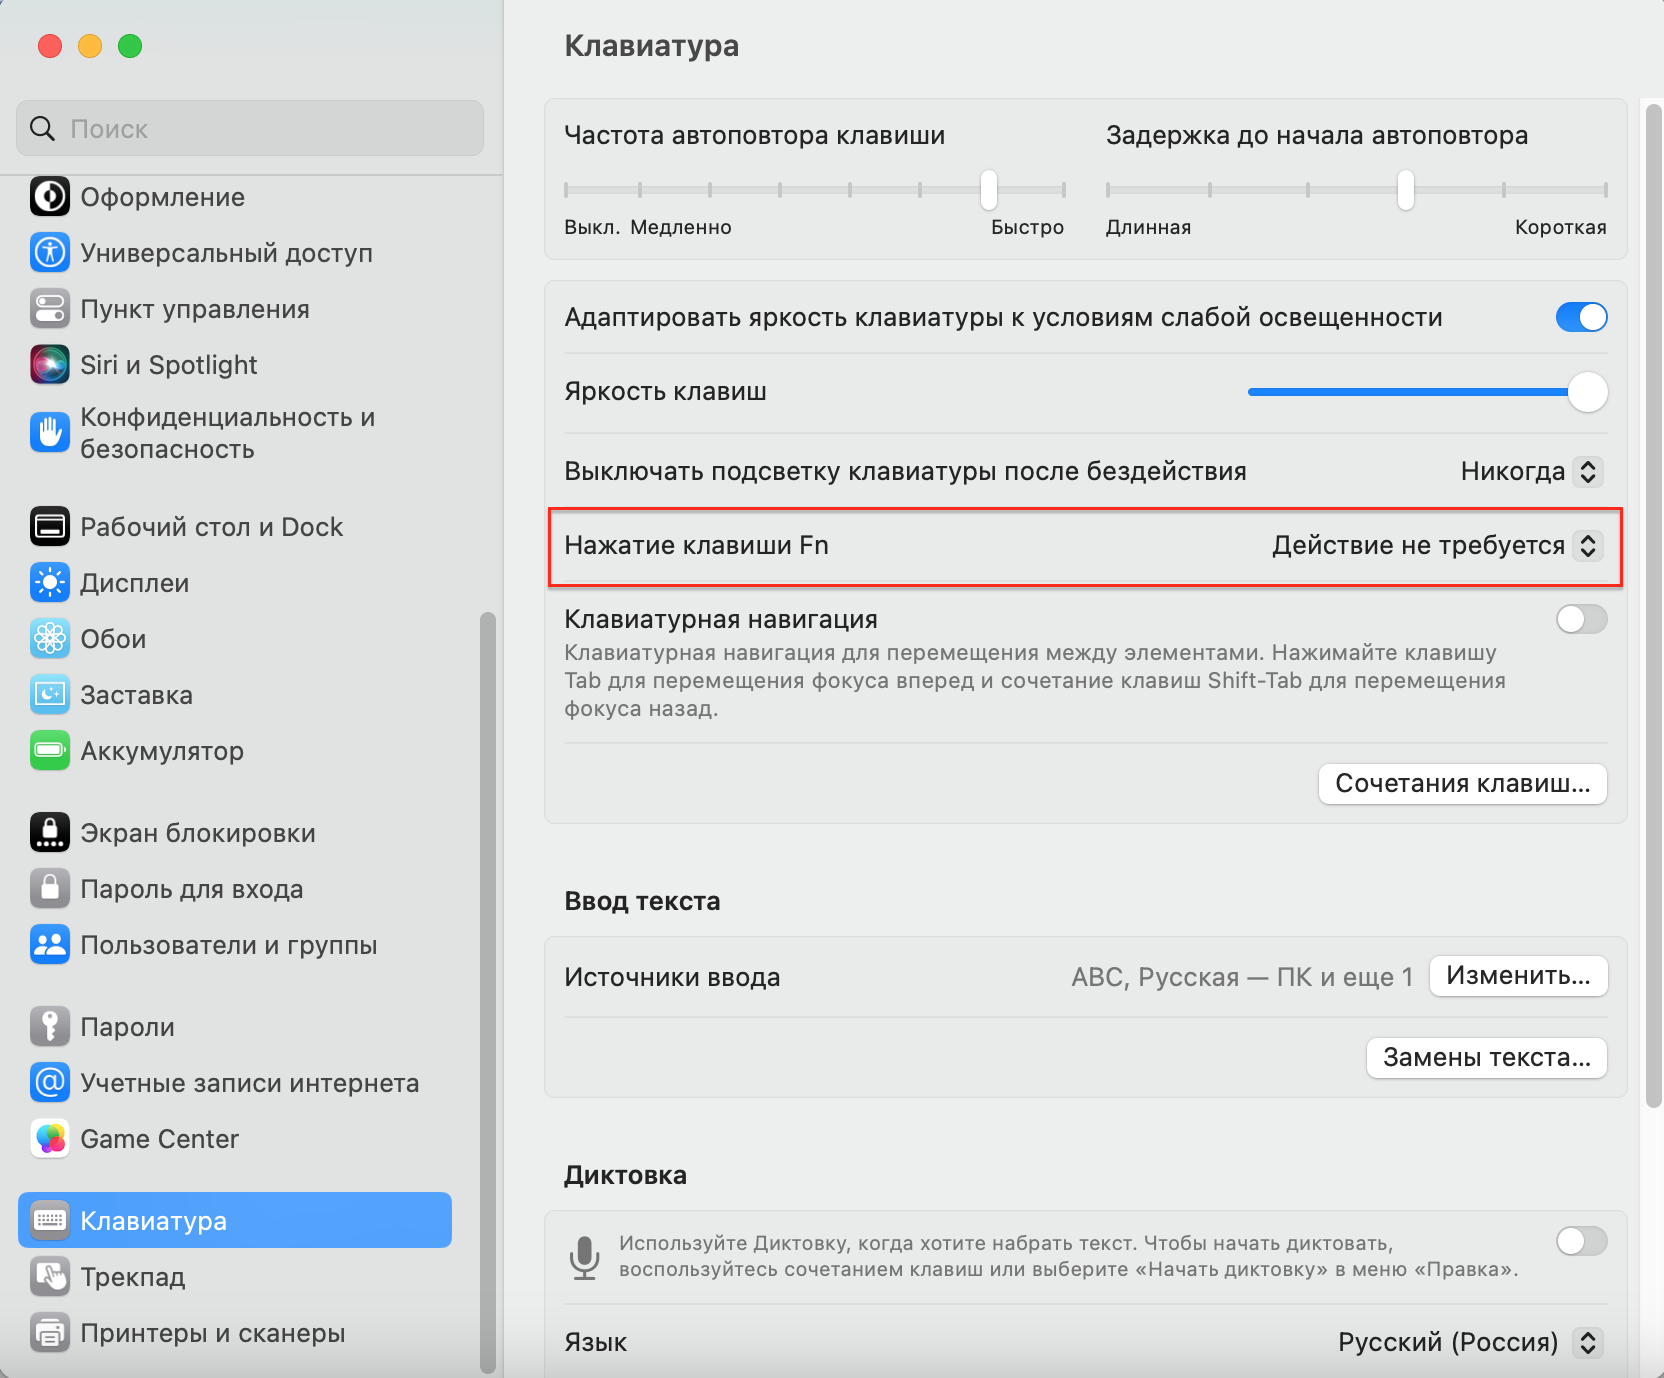
This method works without additional settings on MacBook models with M1 chips and newer. On their keyboard (on the Fn key), there is a globe icon. This button is responsible for language switching and invoking emojis. But even on older Macs, you can assign language switching to the Fn button. To do this:
• Open “System Preferences” > “Keyboard”.
• In the “Press Fn key” row, select “Change Input Source”.
How to Switch Language on a MacBook Keyboard:
You can also change the input language on Mac using three other simple methods.
- Using a keyboard shortcut. By default, it is Control + Space or Command + Space. This button combination can be changed in the keyboard settings.
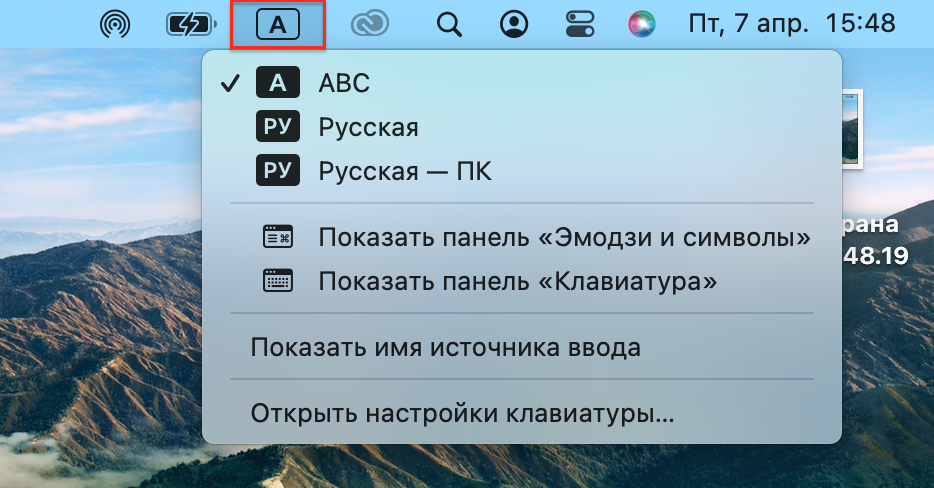
- From the input menu. To do this, click on the icon with letter images in the menu bar. It is located in the upper-right corner.
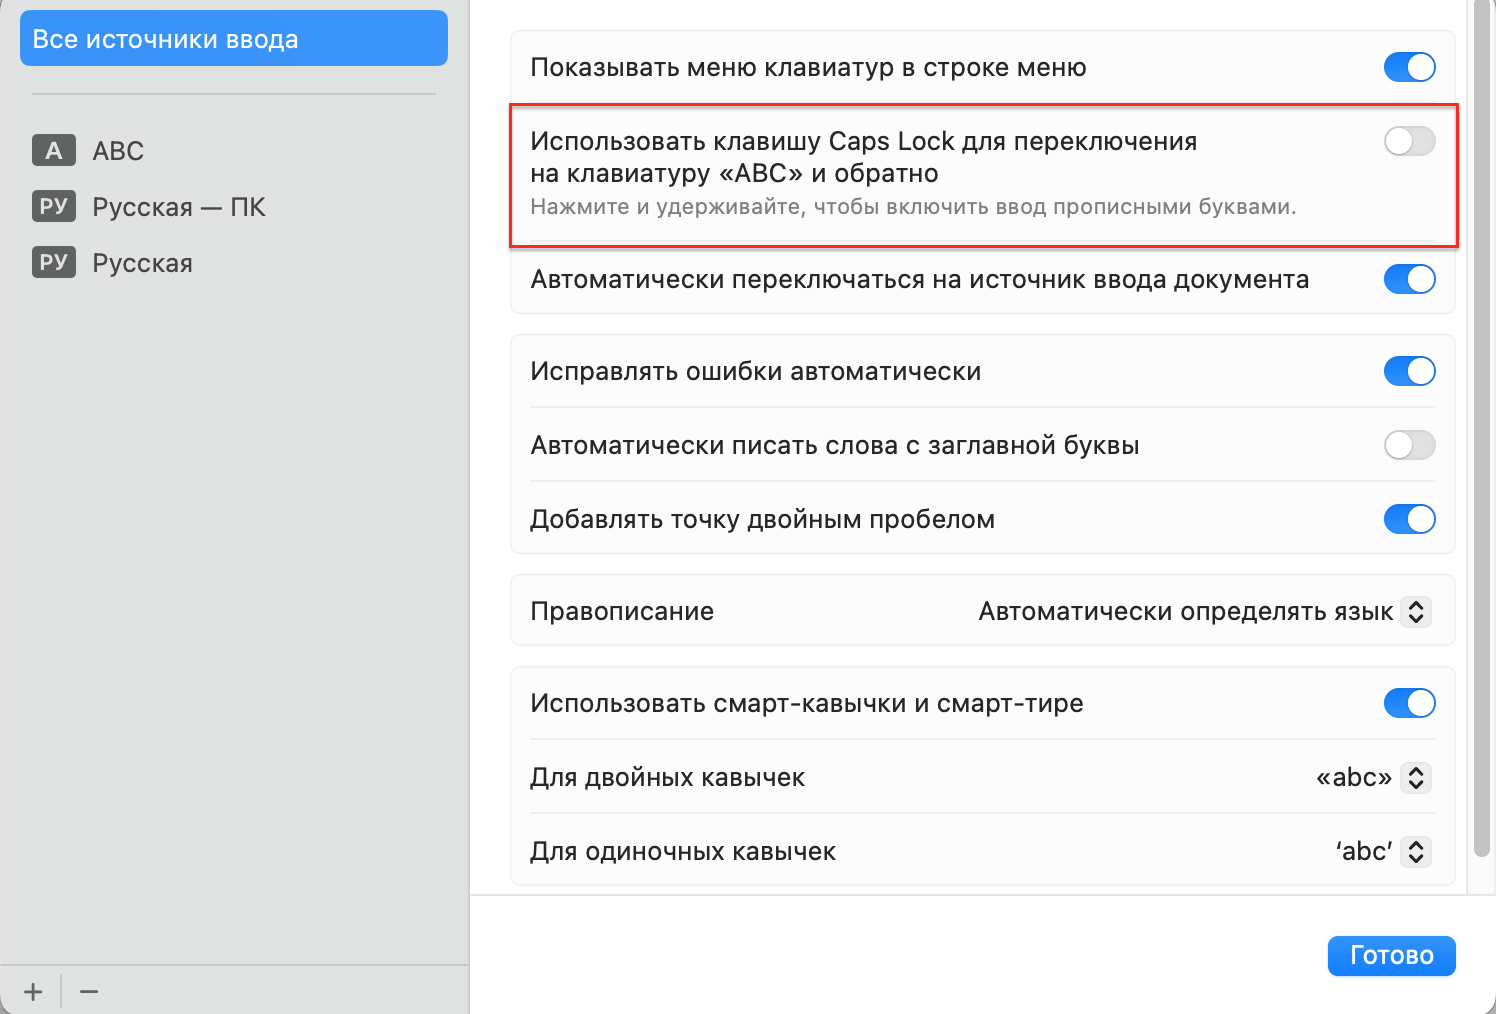
3. By pressing the Caps Lock key. However, to use this function, you need to enable it beforehand (“System Preferences” > “Keyboard” > “Modify”).
There is another quick method for Mac owners with the Touch Bar. You need to customize the Control Strip by adding the “Input Sources” button to it.
Important: This instruction is based on the most current version of the operating system, macOS Ventura. If you have an older OS, the system navigation may vary slightly. The options you need can be found in the keyboard settings.
READ ALSO:
Always be aware!
Subscribe to the newsletter and be the first to know about new promotions and special offers