Apple’s widgets and icons have become a kind of design reference: clear lines, streamlined shapes, colorful and self-explanatory icons are liked by Android users, too. What’s there to like: they actively download and install ready sets of iOS icons on their devices.
But still many people are familiar with the standard icons and widgets. Some experts on visuals even have a tinge in their eyes: they want aesthetics, harmony, and unified style. That’s why today we’ll show you how to organize your workspace on your smartphone nicely and logically in a few simple steps. We’ll tell you right away: the guide will be relevant for iOS 14 and newer users.
Just a side note
Before you experiment with your device, look for inspiration on Pinterest. There are lots of interesting ideas and ready-made icons for your home screen that you can download for free. Create a separate board for them, and then you’ll have quick access to all the work you’ve done.
To save time searching for images, use our search hints: iPhone desktop, icons for iPhone, iOS icon aesthetic, App Store icon aesthetic and the like. You can also specify in the query the color that will be accentuated in the image: for example, YouTube icon aesthetic green. After all, if all the icons are in the same style, the desktop will look more harmonious.
Avoiding chaos and clutter in the workspace will help to divide it into blocks. For example, on the first desktop it would be logical to keep icons of frequently used applications and separate them thematically: for example, you can combine books, notes and task scheduler; podcasts, music and movies; photo, video, editing and processing; cab, navigation and search engine, etc. And anything you don’t need quick access to can be placed on the following desktops or even left in the App Library.
By the way, keep in mind the logic and associations with these applications when choosing images. This will help you get used to them faster. For example, a cab service will be perfectly illustrated by a car, a navigator by a map or footprints, a bank by a shopping cart or a wallet.
Once you’ve selected the most suitable icons, stickers and photos, upload them to your iPhone gallery and be ready to change your desktop beyond recognition!
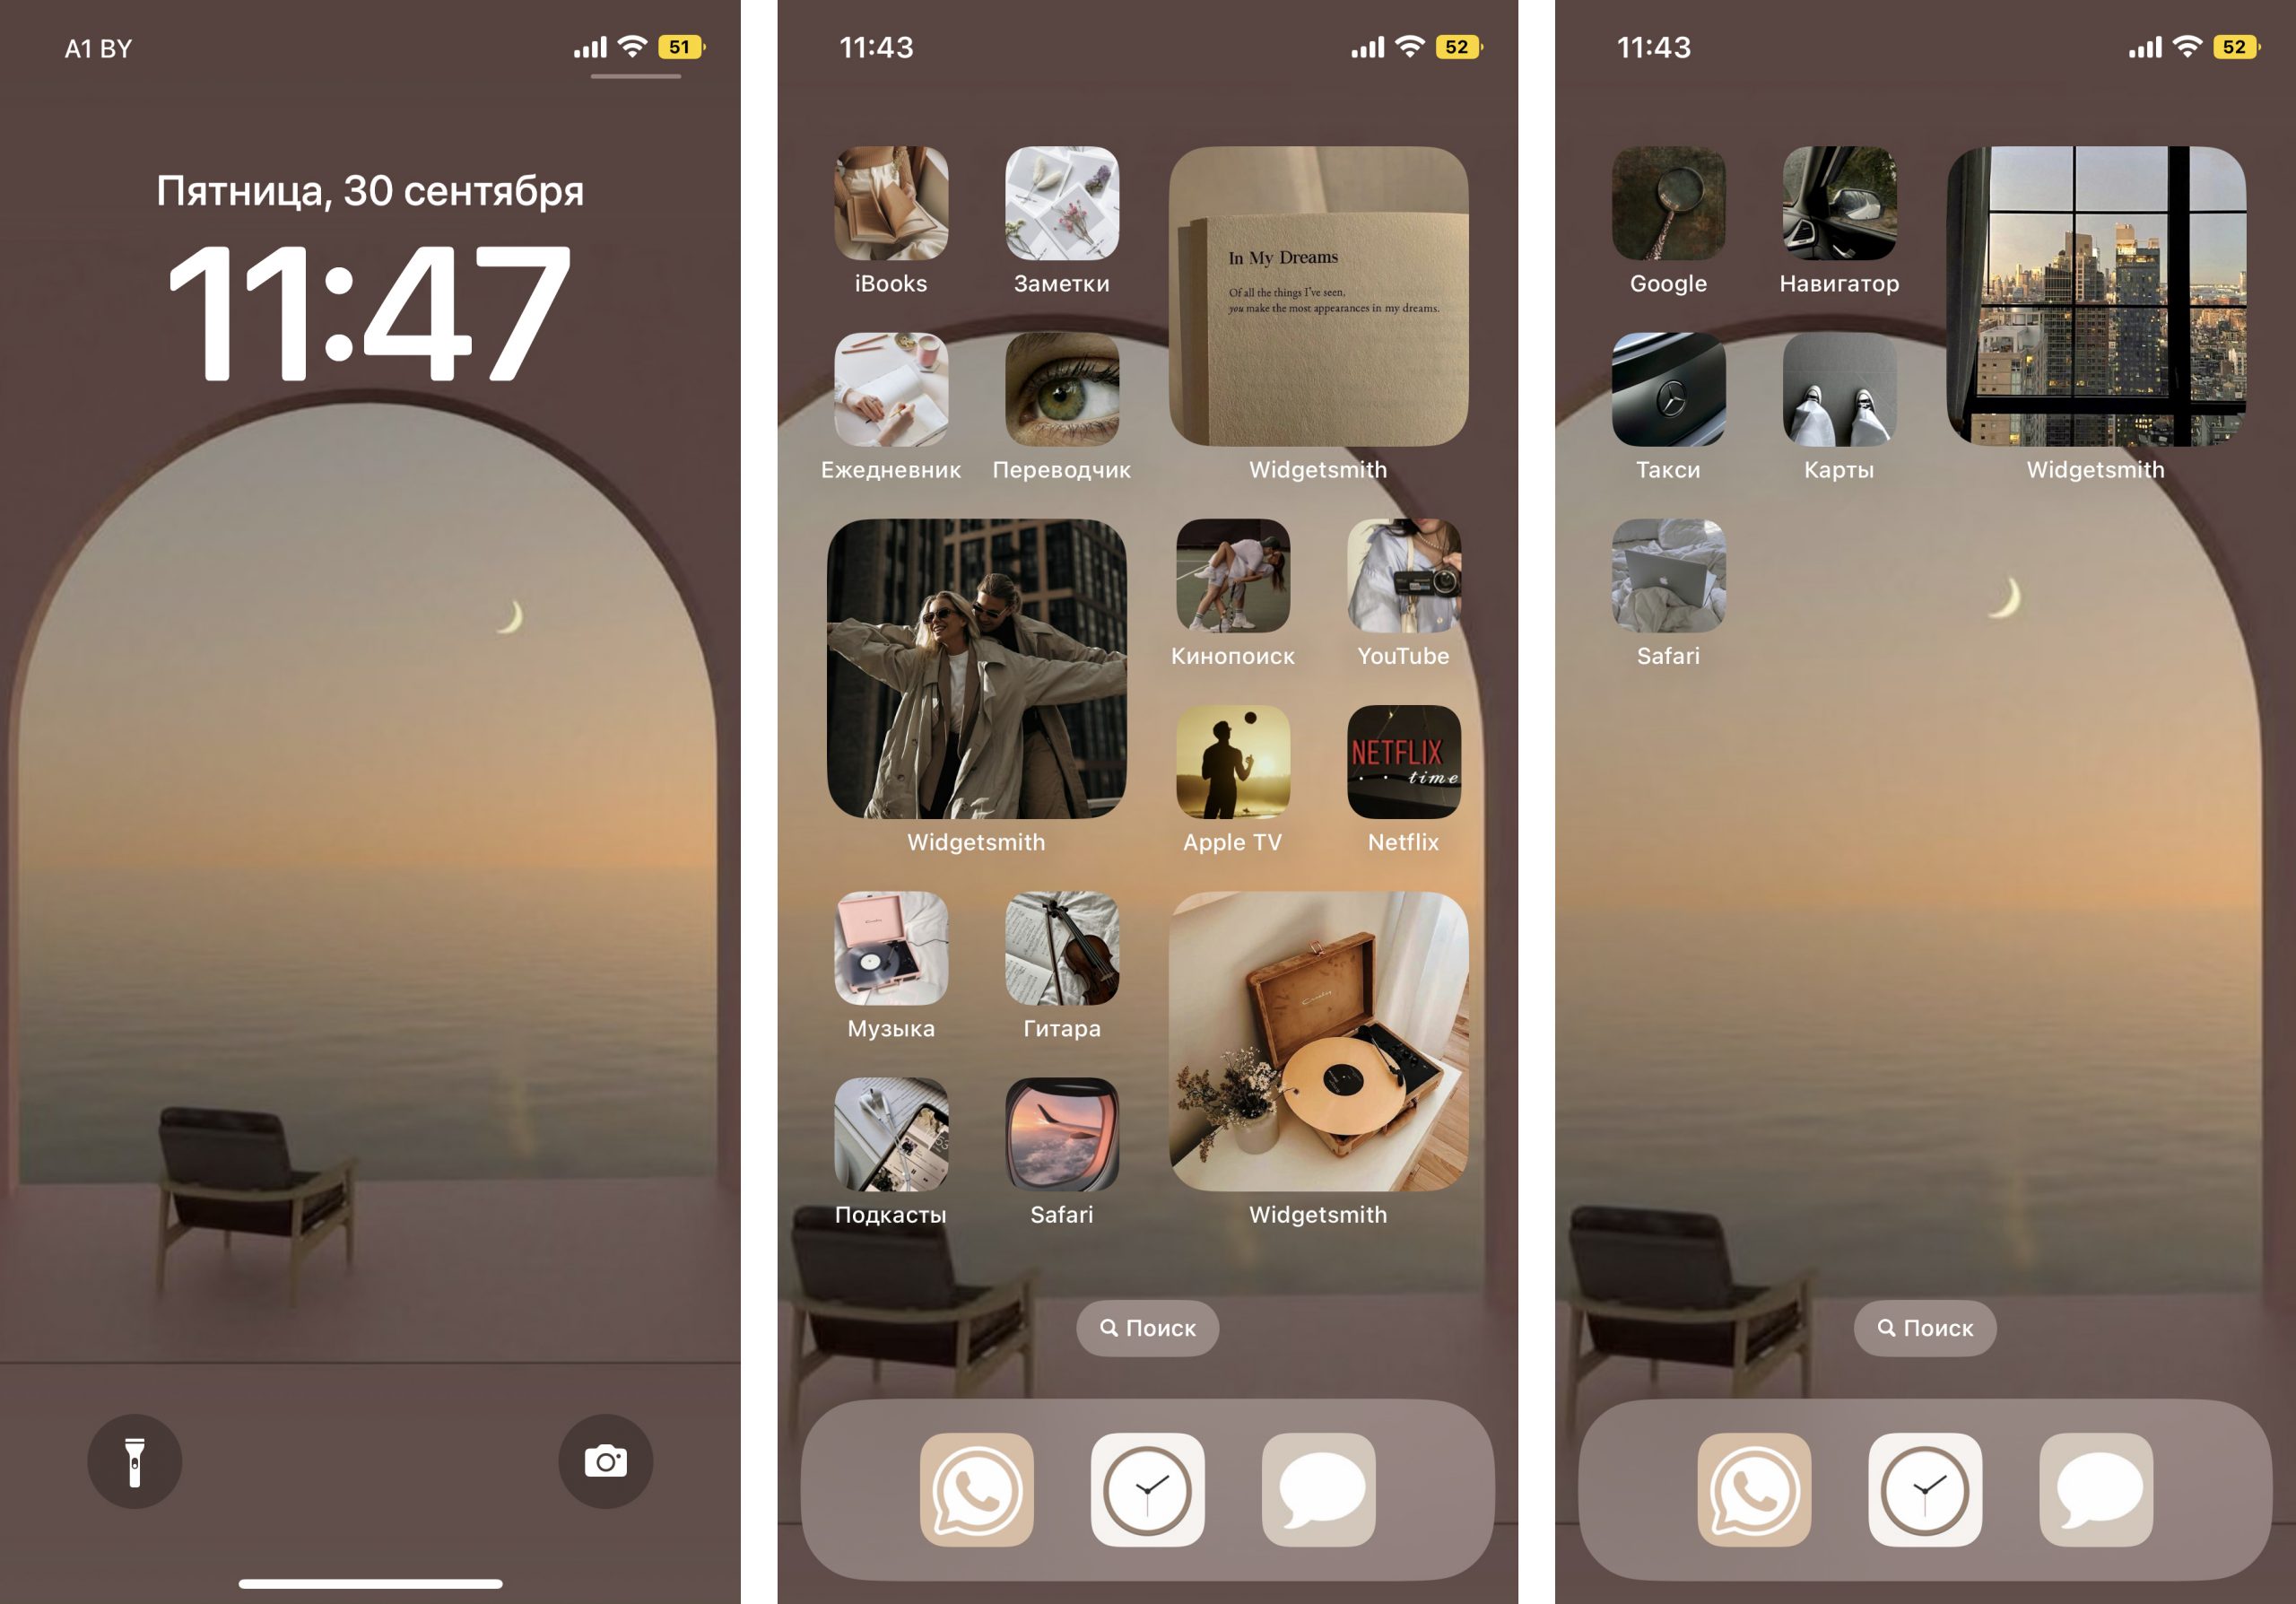
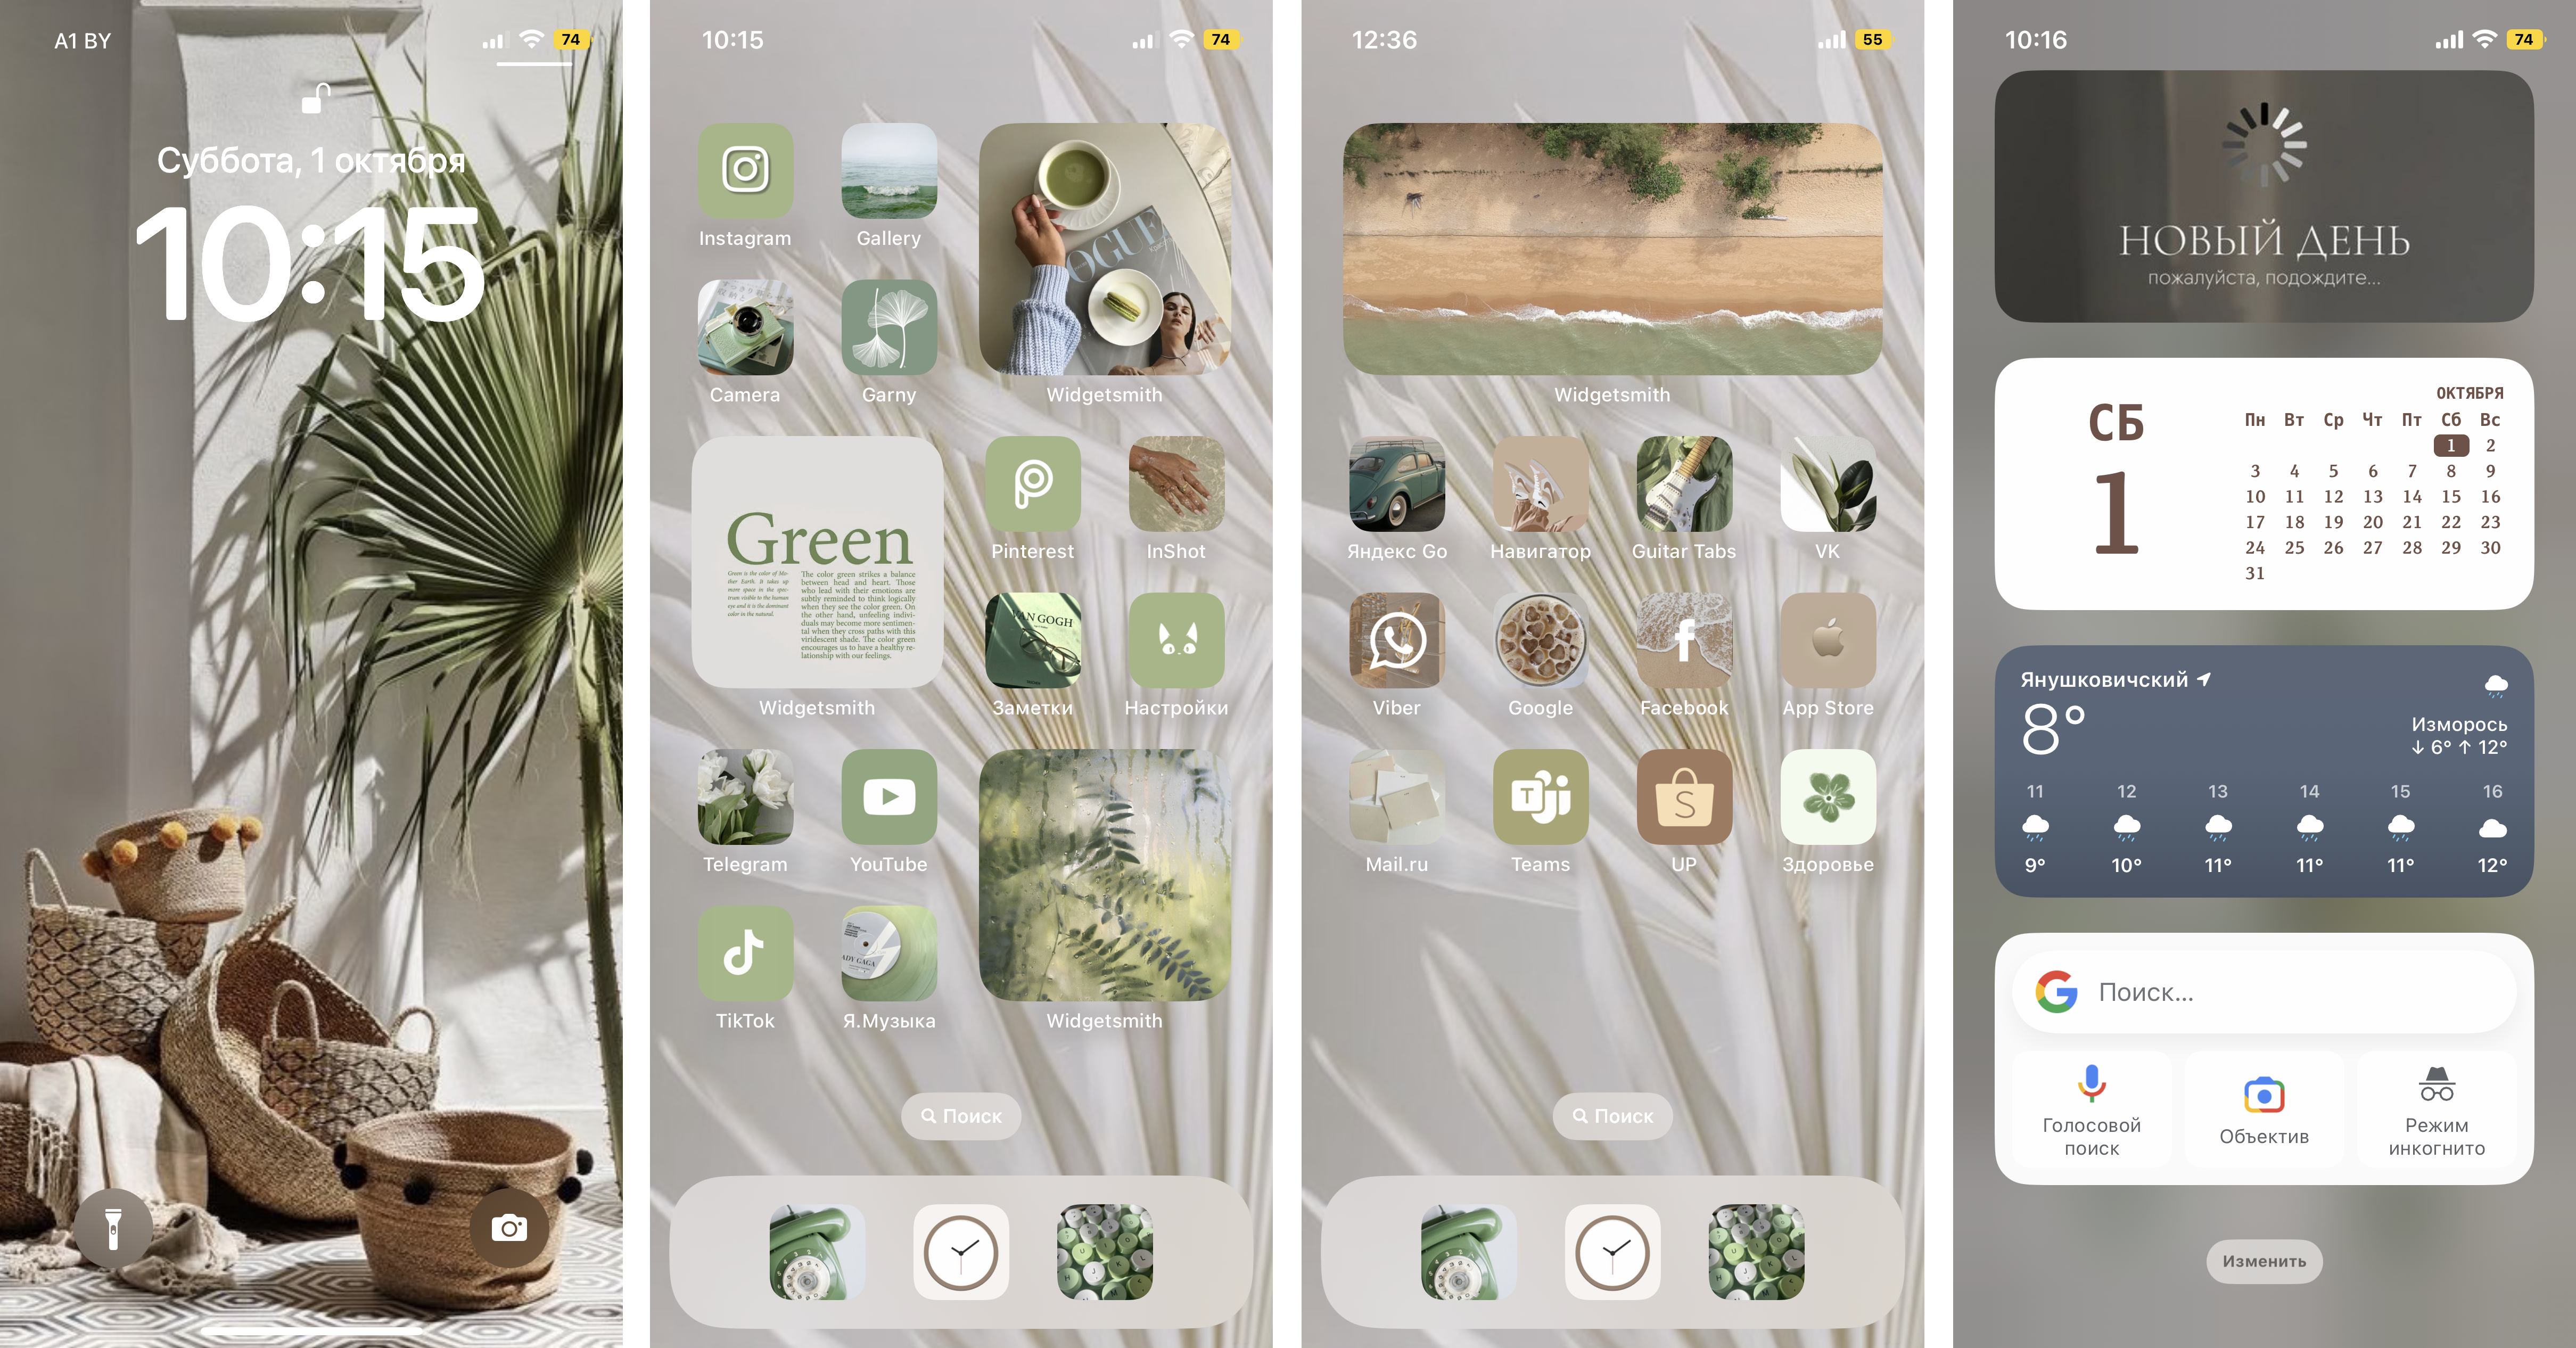
On the left are the standard iOS widgets and icons. In the center and on the right are the adapted ones. Do you want us to show you how to do the same?
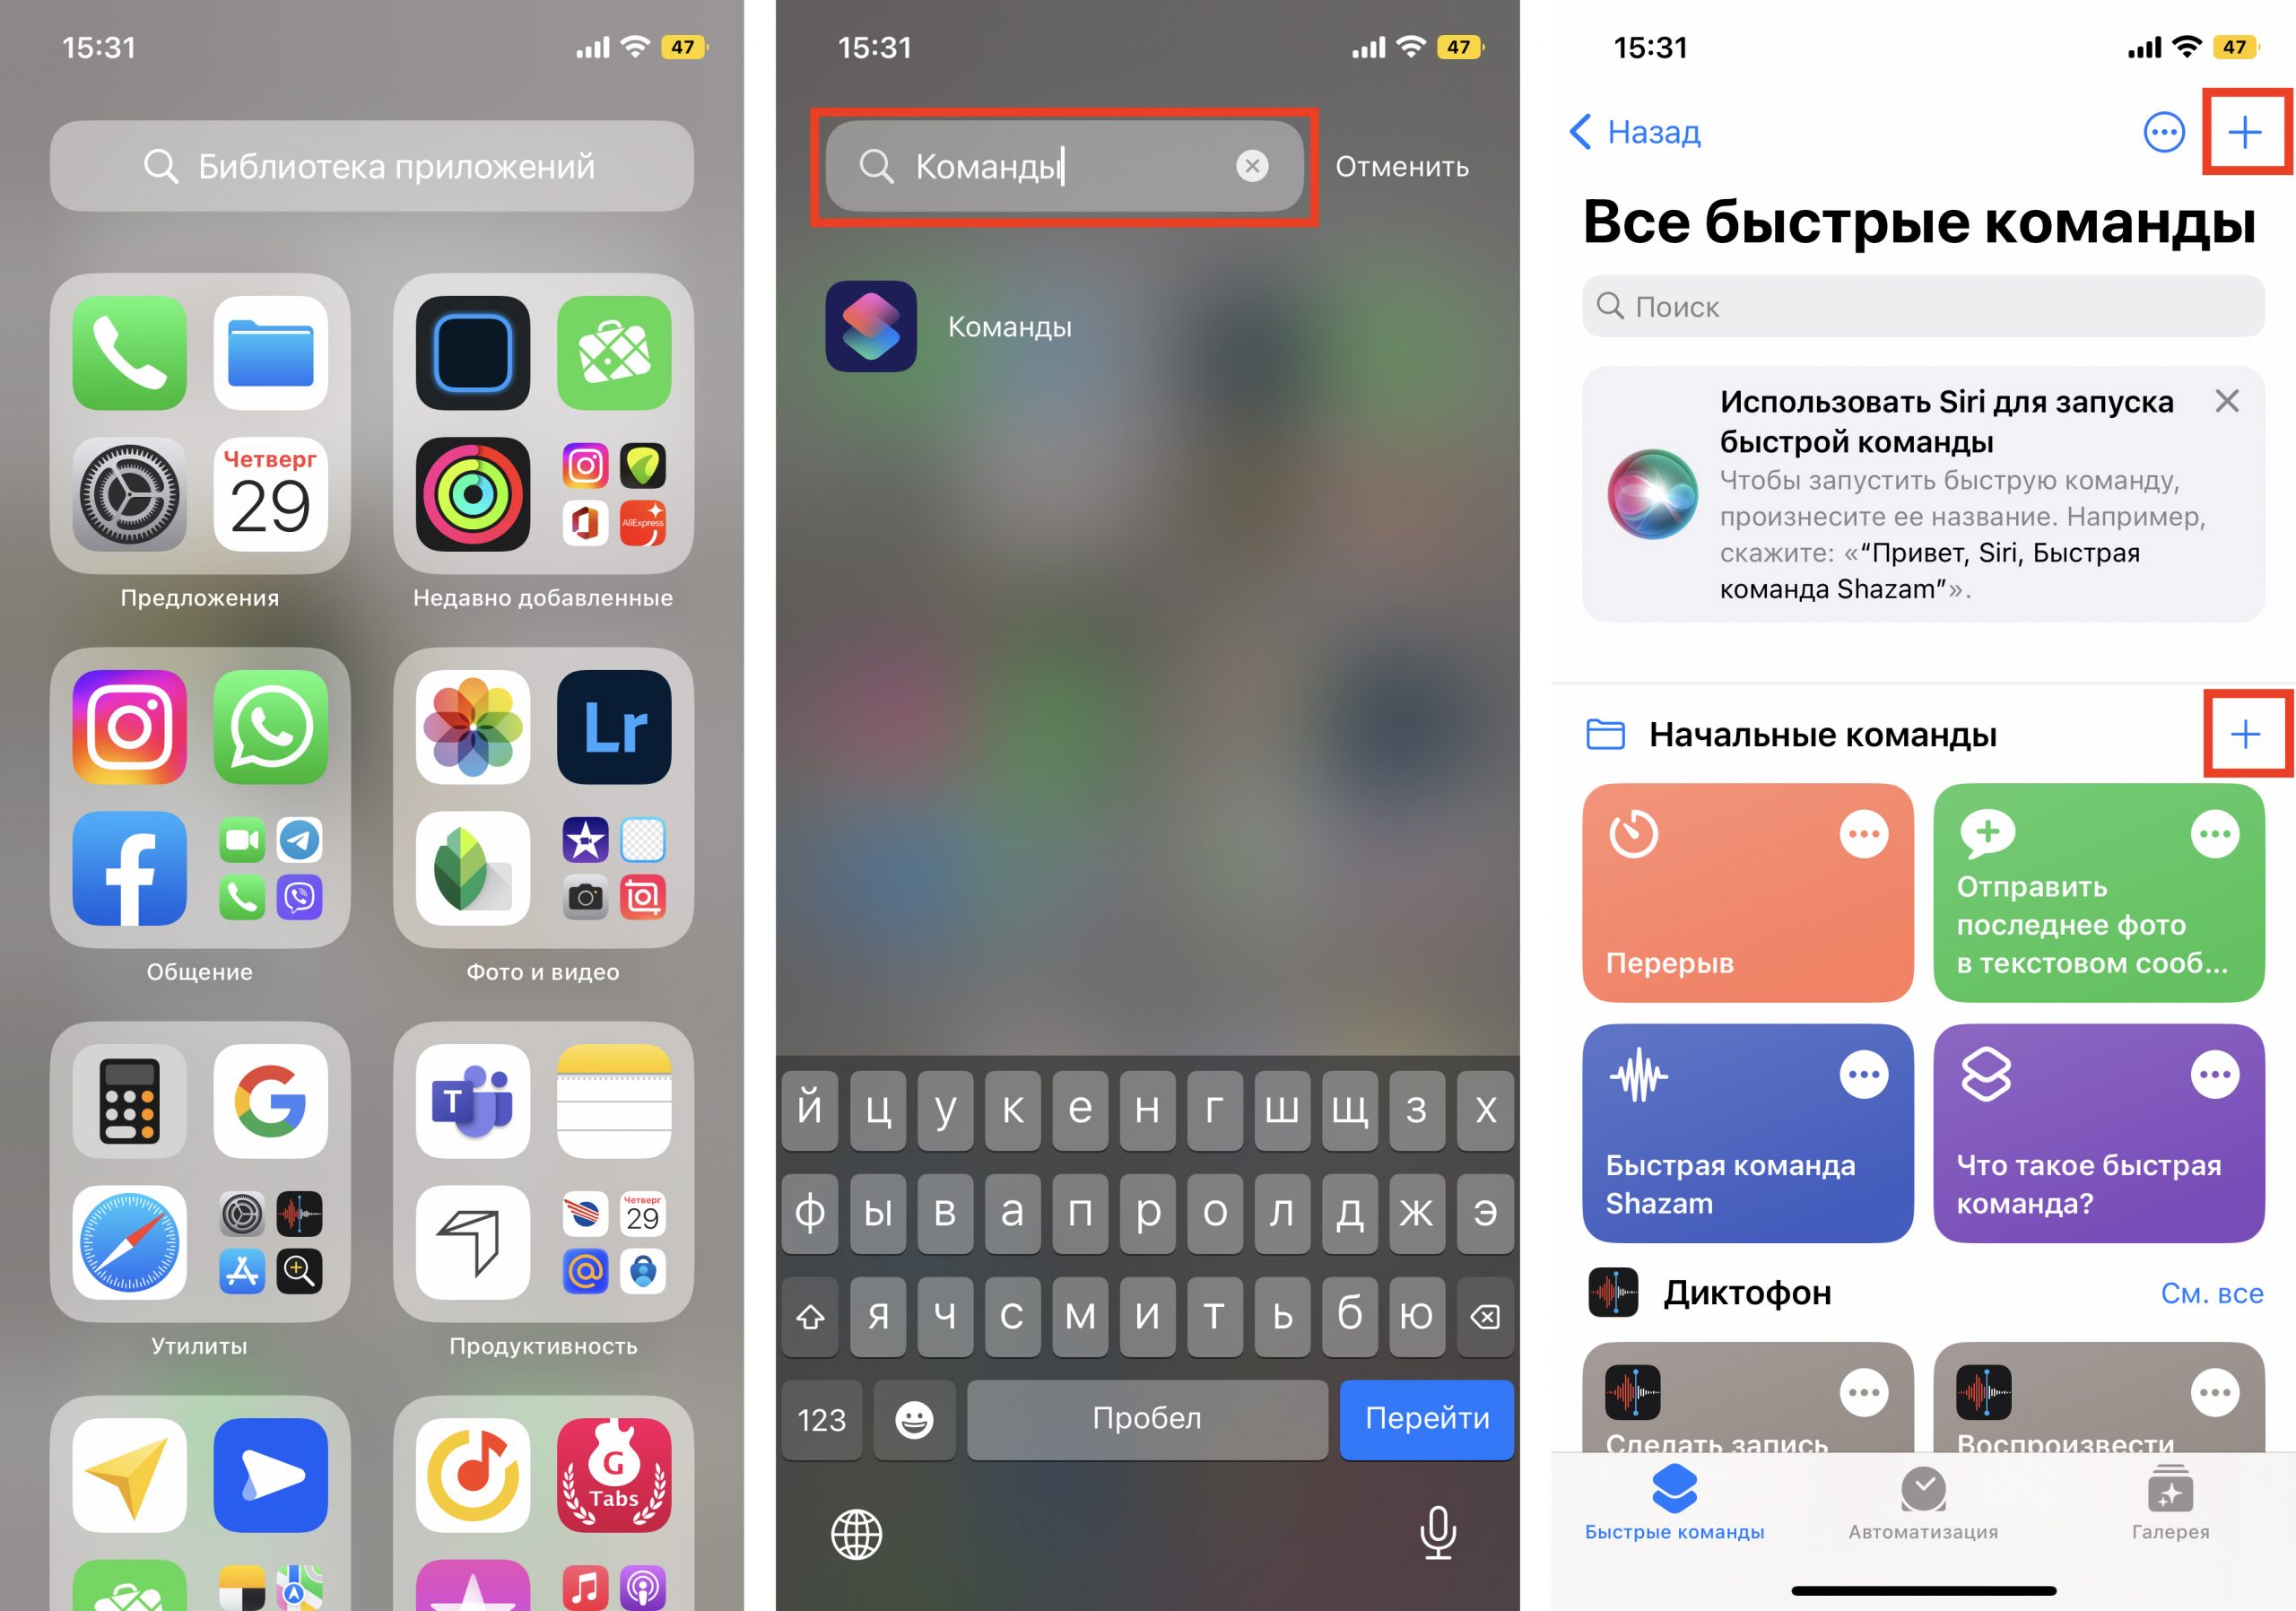
How to change the icon of any application on your iPhone?
In order to do this, you don’t need to download anything additional. You’ll need the built-in Commands app, and you’ll also need pre-selected pictures for each app and a little patience.
- In the Library of your iPhone, find the built-in Commands app. Tap the blue plus icon in the upper right corner or to the right of the “Start Commands” menu – it won’t make a difference.
2. A menu will open for you to create a “New Team”. Select the “Open Application” action. In the next window, you need to select the desired application and name the command in the same way.
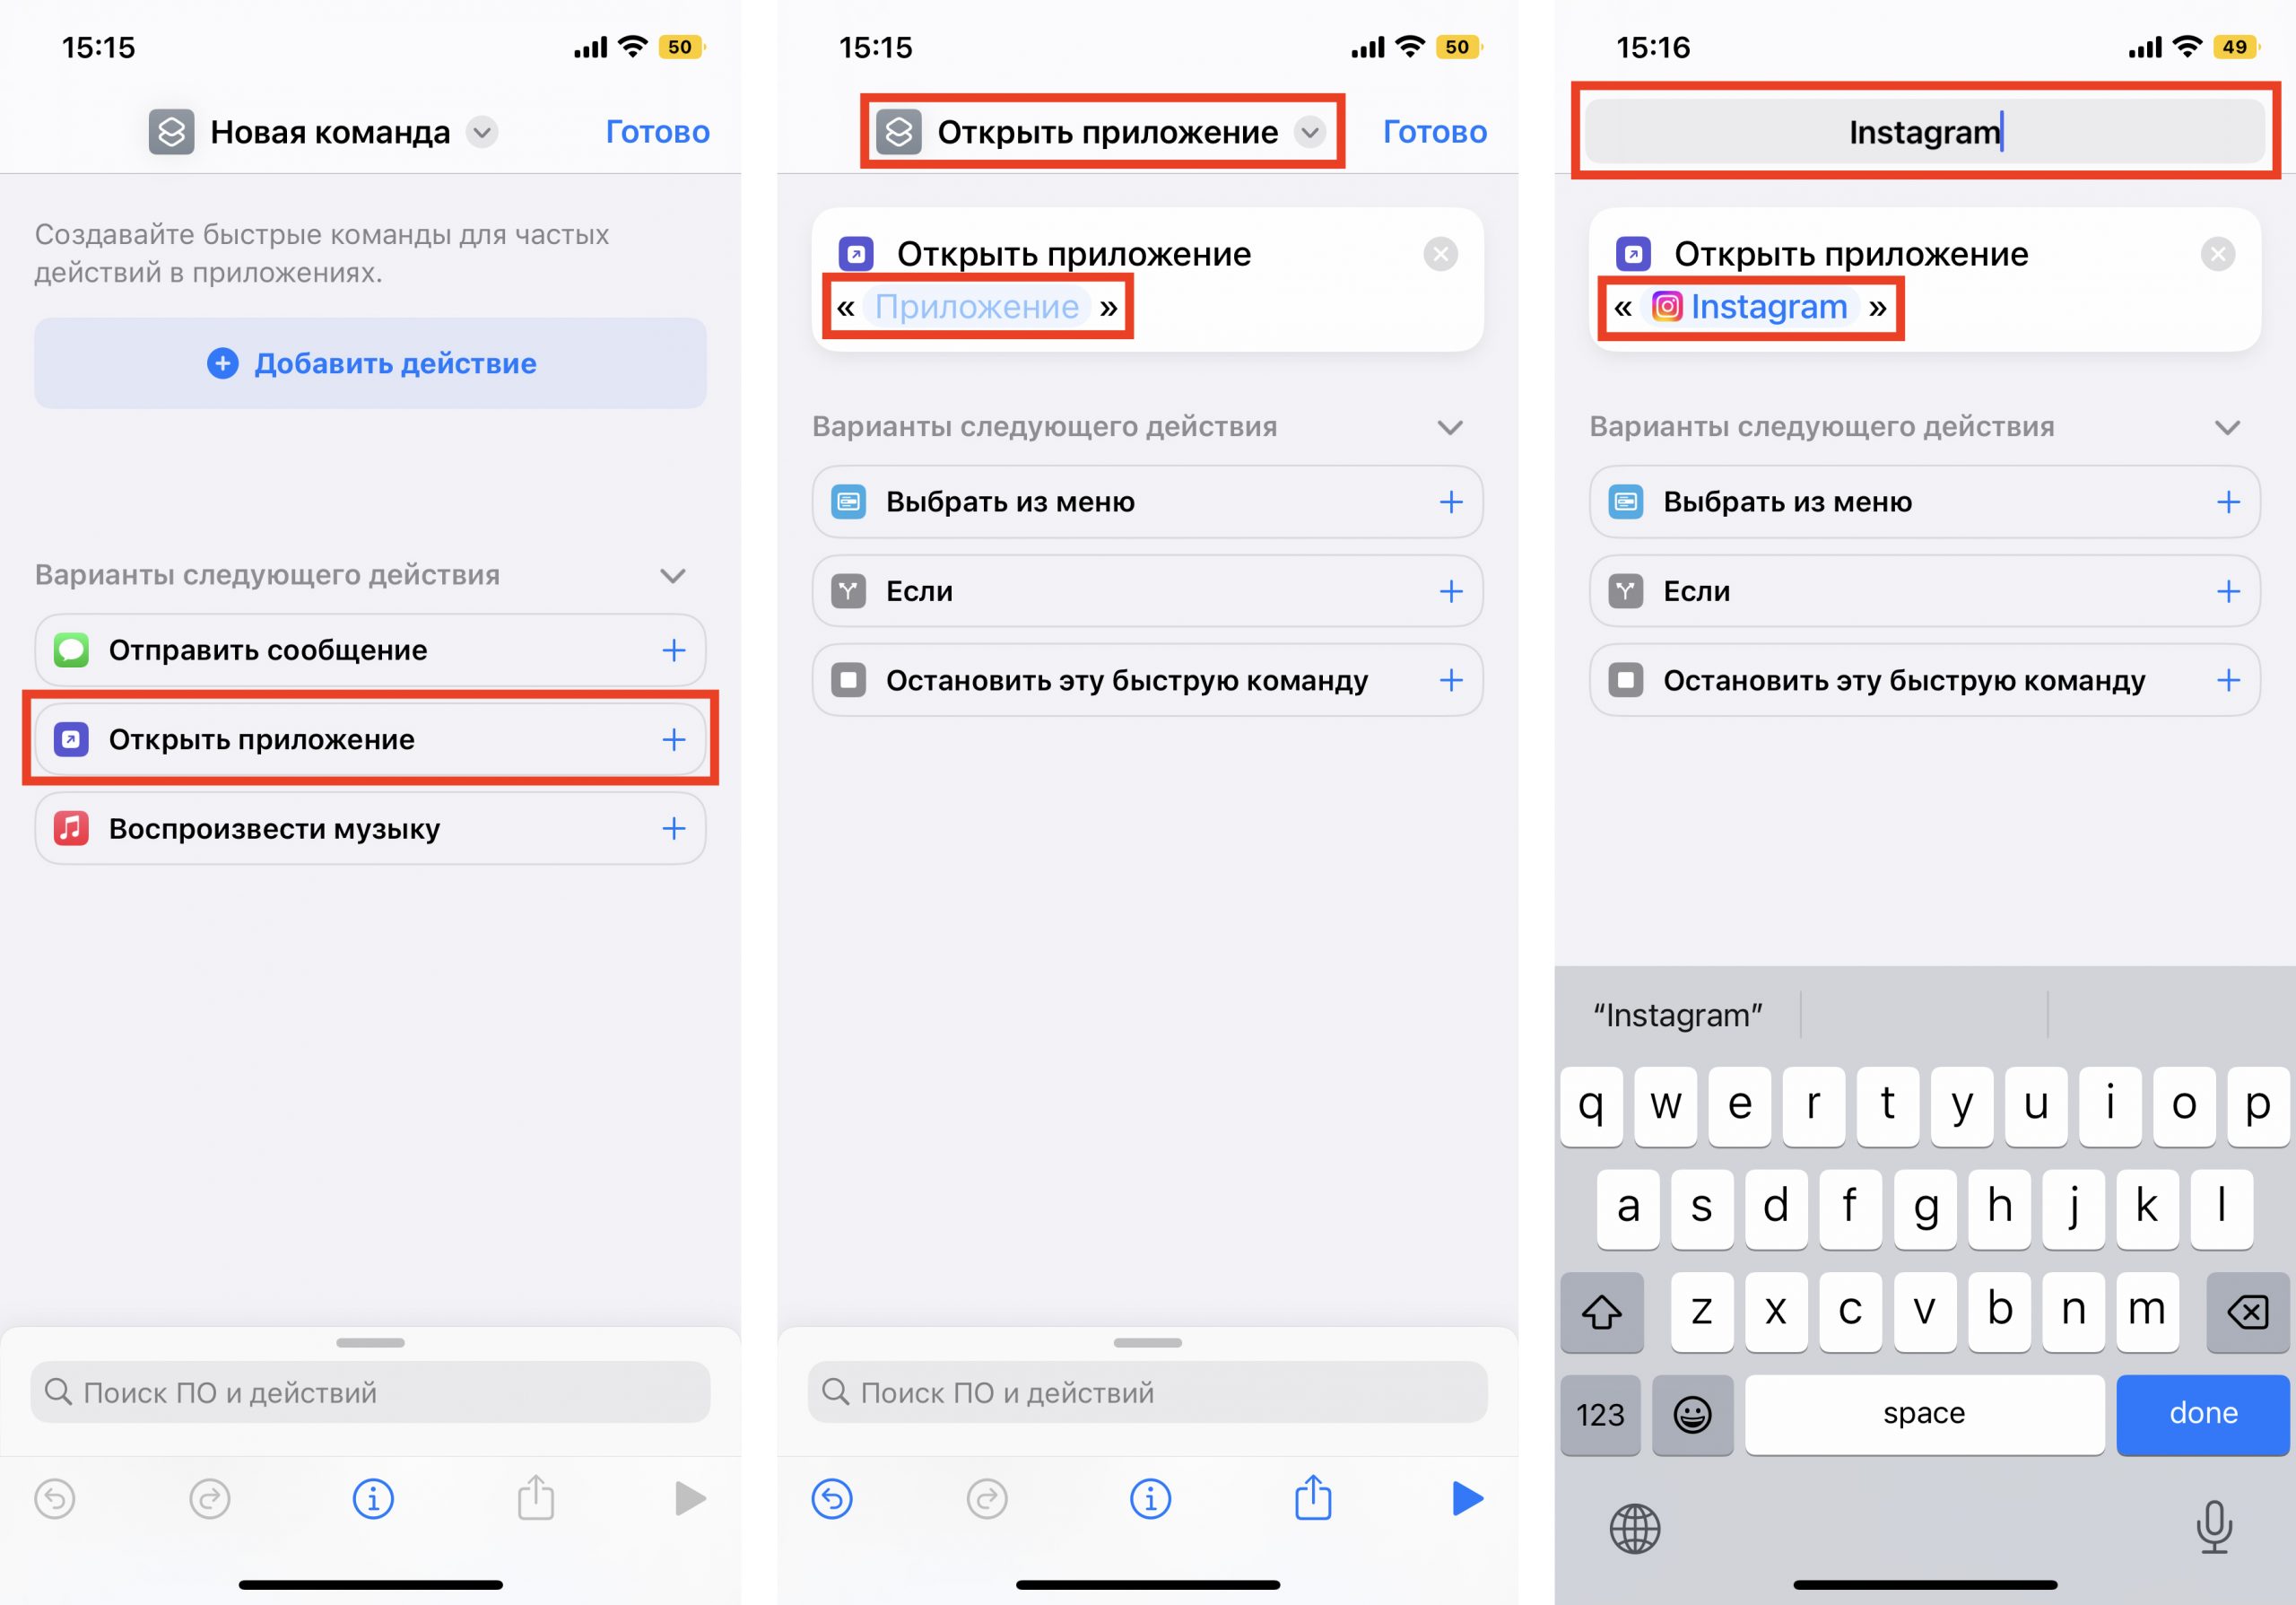
3. Next, click the “Share” icon at the bottom right of the screen and select the “Add to Home screen” action. Rename the line to the name of the desired application (in our case it is Instagram). But don’t rush to click “Add”, otherwise your command will appear on the desktop without an icon.
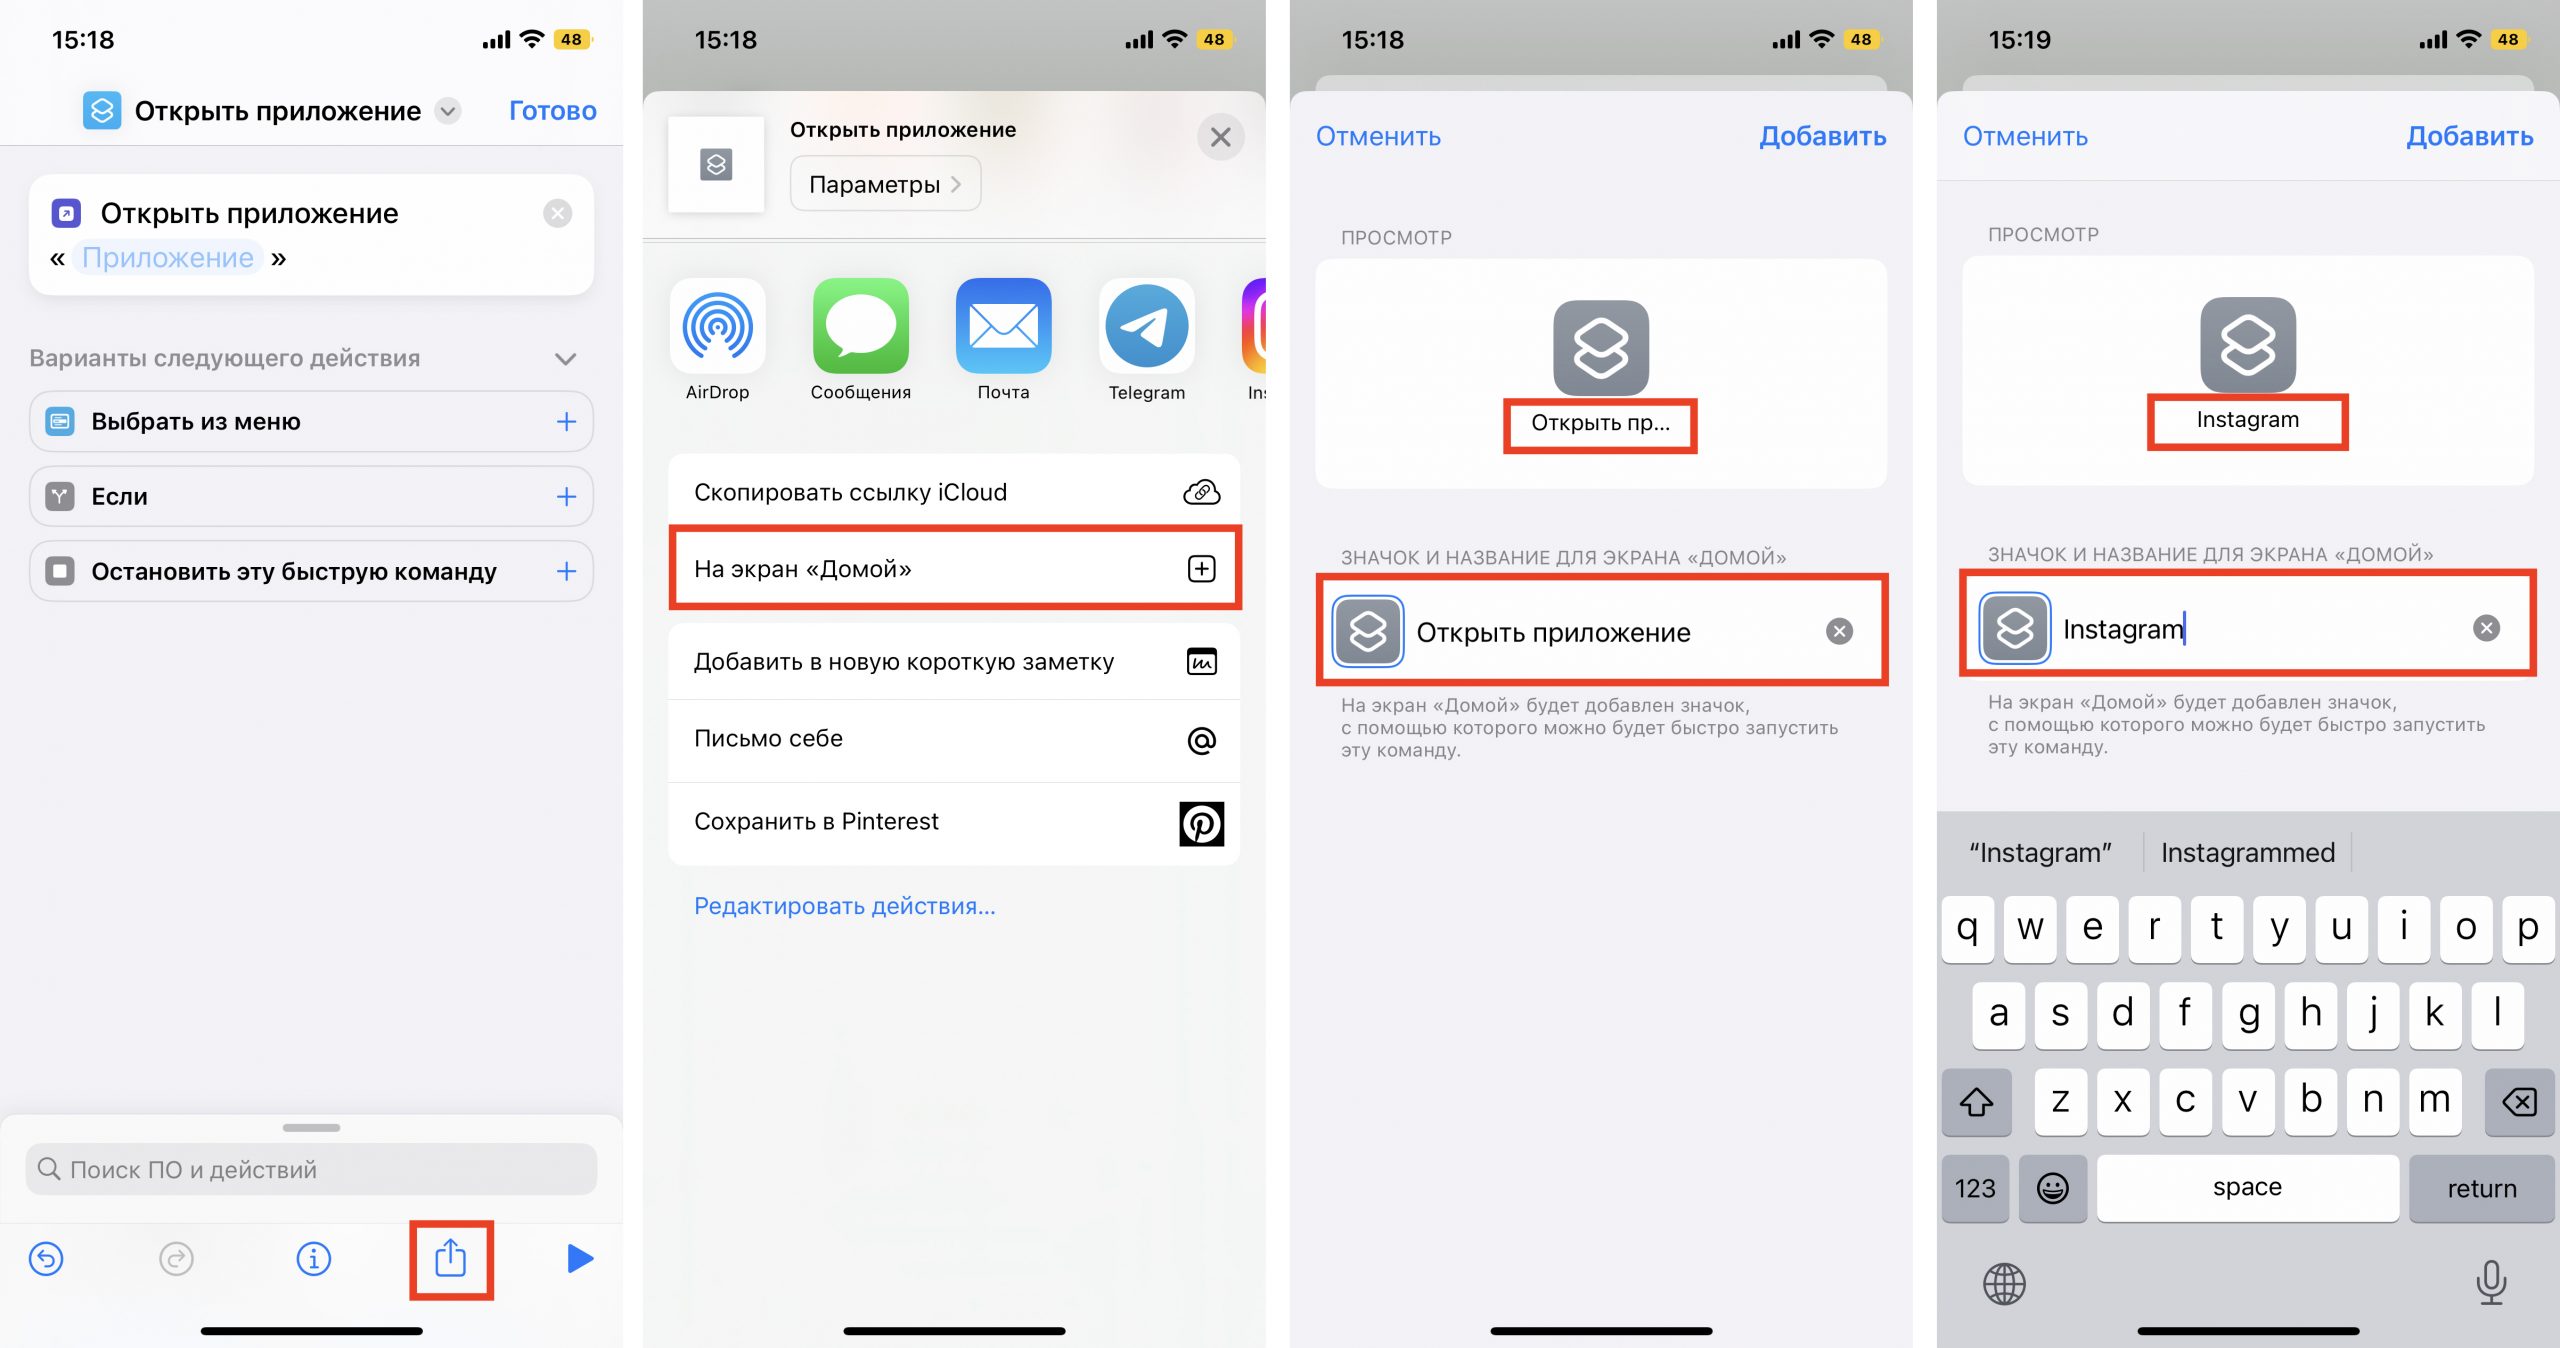
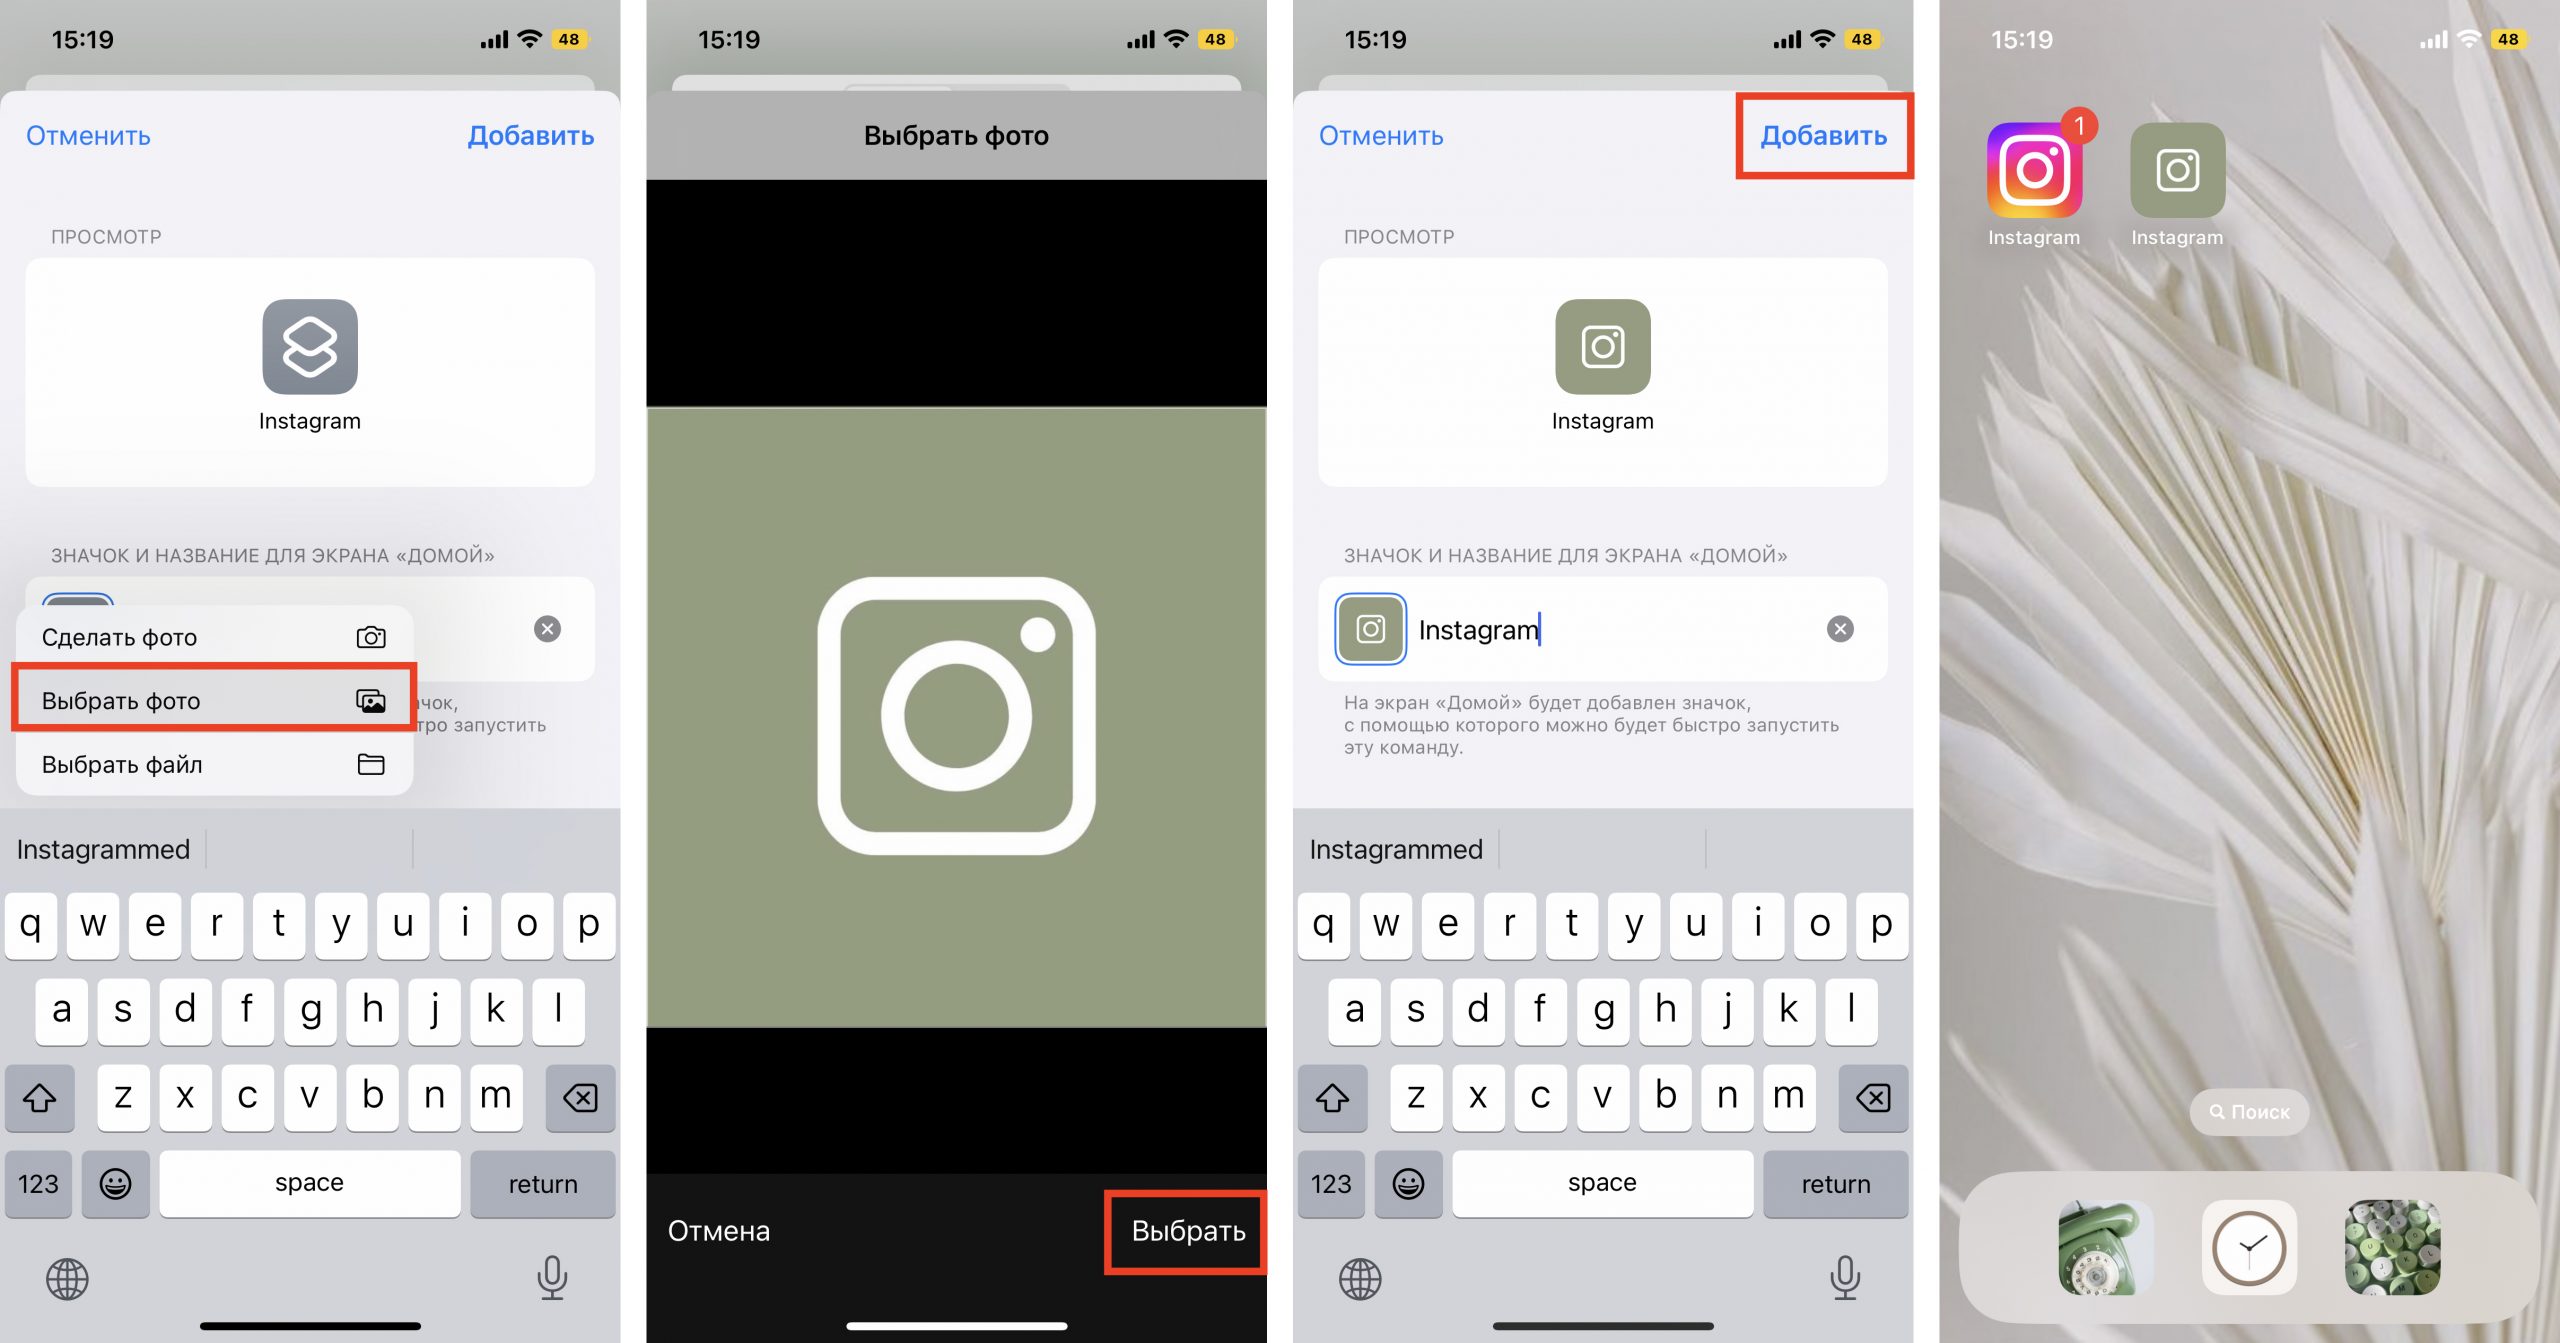
4. It remains to assign a new image to the command. Click on the icon to the left of the name: from the suggested actions, tap “Select Photo”. Find a suitable image in the gallery from the ones you have previously downloaded, and crop it evenly around the edges of the square. Click “Add” and “Done”.
This is not the most obvious way to replace the standard application icons with your own. It can be any image, even your selfies. This method has only one disadvantage: when you click on such an icon, a two-second push notification will pop up at the top of the screen. This is due to the fact that in this way you do not change the original icon of the application, but only create a copy of it with a link to the current application. Perhaps in future versions of iOS Apple developers will remove this restriction.
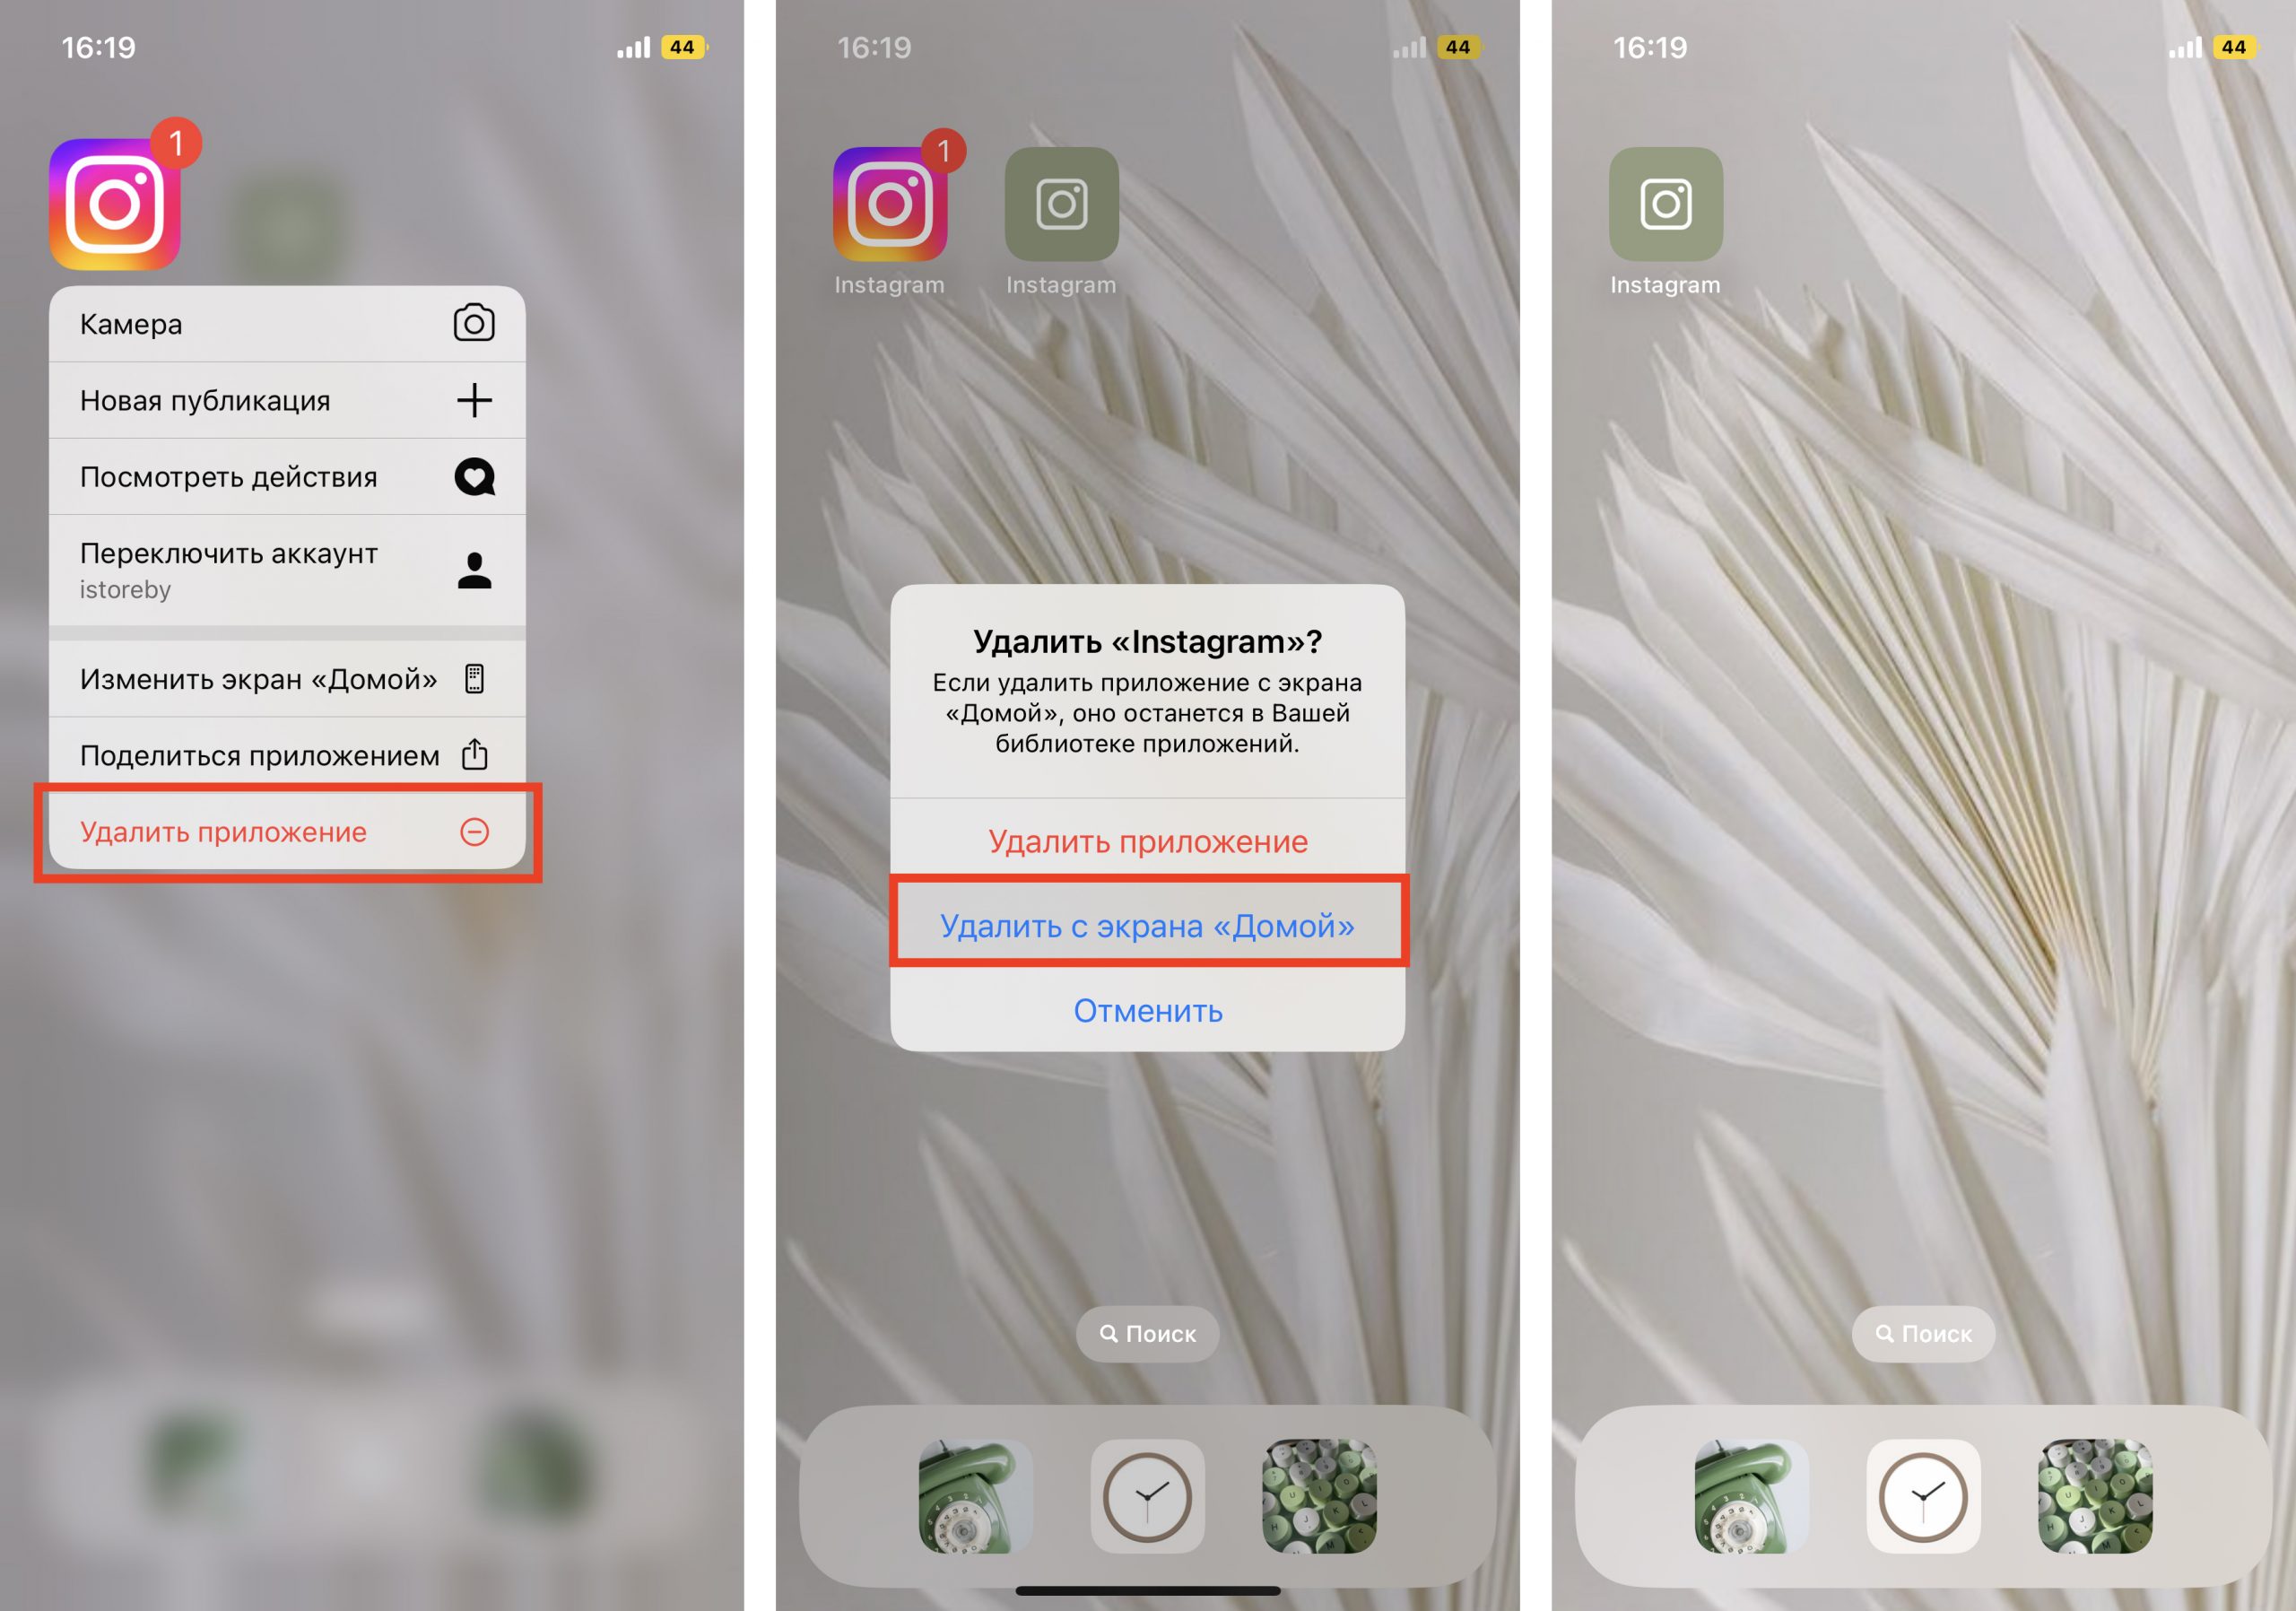
By the way, it is better to remove standard icons from the desktop to avoid confusion. Be careful: from the “Home” screen you need to remove only the icon, not the application itself. To do this, hold your finger on the icon of the desired application for a few seconds – and follow these steps: “Delete application” – “Remove from home screen”.
To create your own unique workspace, apply the same mechanism to the other applications you use most often.
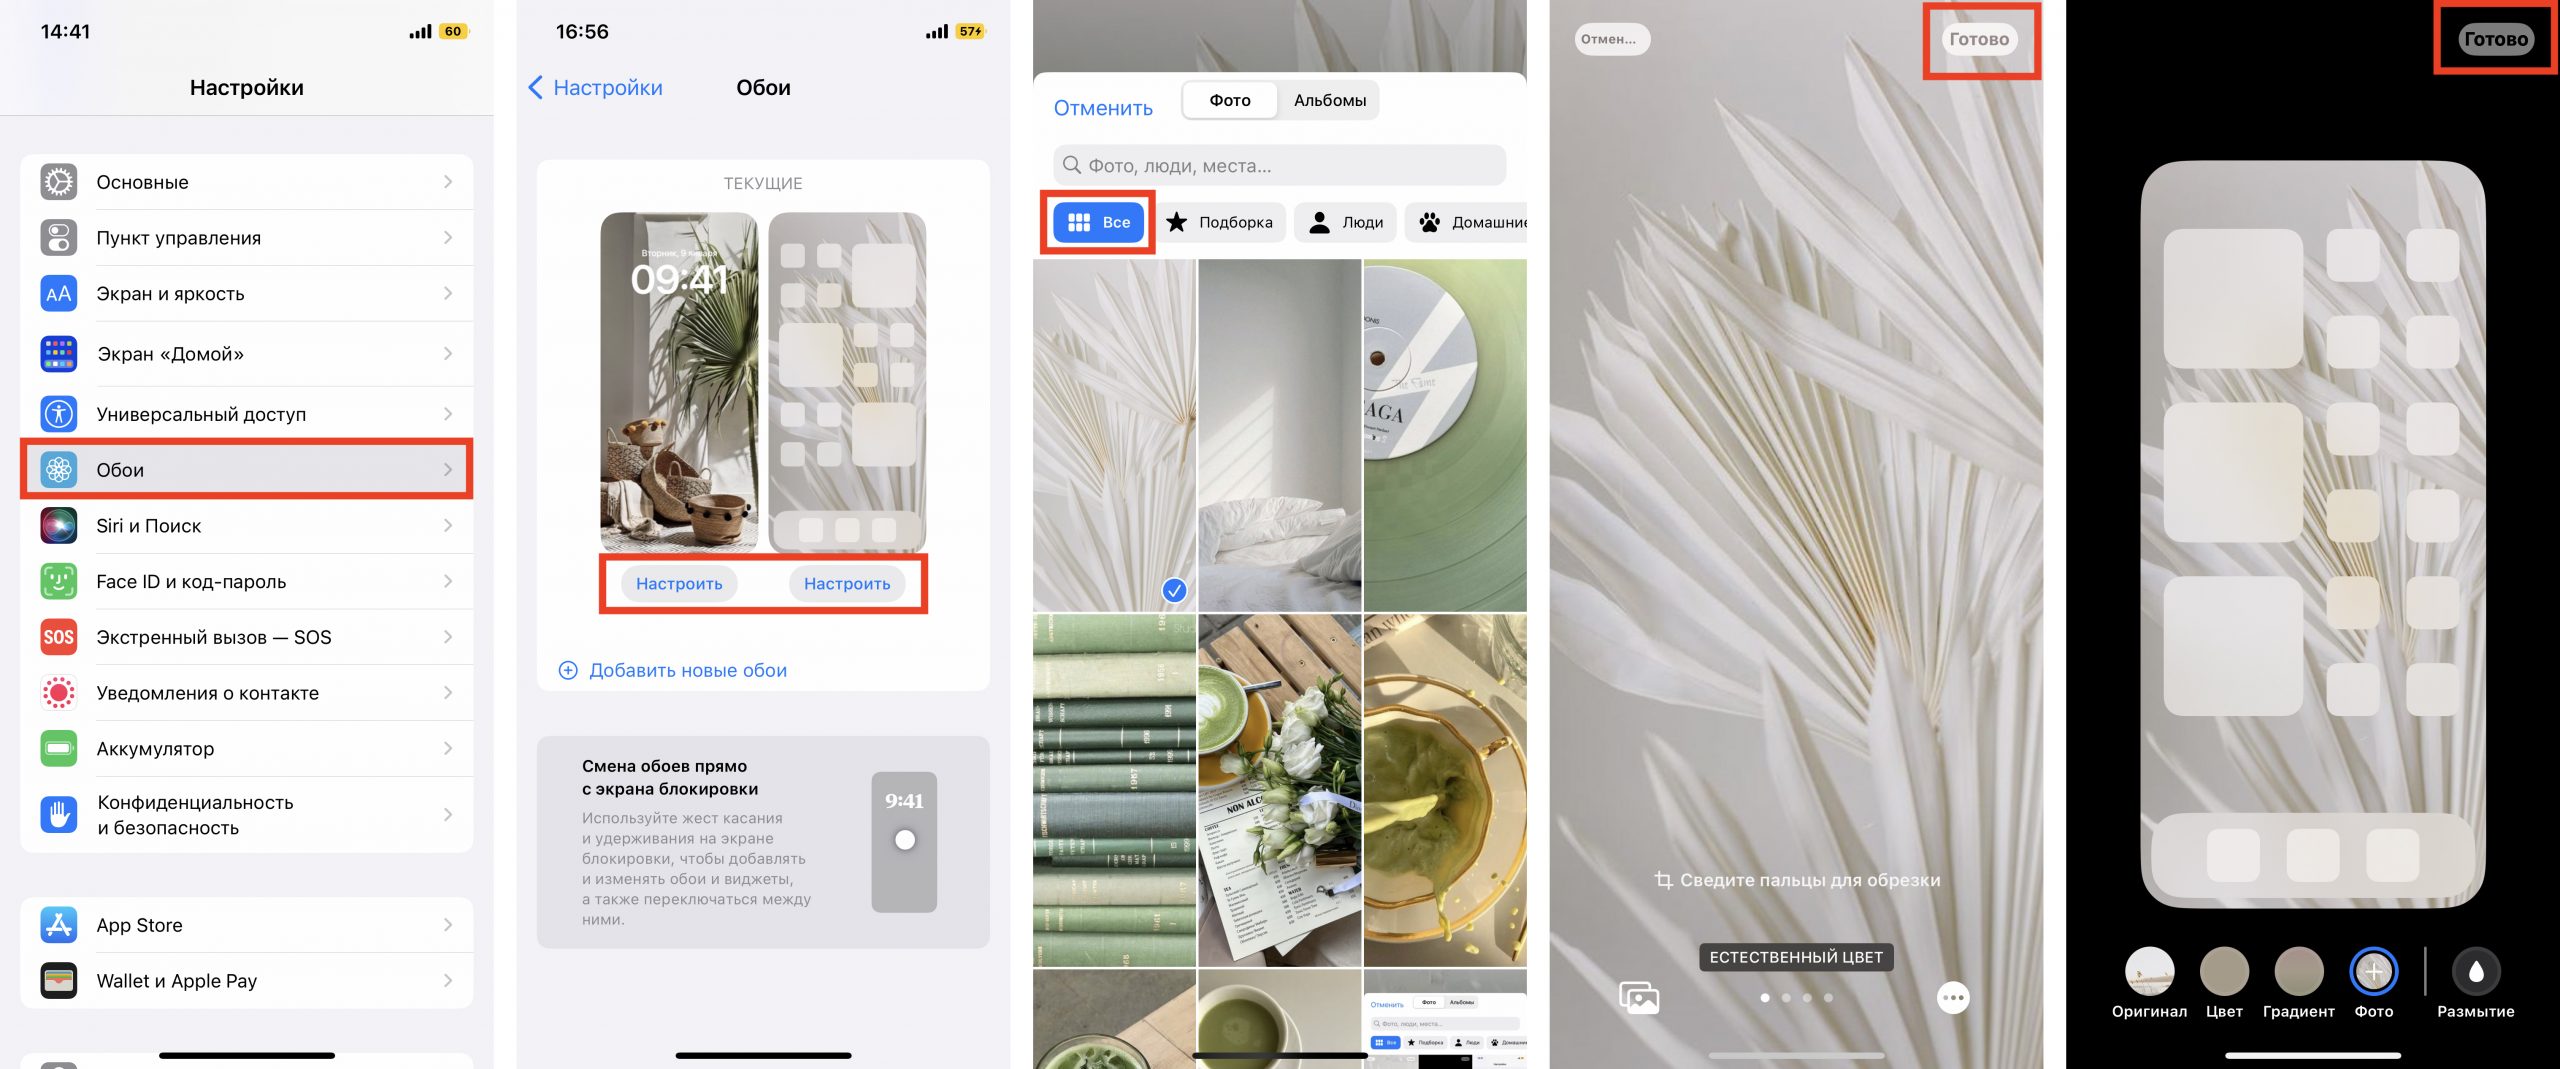
Don’t forget to choose the desktop wallpaper as well: this is where your new icons will be placed. You probably know how to do this, but we will remind you: go to “Settings” – “Wallpaper”, there you will be able to choose a background for your home screen.
How do I create my own widgets on my iPhone?
In addition to icons, you can also place widgets on the screen. These are larger information windows that give you access to certain applications: Calendar, Mail, Notes, Weather, Music, etc.
We remember well the days when widgets could not yet be placed on the screen the way we wanted. And today we’re talking about creating your own in the popular Widgetsmith app. They’re great for decorating your desktop and displaying the time, date, weather, reminders, health indicators, and your photos. Let’s try to create a widget right now, shall we?
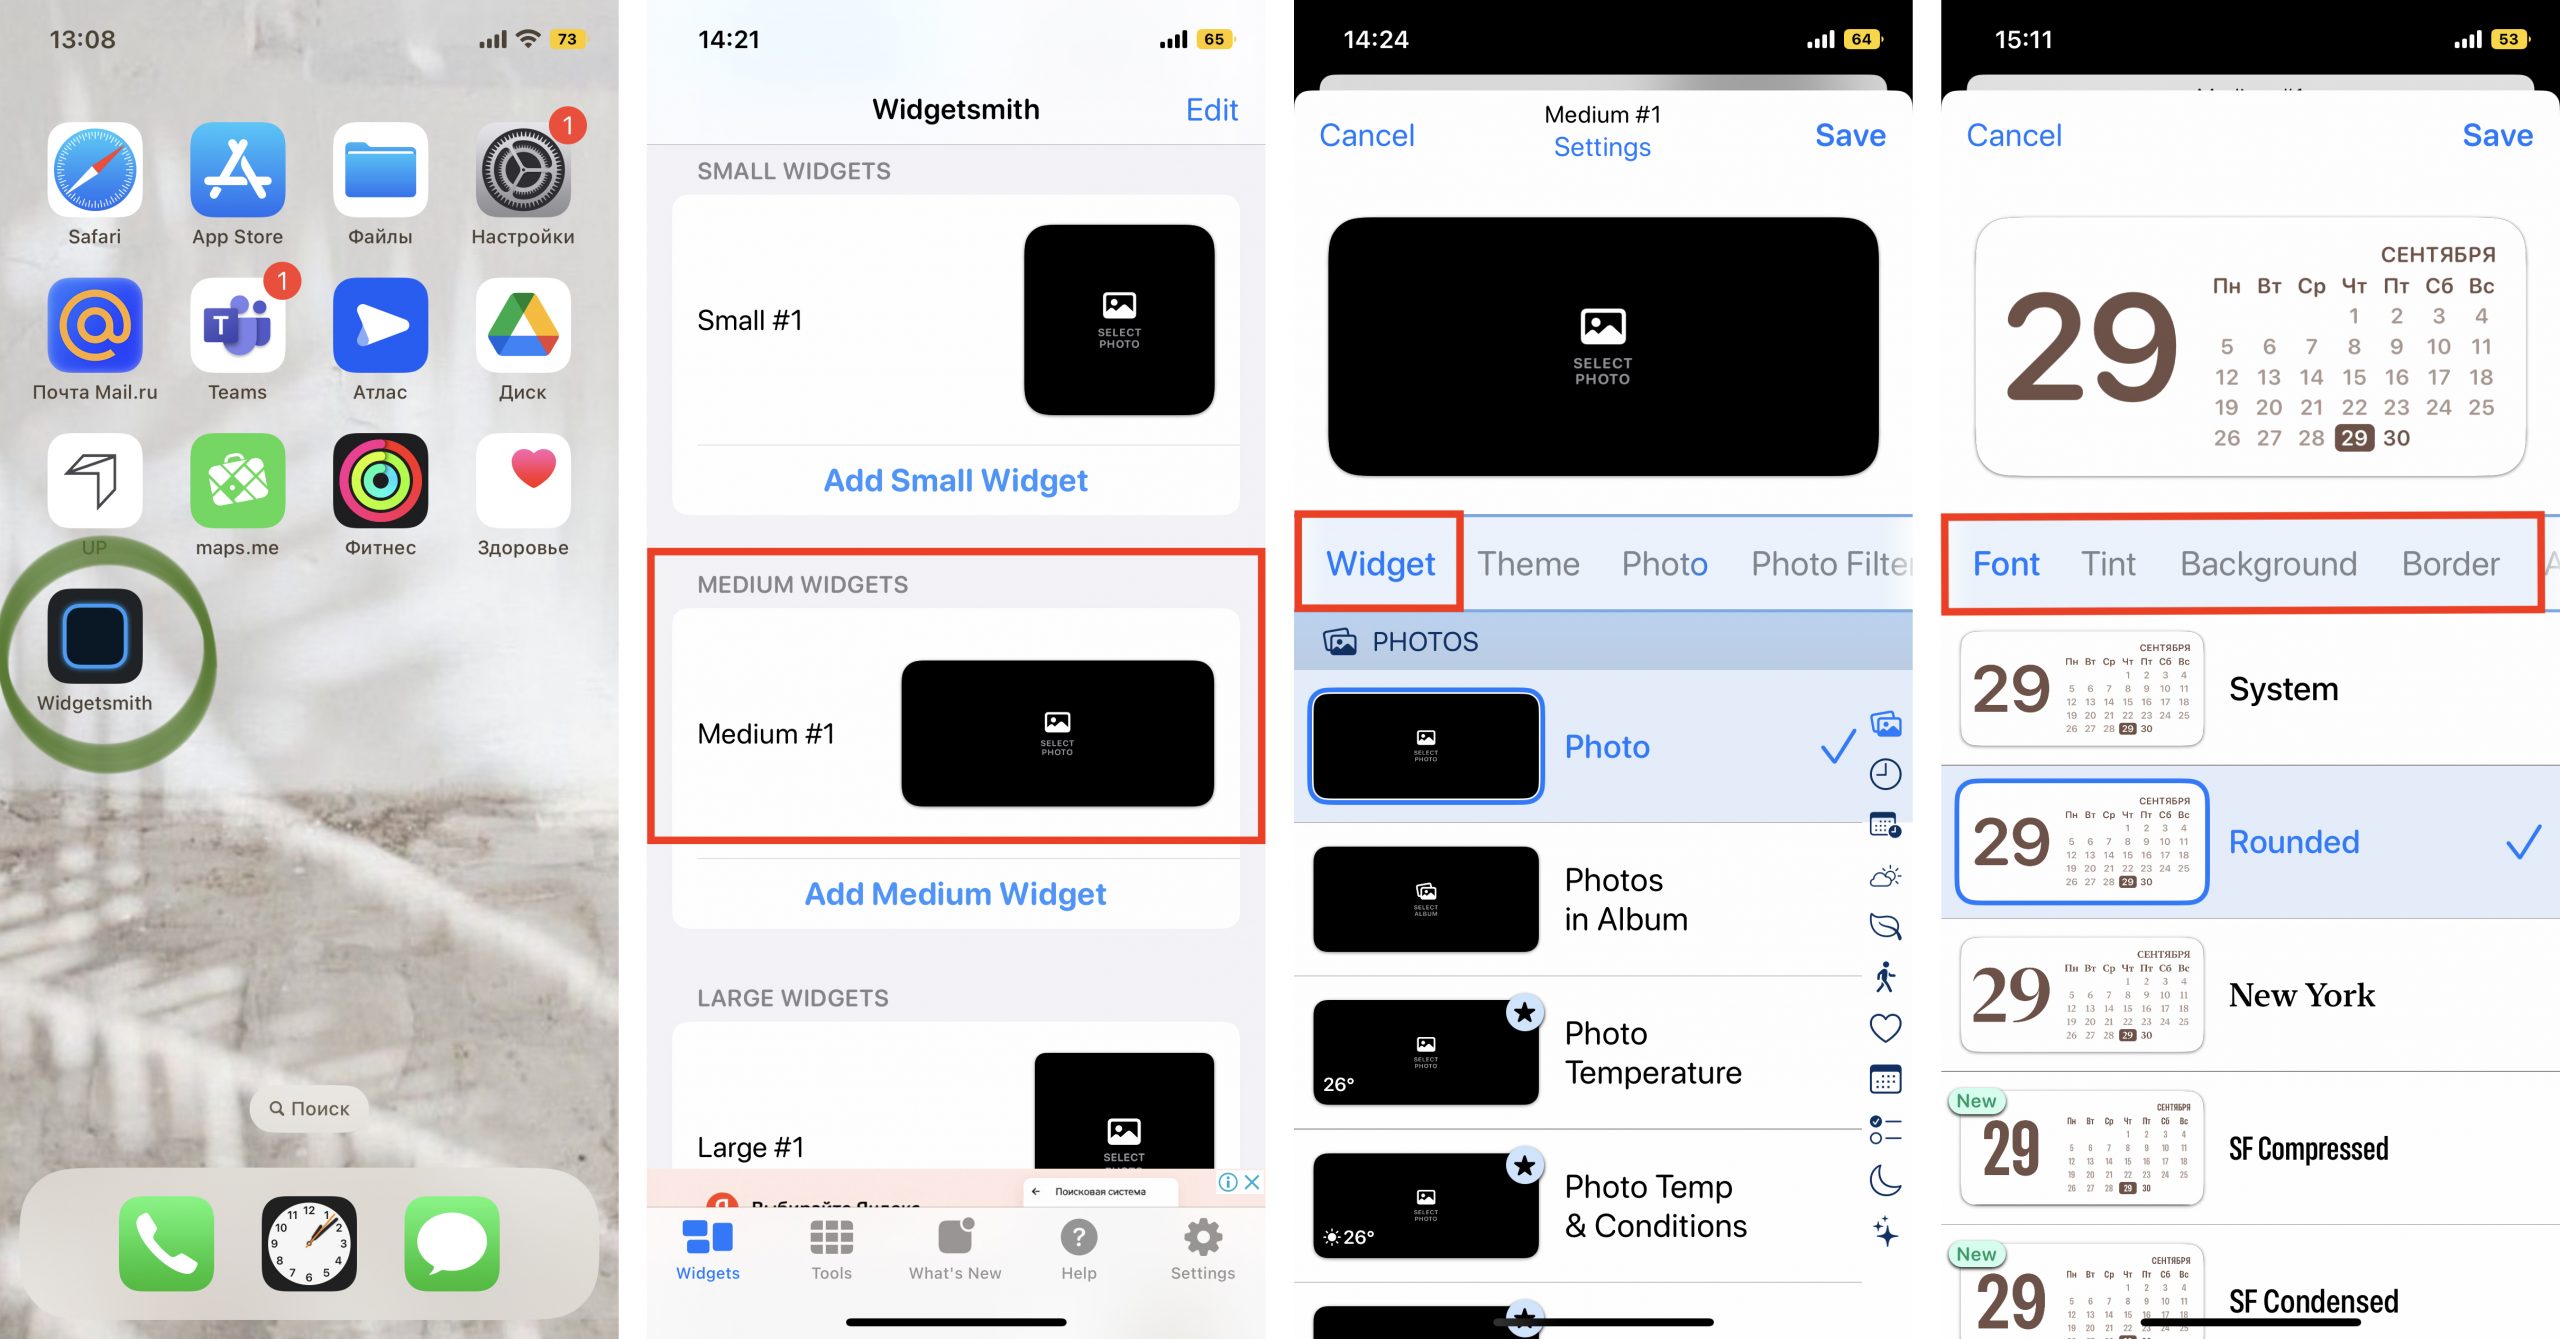
- First, you need to choose the size of the widget you’d like to create: click on it to set the settings. There are three sizes available to Widgetsmith users: small, medium and large.
- Next, select the type of widget: photo, album, calendar, etc. We want to create a medium sized calendar (Medium). Find it in the list in the Widget section and go on to customize the font, color, background, etc. When you’re done, save the data.
3. In the same way, you can create a small widget from any image in your gallery (Small). Select the widget size, the Photo type, and load the image from the library. Save. The created widget will be displayed together with the other widgets you created.
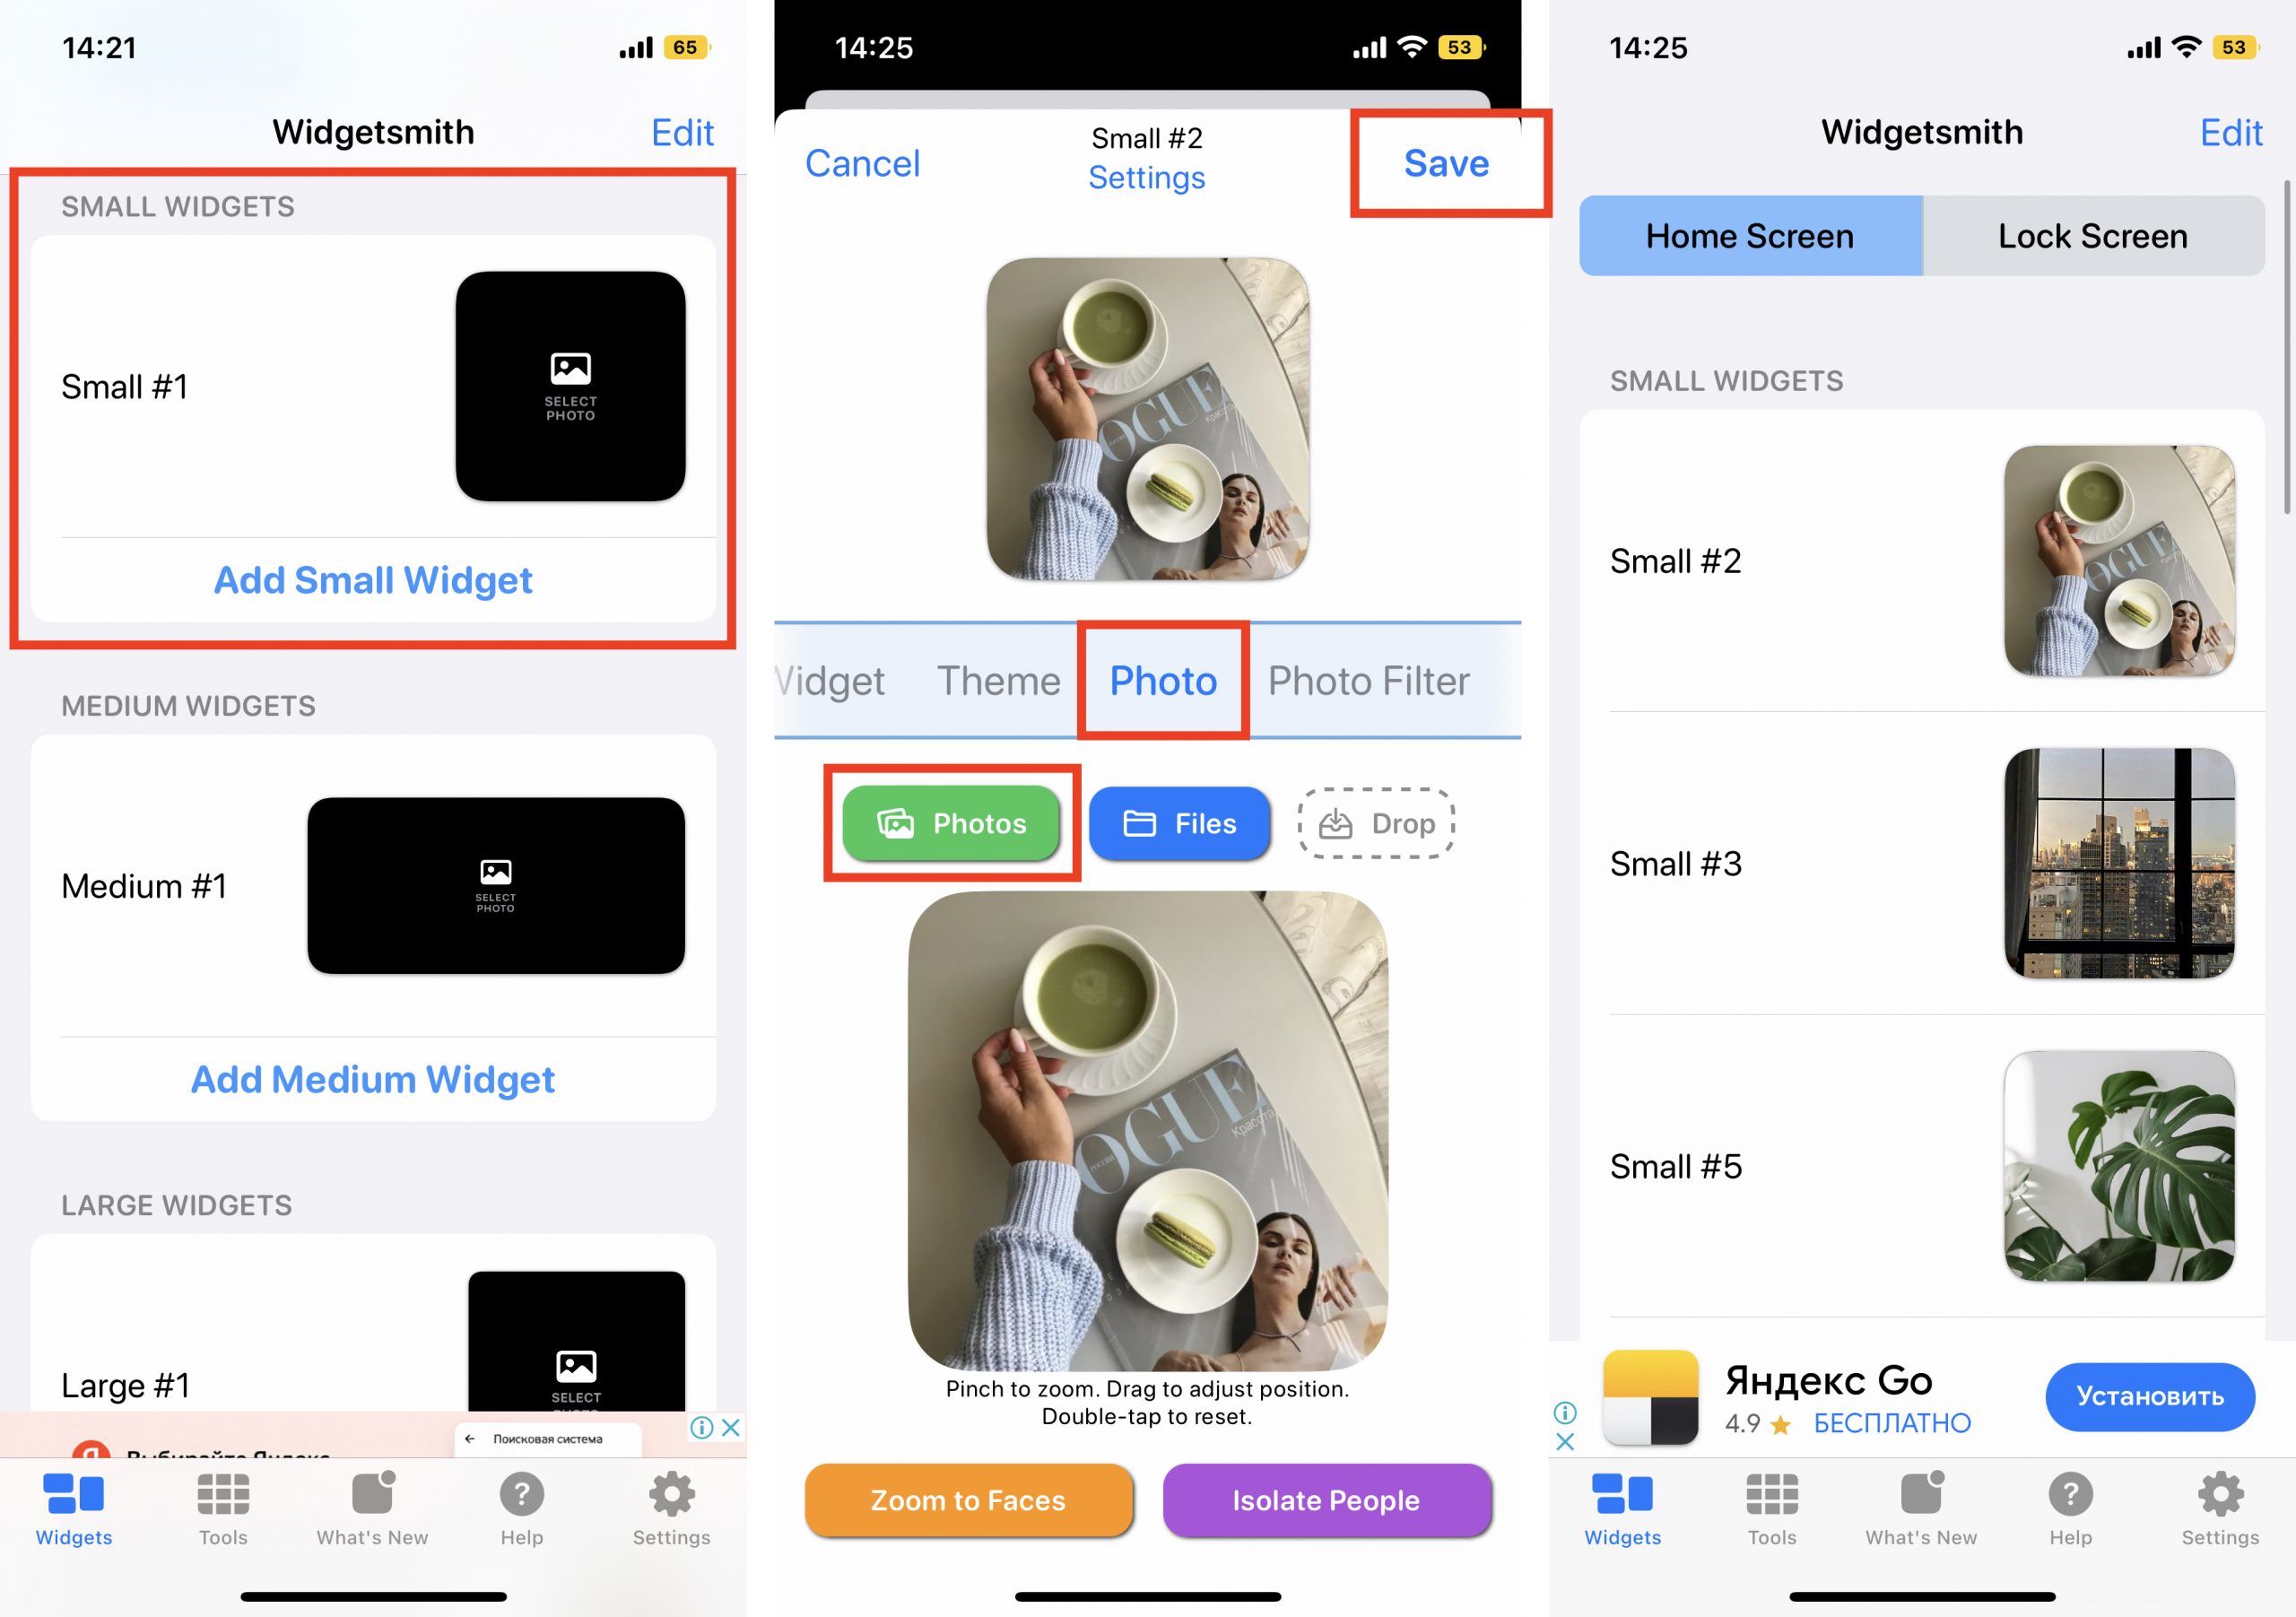
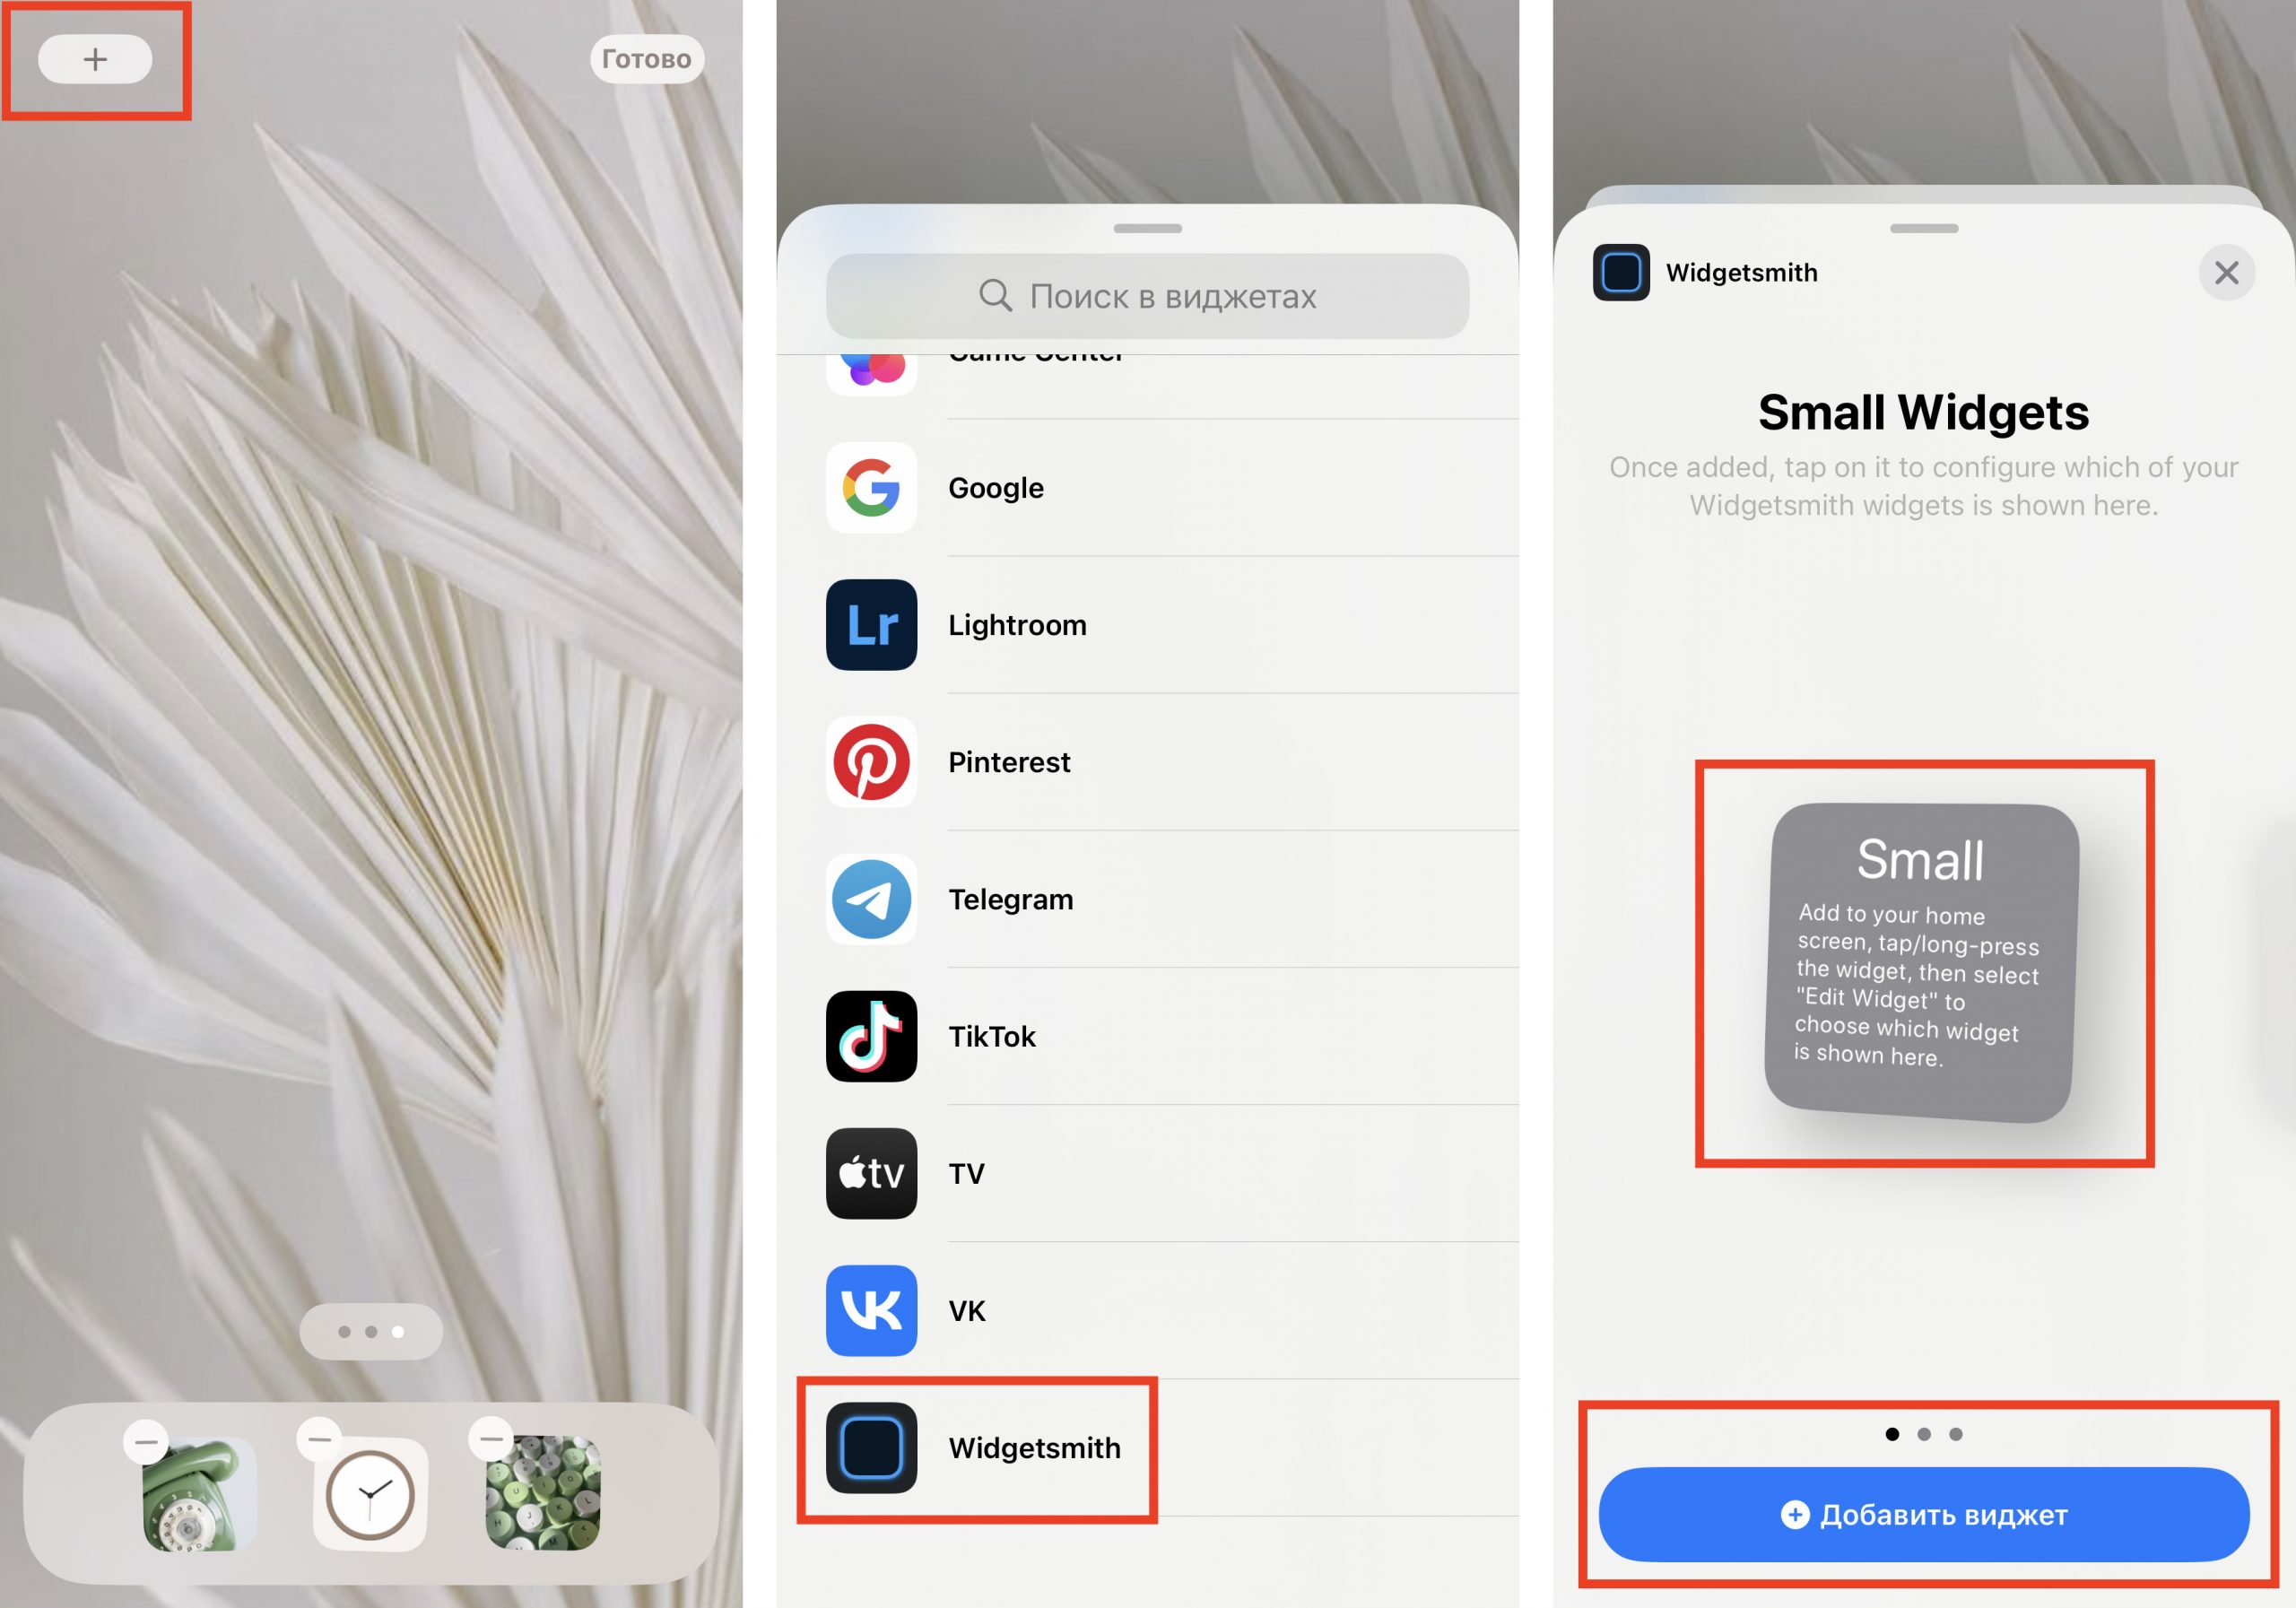
4. To add a widget to your iPhone desktop, exit the Widgetsmith app and return to the Home screen. Hold your finger on the screen for a few seconds and then click the plus sign in the upper left corner. Find Widgetsmith in the list of available apps that you can add to your desktop as a widget. Select it and find the one you have created.
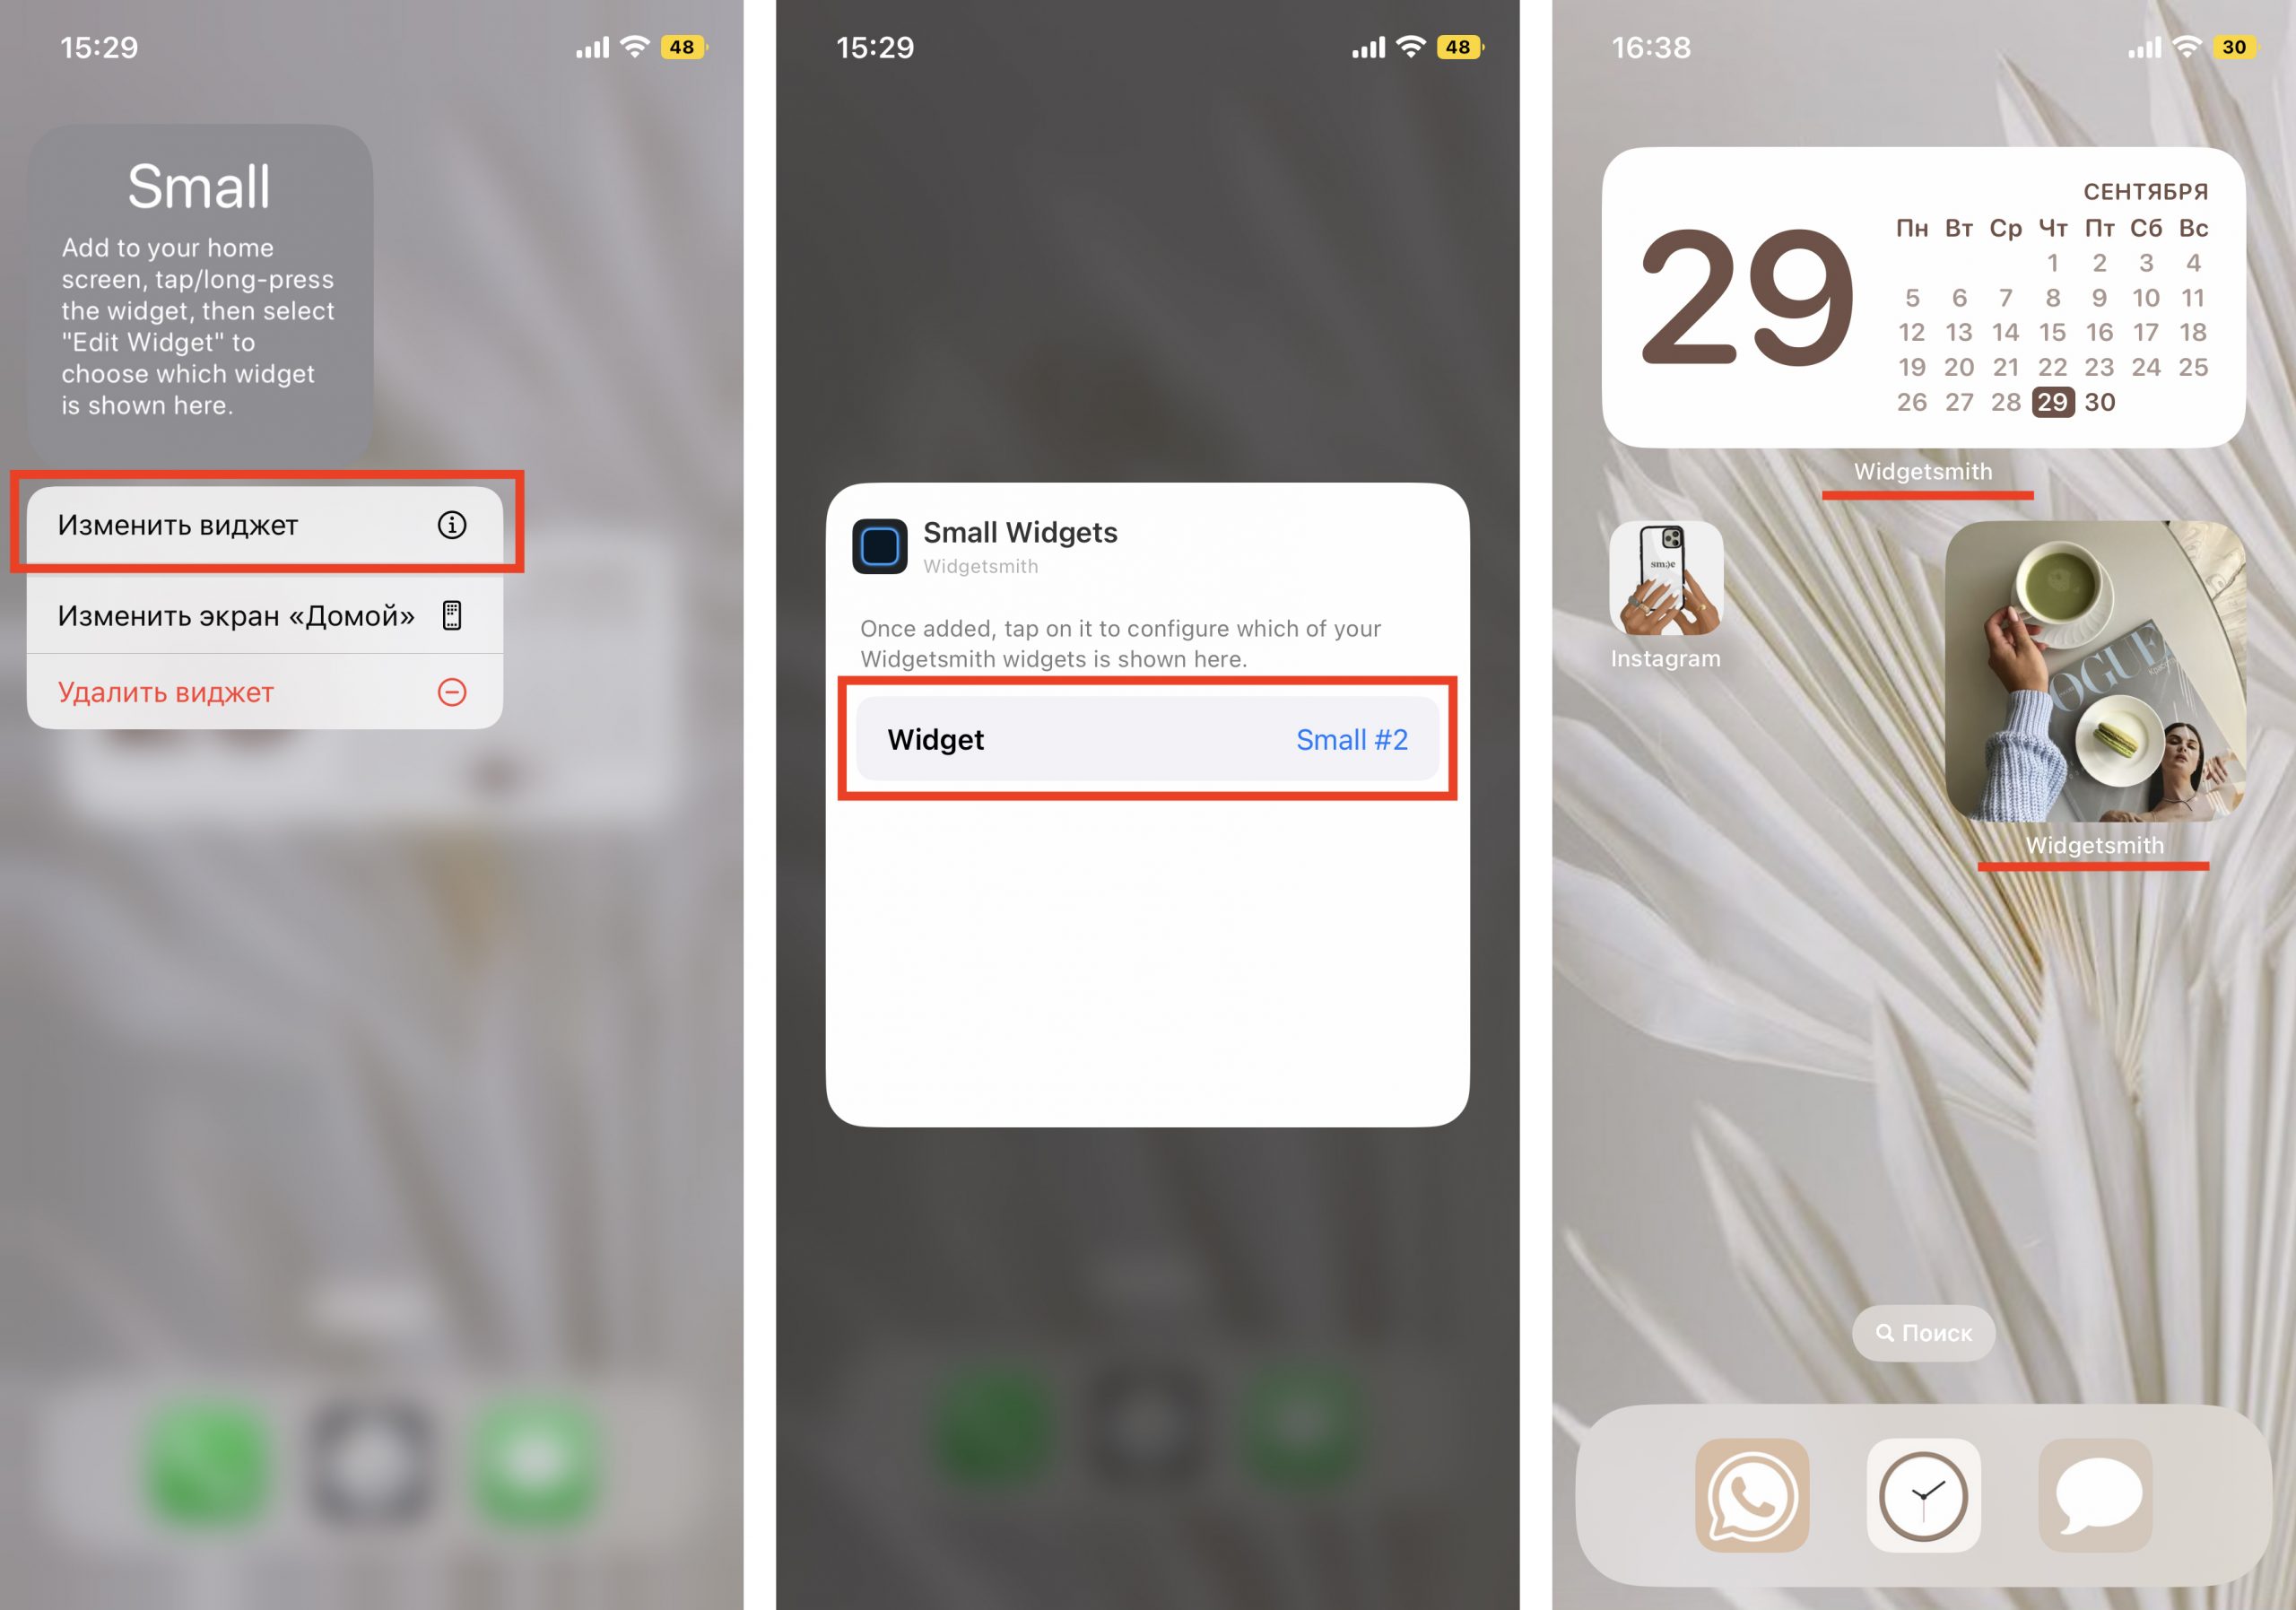
The only nuance is that under such widgets the name of the application in which they are made will always be displayed. But you should agree that this is not a big price to pay for the features Widgetsmith provides to its users. Just look how beautiful and harmonious the home screen and lock screen look with the new icons and widgets in the same style!
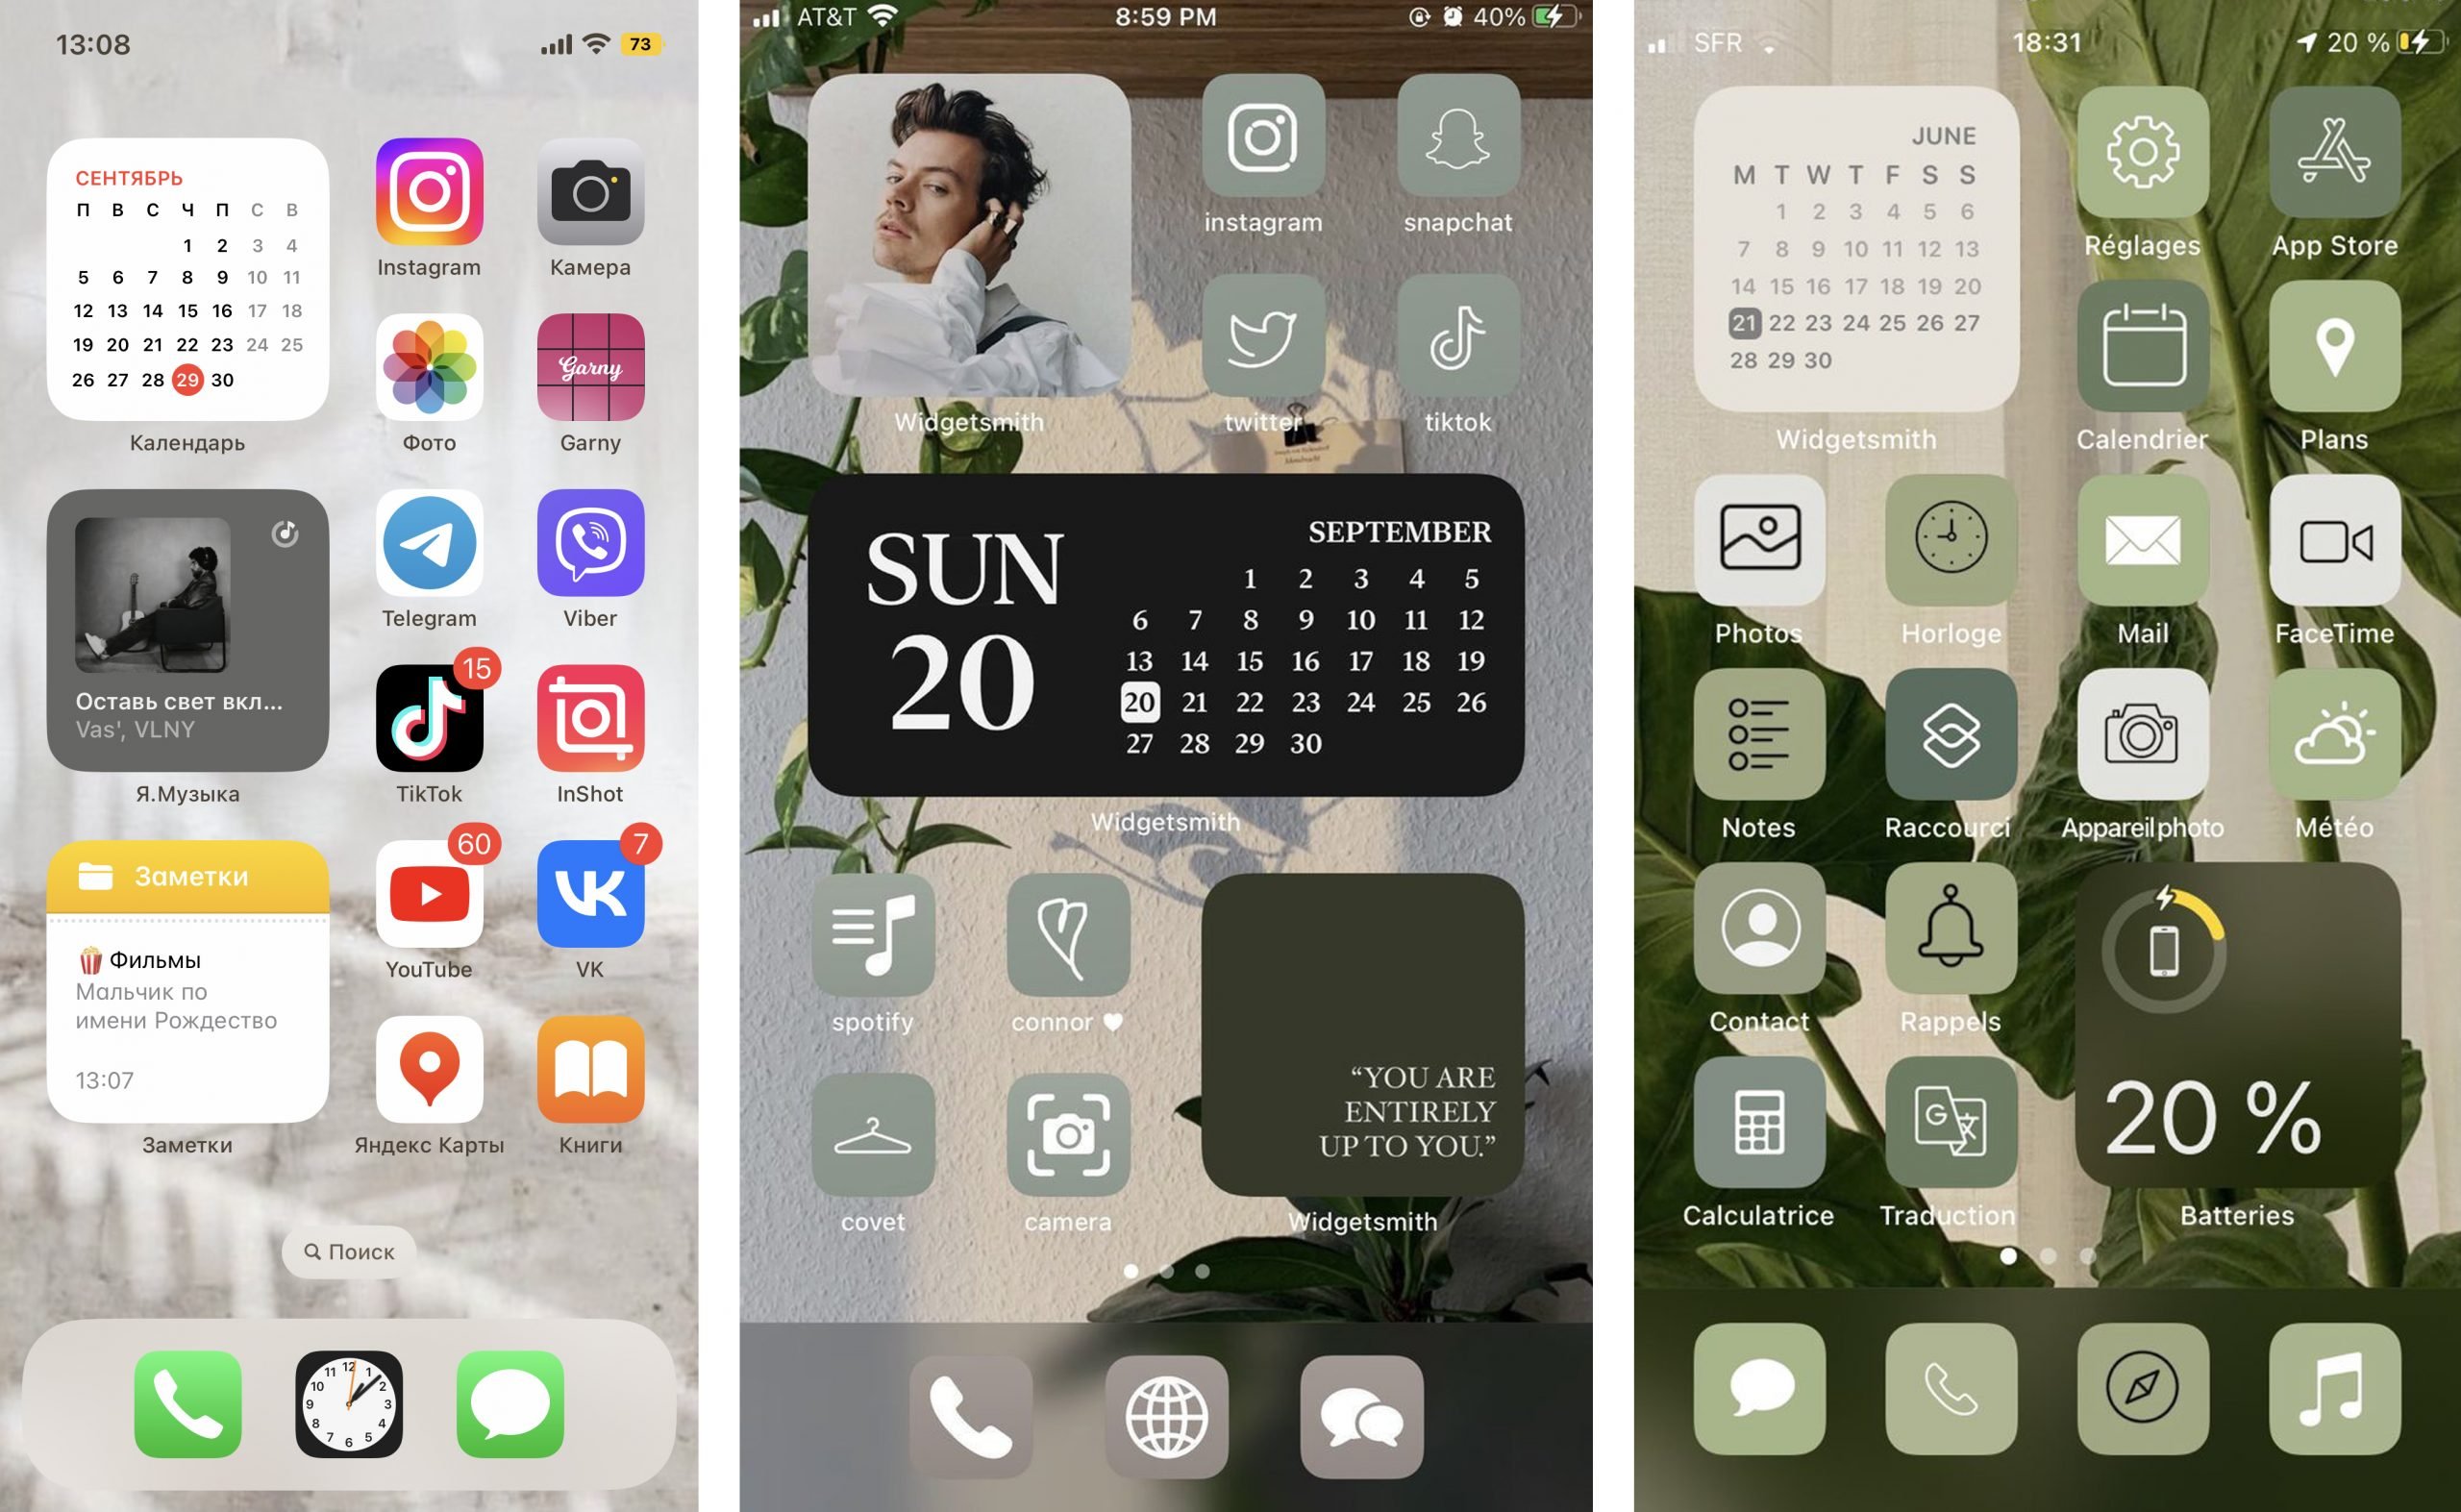
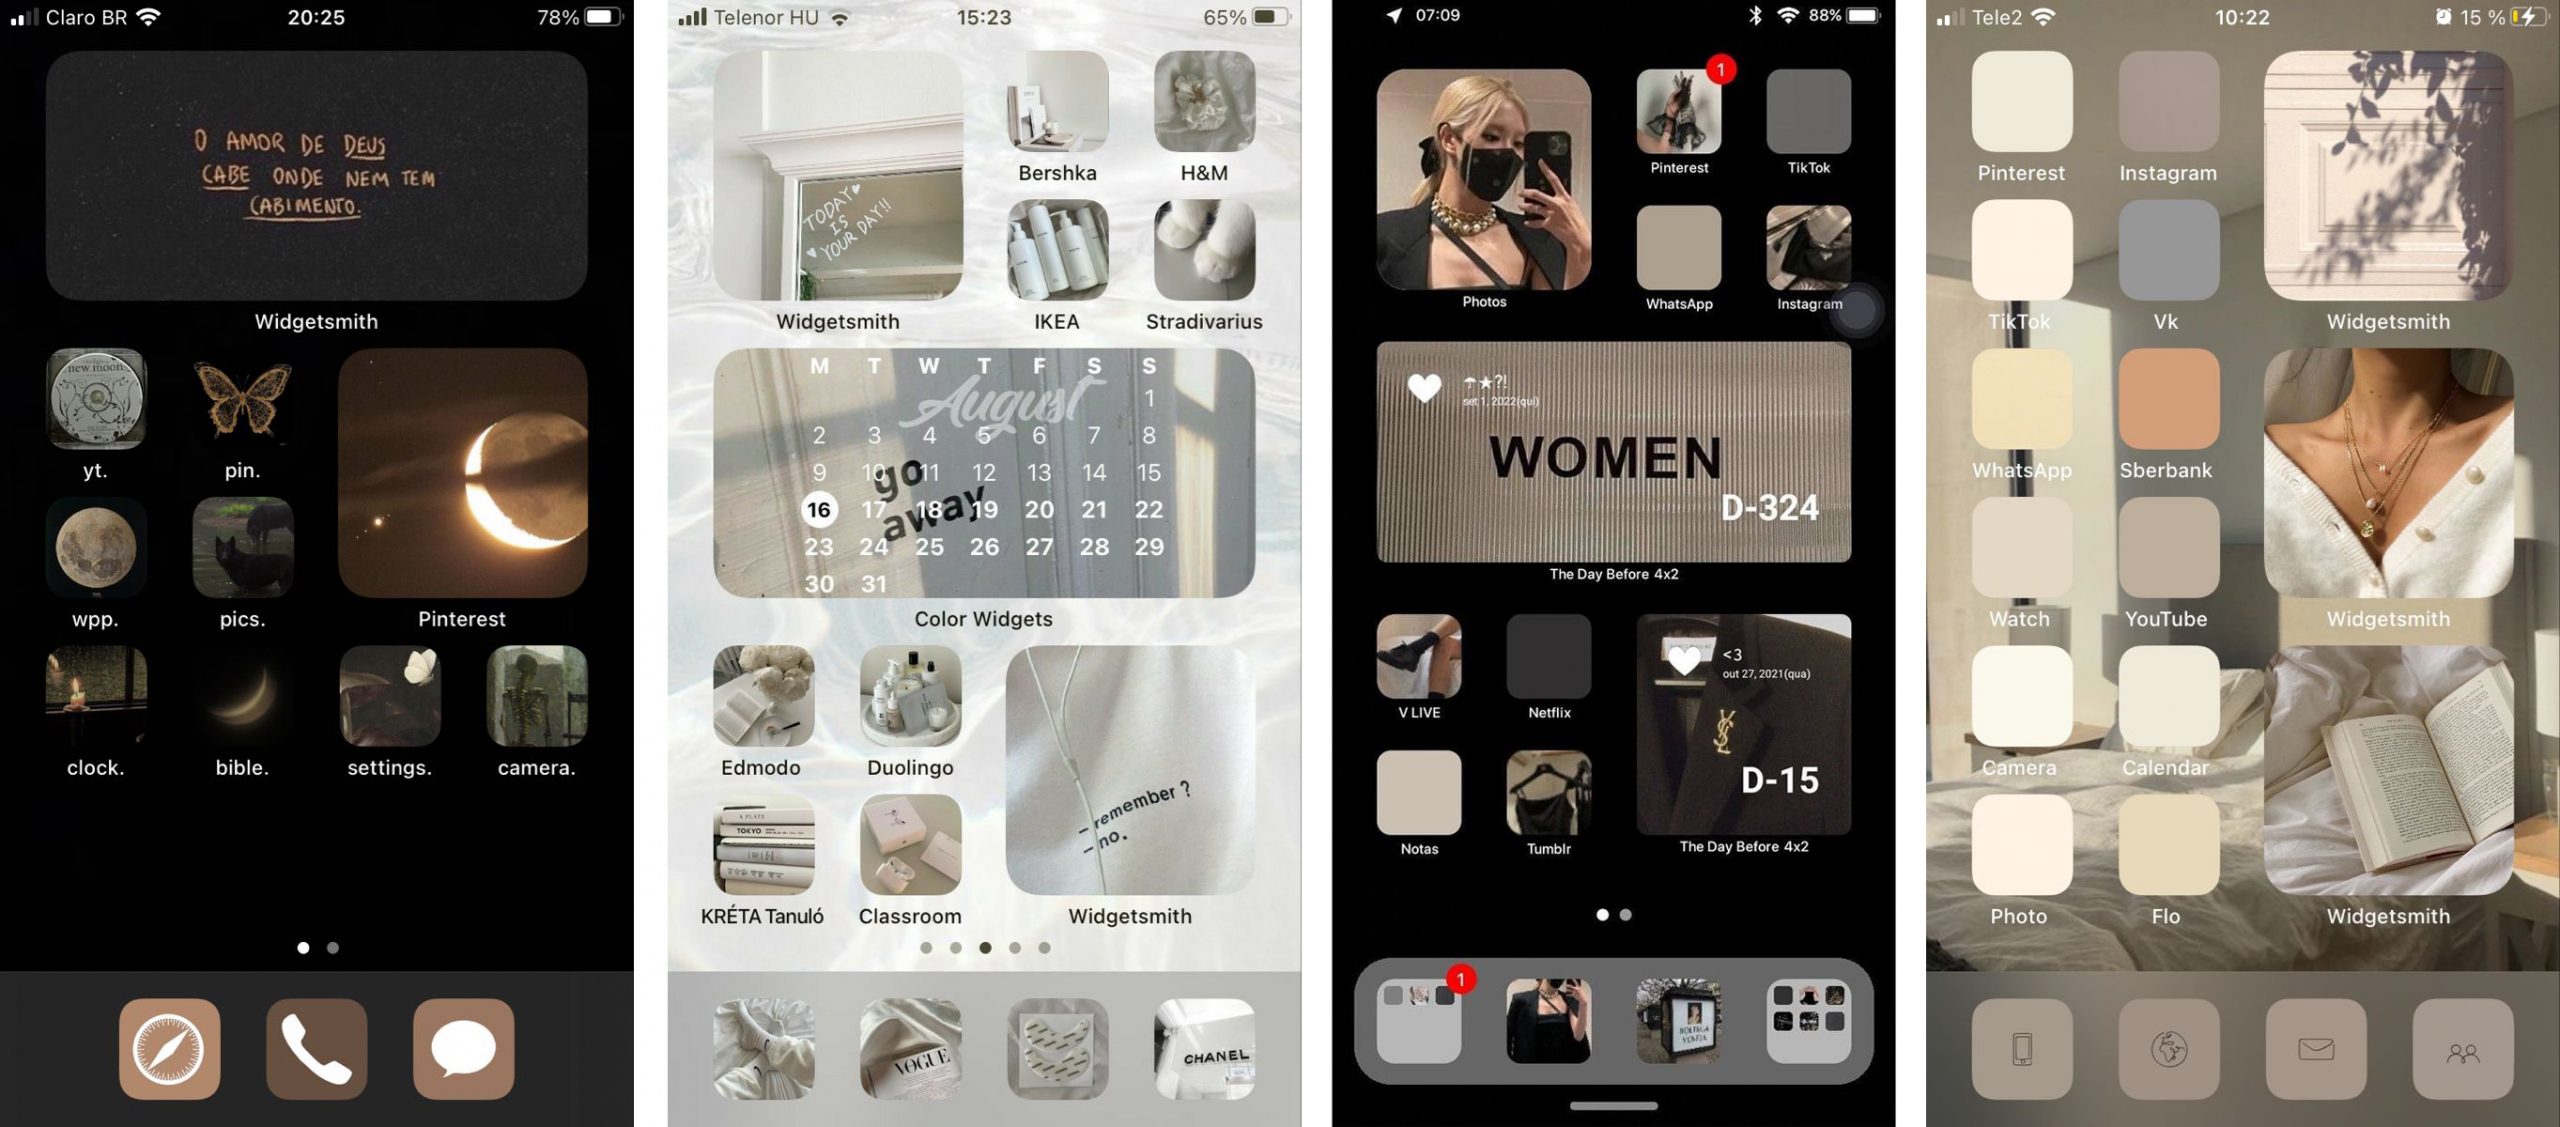
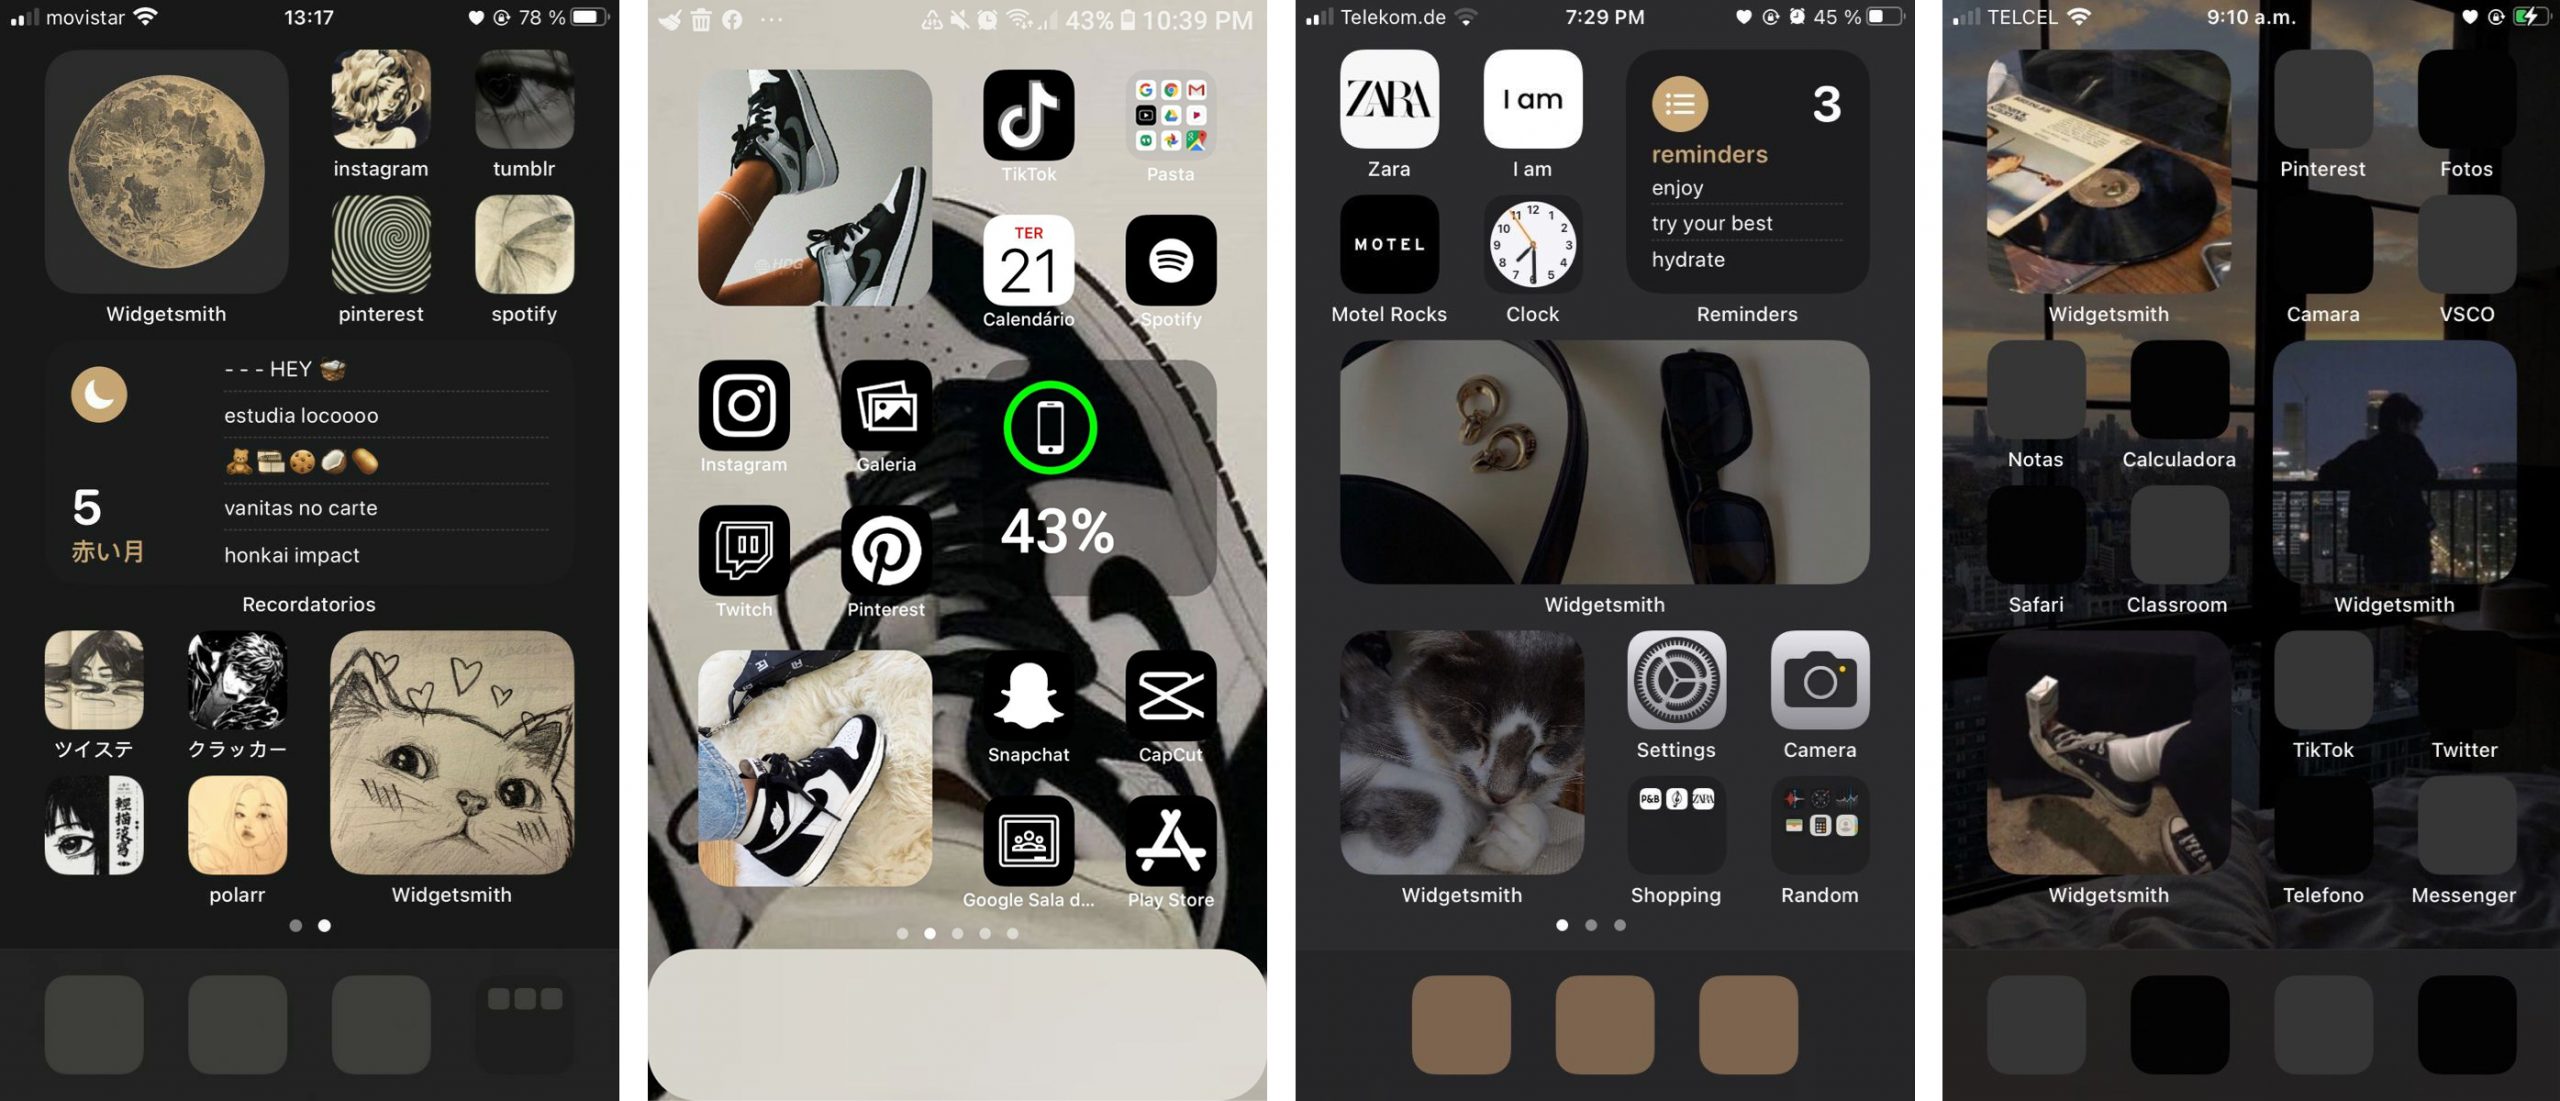
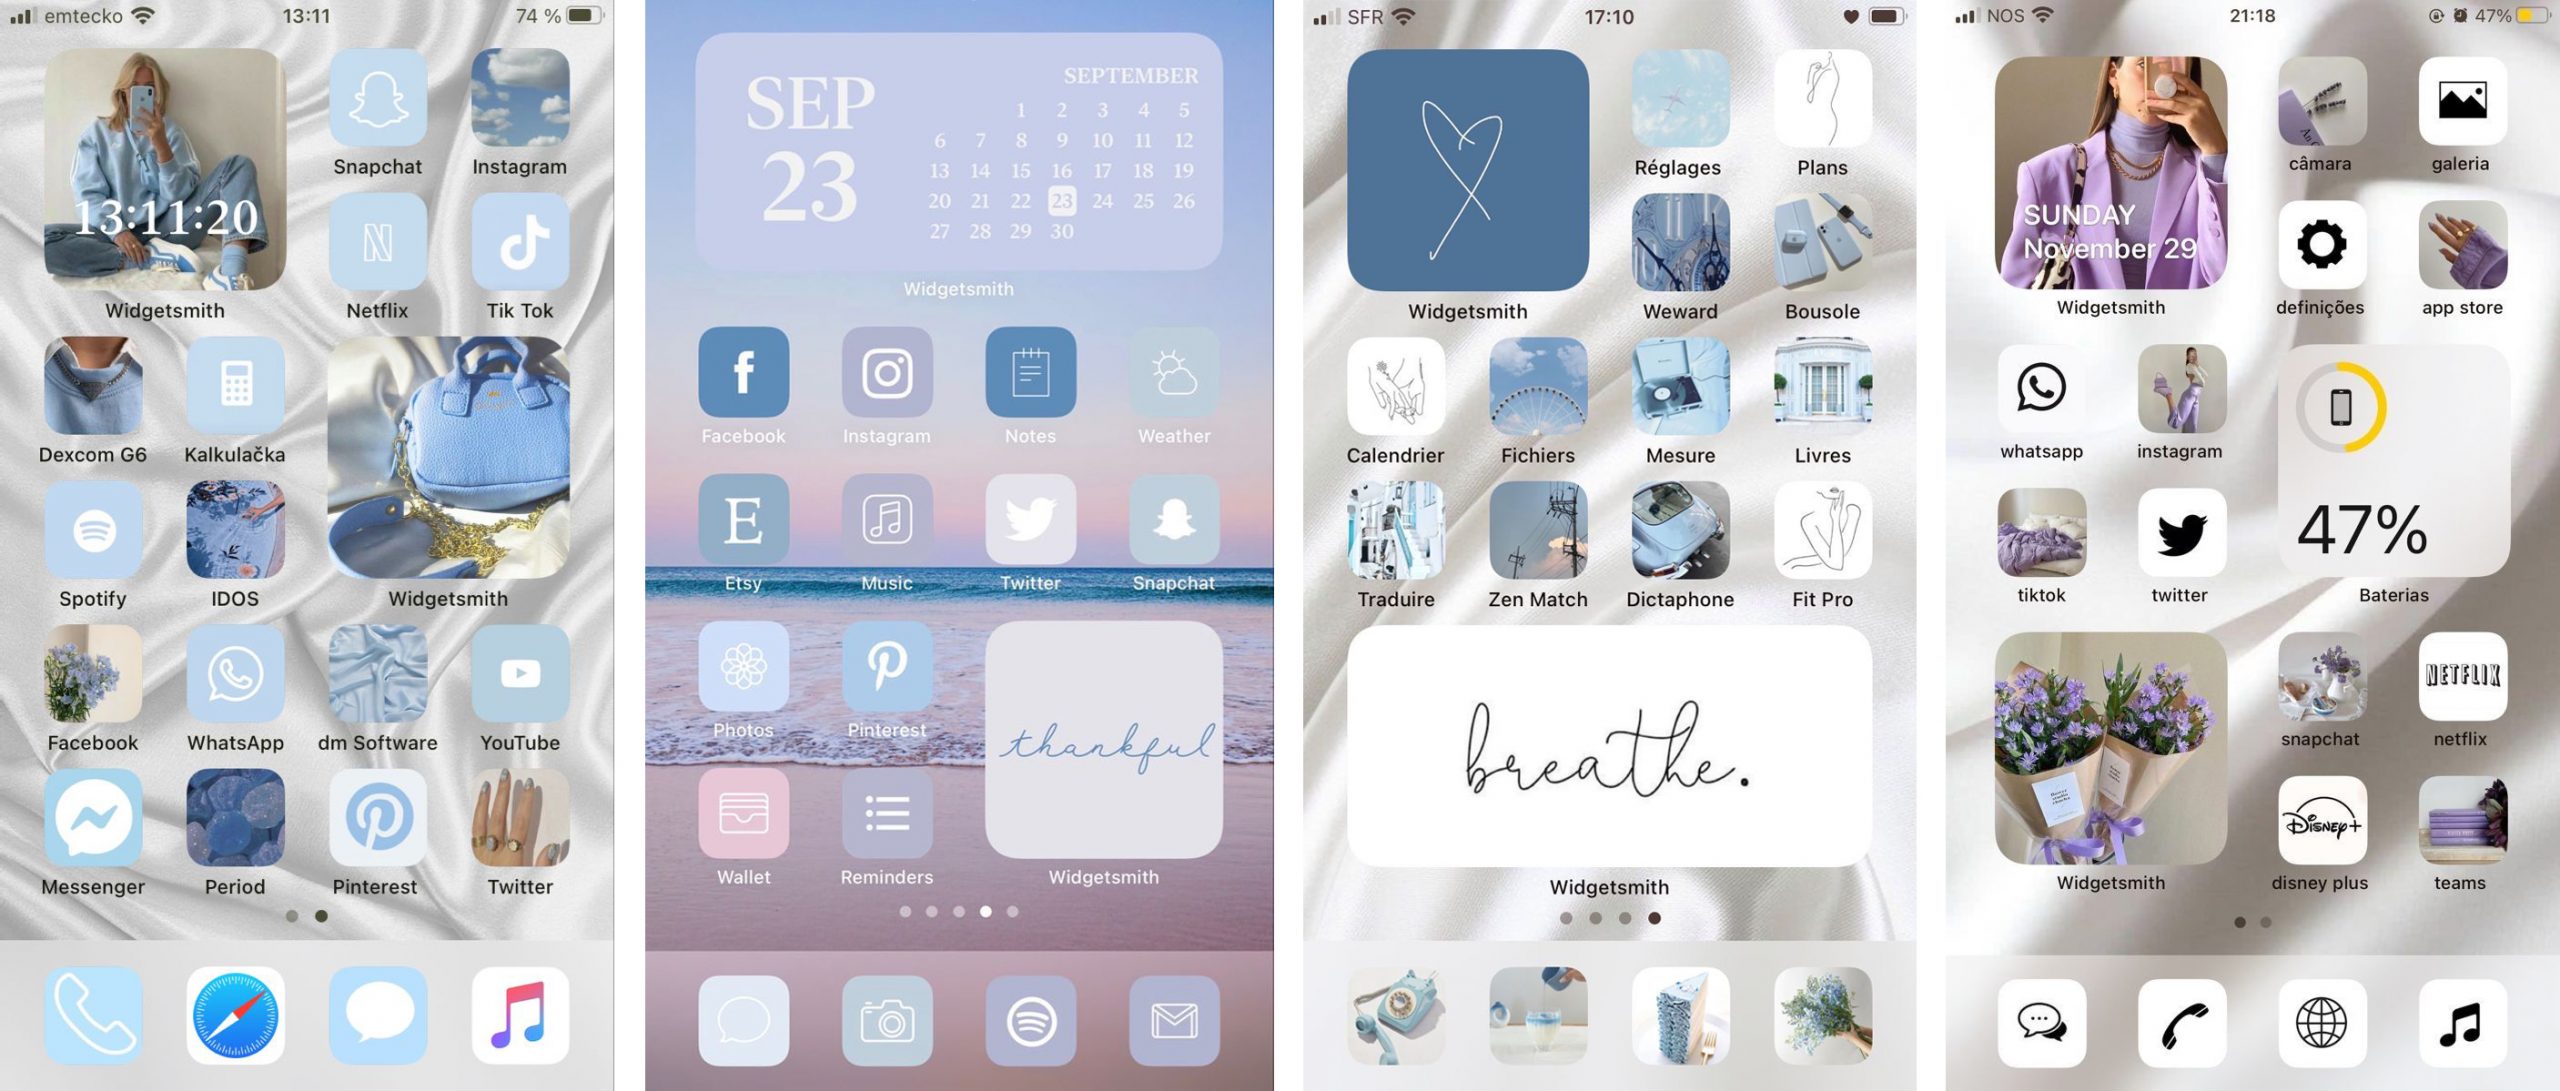
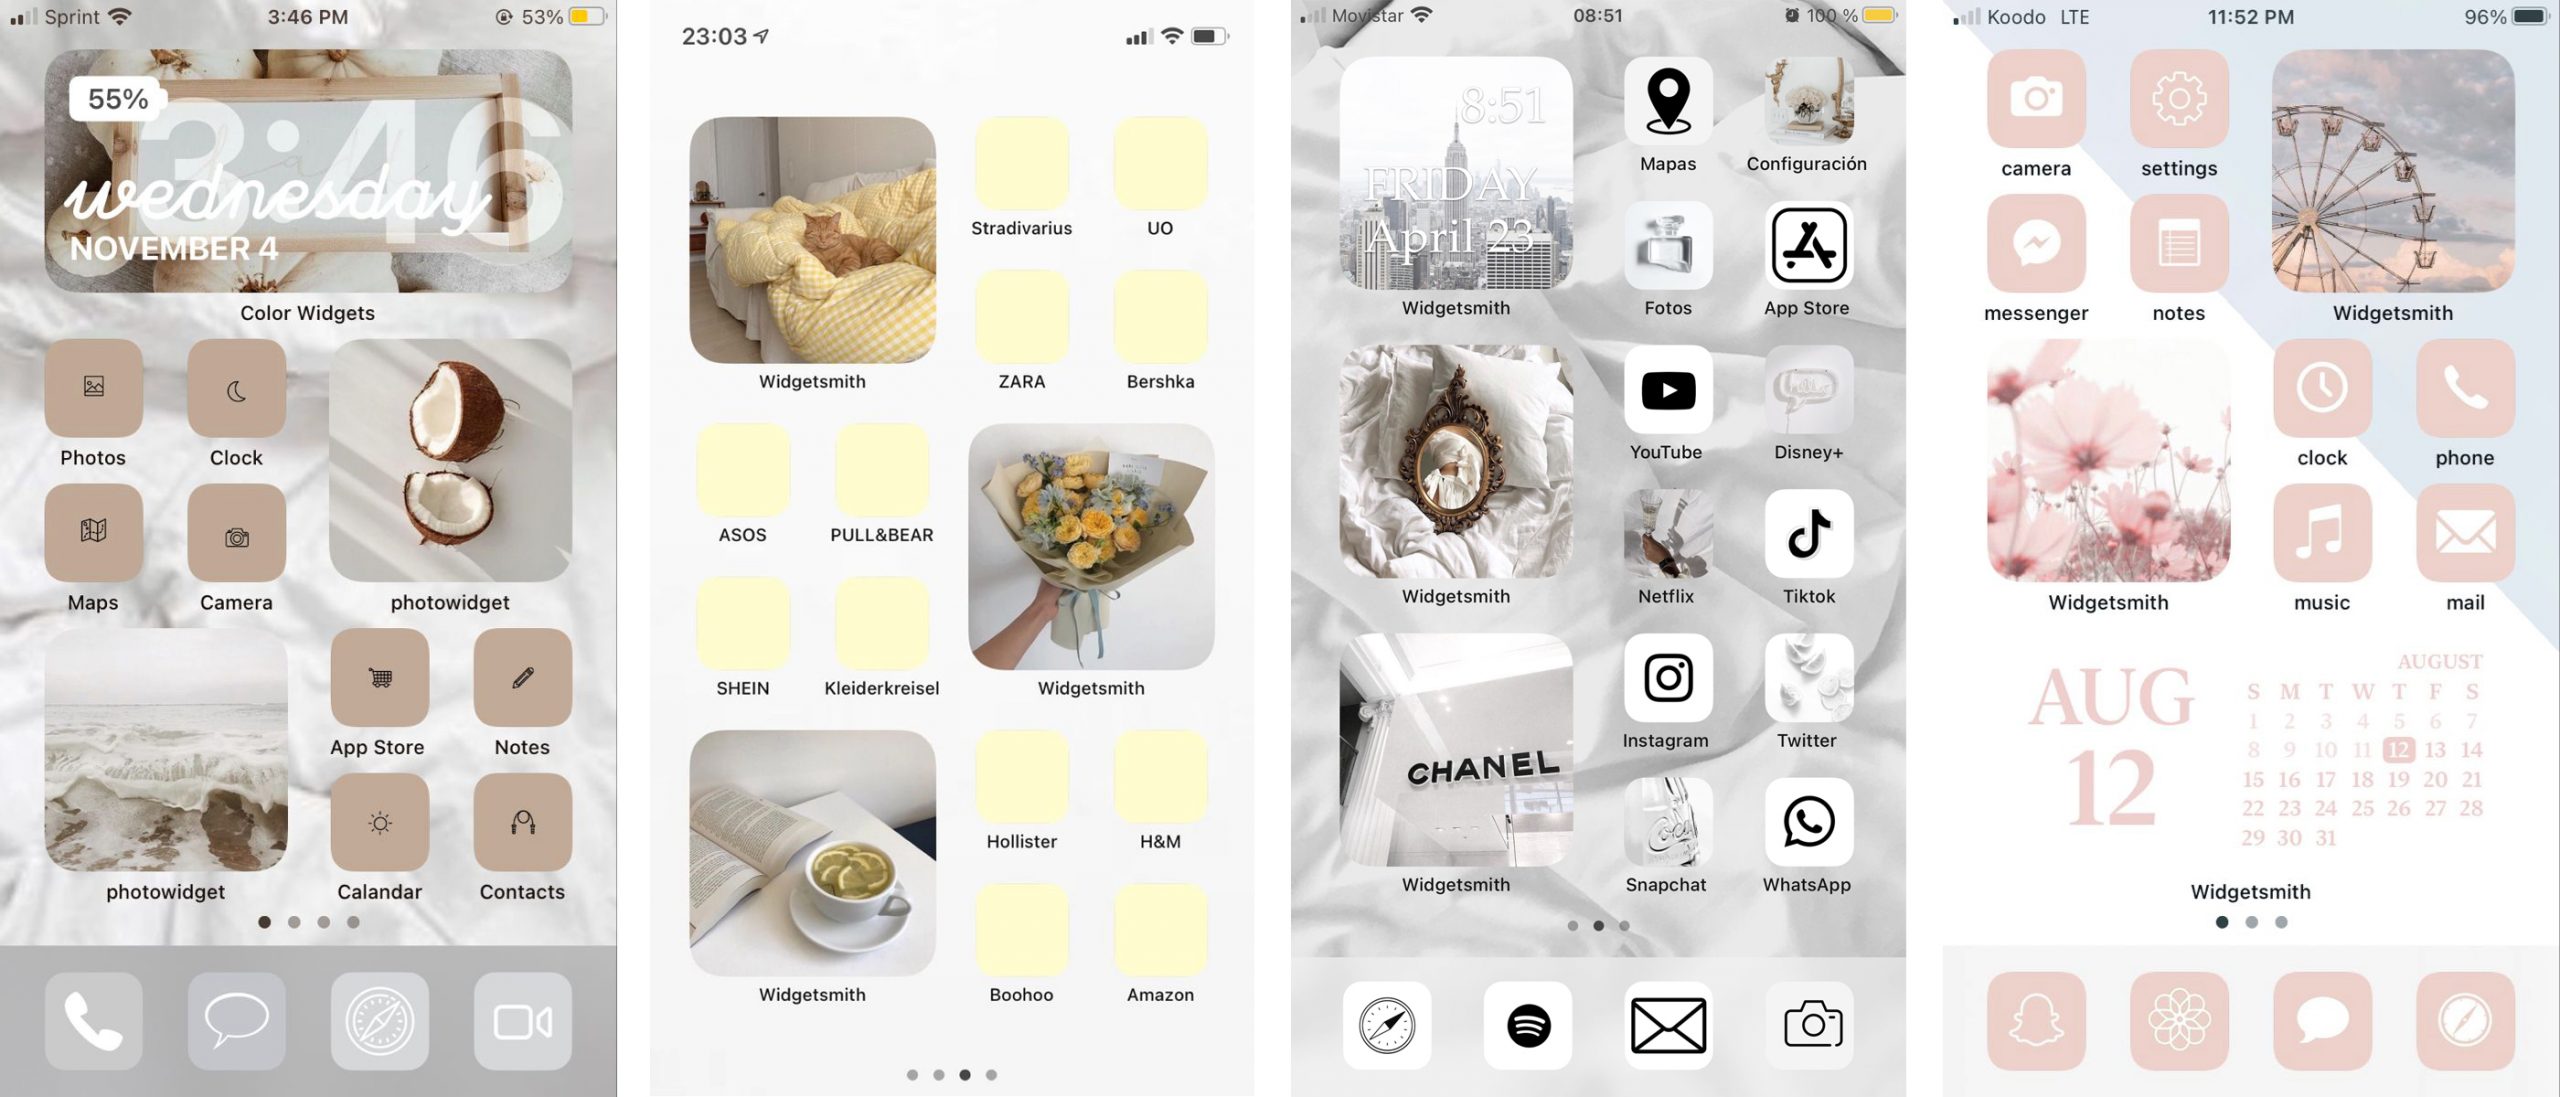
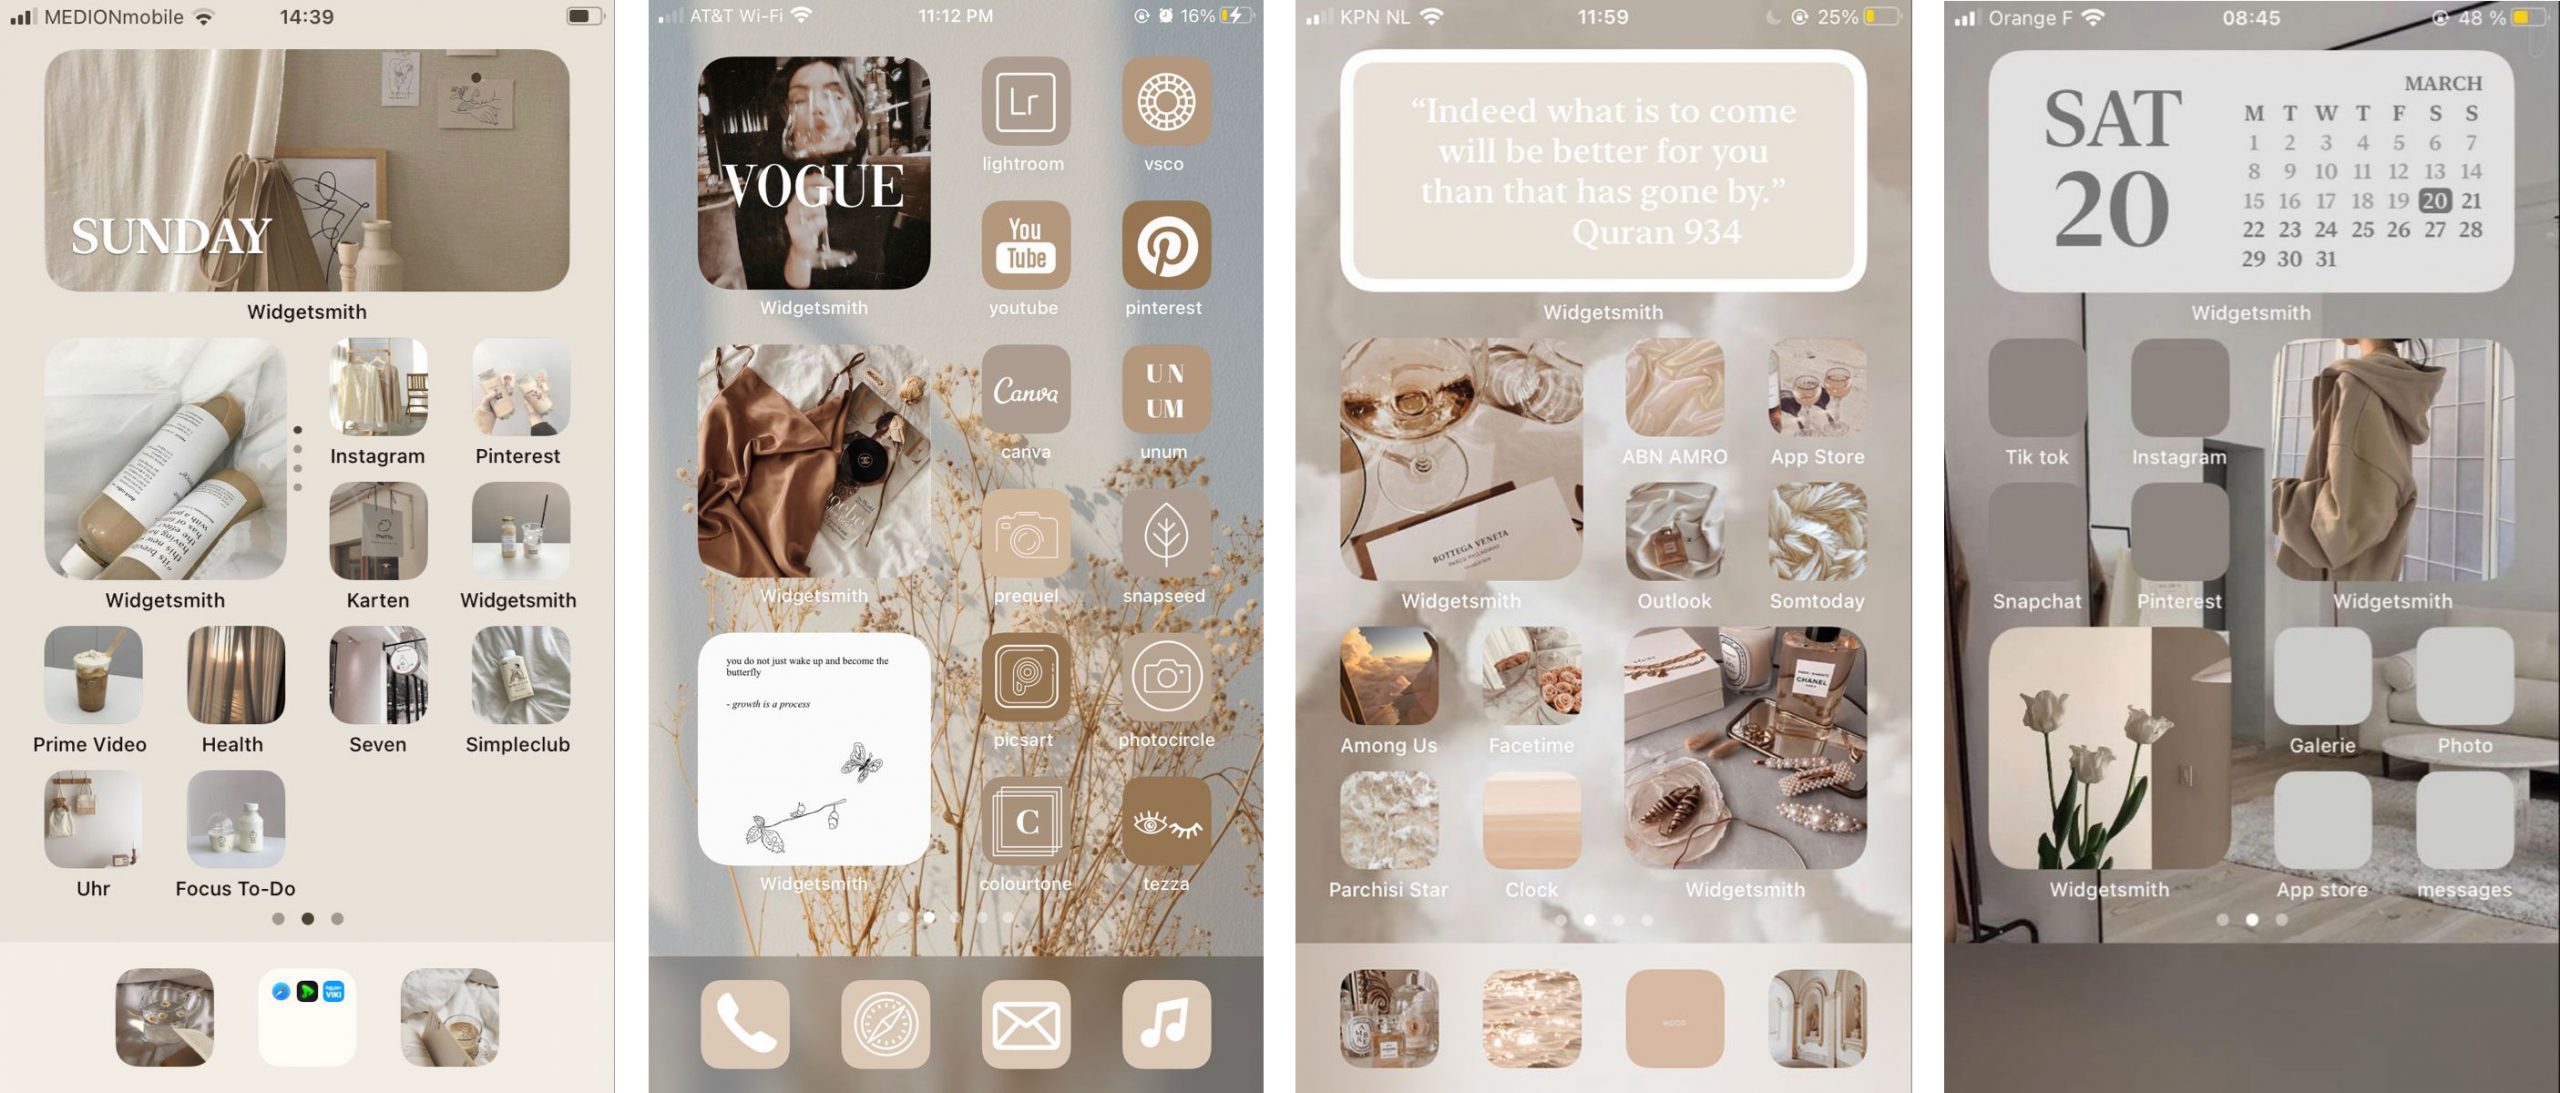
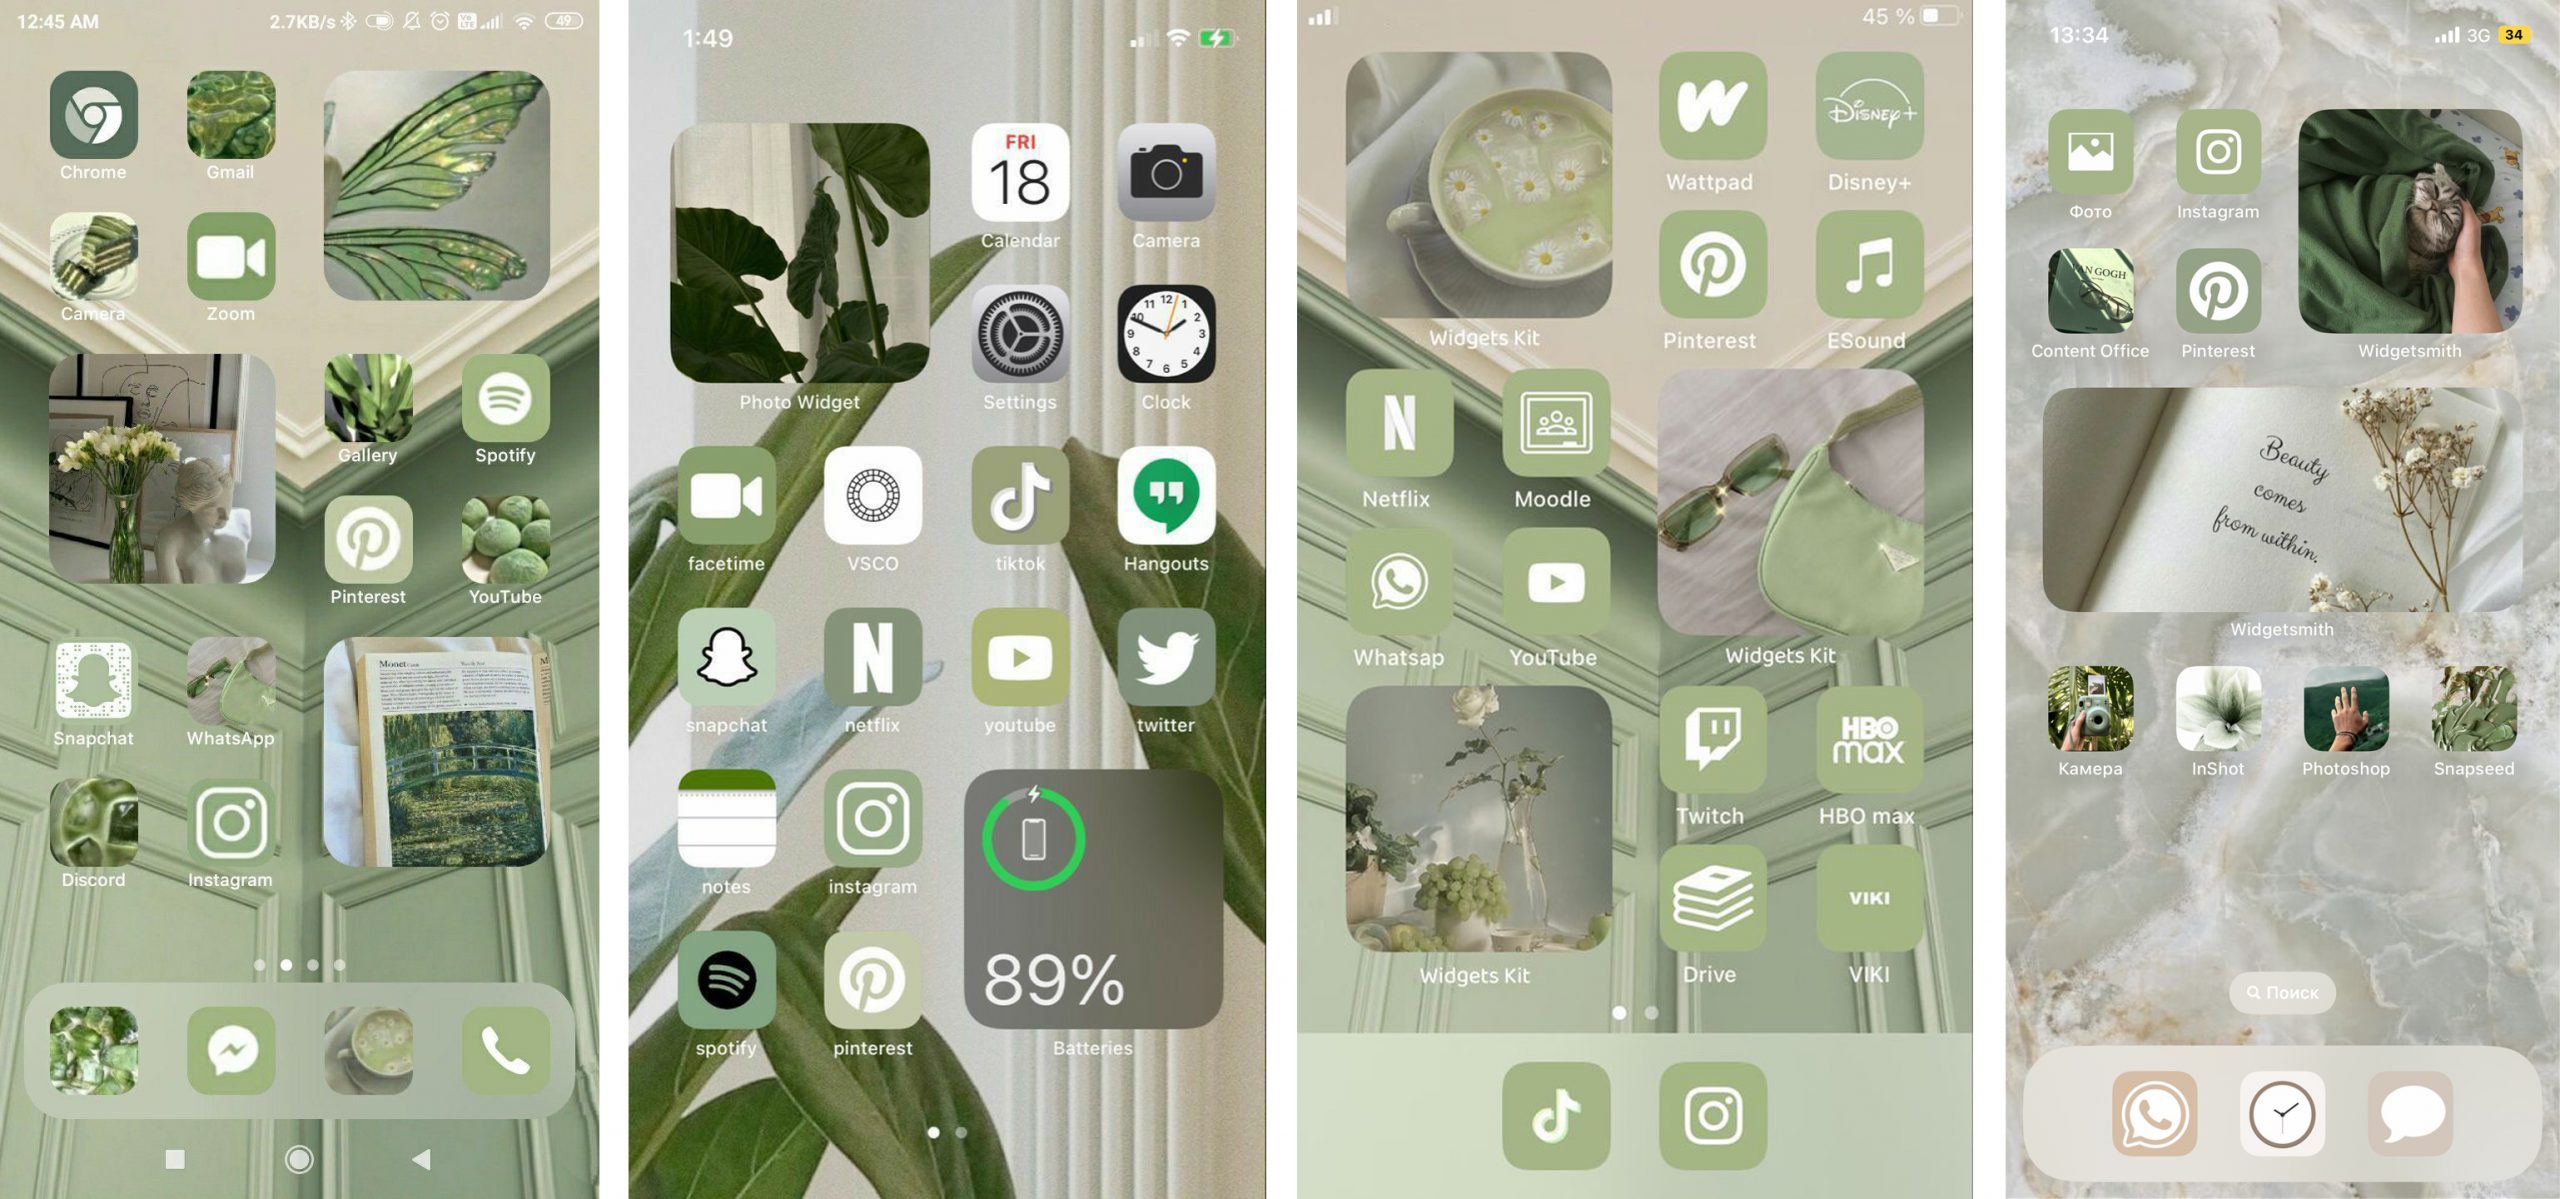
Ideas for your inspiration and desktop design
Always be aware!
Subscribe to the newsletter and be the first to know about new promotions and special offers