For many iOS users, the key factor in choosing a particular iPhone model is the camera capabilities. In late 2020 Apple made a breakthrough in the area with the introduction of Apple’s ProRaw format. If you want to take professional photos and have been looking for a masterpiece button in your settings for a while now you should definitely get to know it better.
What is Apple ProRaw?
Well, for starters, the RAW format itself has existed before. Adobe, a well-known American software company, introduced it in 2004. It was given the extension DNG (Digital Negative Specification), which means “digital negative”. Photographers around the world immediately switched to RAW format, as it does not compress the file and allows for much more information in post-processing.
Most modern smartphones shoot in standard JPEG format by default, the iPhone in HEIC format. These formats take beautiful, juicy photos, but are not subject to in-depth editing. That’s why, at the forefront of technological discovery, Apple has created its own high-quality photo format, Apple ProRaw.
Here, we would like to save our readers from disappointment. We talk about the amazing capabilities of Apple ProRaw files, but the first thing you will probably say when you take a picture is “nothing special” or even “but JPEGs are prettier”. Don’t jump to conclusions.
RAW is an English word that stands for “raw”. It means you get an unprocessed, unprintable file. Comparing it to JPEG or HEIC in this respect is simply meaningless, to put it simply. In the first case, it’s already done for you: you can eat the meal or treat someone close to you to it, while in the second case it’s up to you to decide what to do with all the food.
It turns out that Apple ProRaw is a source that has not yet been processed. That’s why the files are so “heavy”, for they store megabytes of valuable information. The challenge for the user is to use it wisely. For example, you can “pull out” badly shadowed areas of a photo: even if you see a white sky on the screen, you can still give it back a blue color, because information about that part of the photo is stored in the file itself. But it’s almost impossible to edit a JPEG if it’s originally shot poorly.

How does Apple ProRaw work?
Before it arrives in your photo gallery, a photo in standard JPEG format is subjected to your smartphone’s internal algorithms; it means you command it to process the image itself. For example, the iPhone’s clever Deep Fusion technology is responsible for maximizing photo detail, while HDR widens dynamic range and allows you to capture better-light images.
Apple’s ProRaw assumes that the smartphone will only capture the data for you, but it’s up to you how you use it when you edit. To bring it home, you’ll need to tweak brightness, saturation, contrast, shadows, as well as working out shades, adding sharpness, suppressing or leaving noise, and correcting optical distortion.
Once again, you can do all of the above with a JPEG file, but you’ll get more out of a RAW file, and it will give a cooler result! That’s why if you plan to take pictures in deliberately difficult conditions – in bright sunlight or in complete darkness – use Apple ProRaw.

Examples of photos in Apple ProRaw format
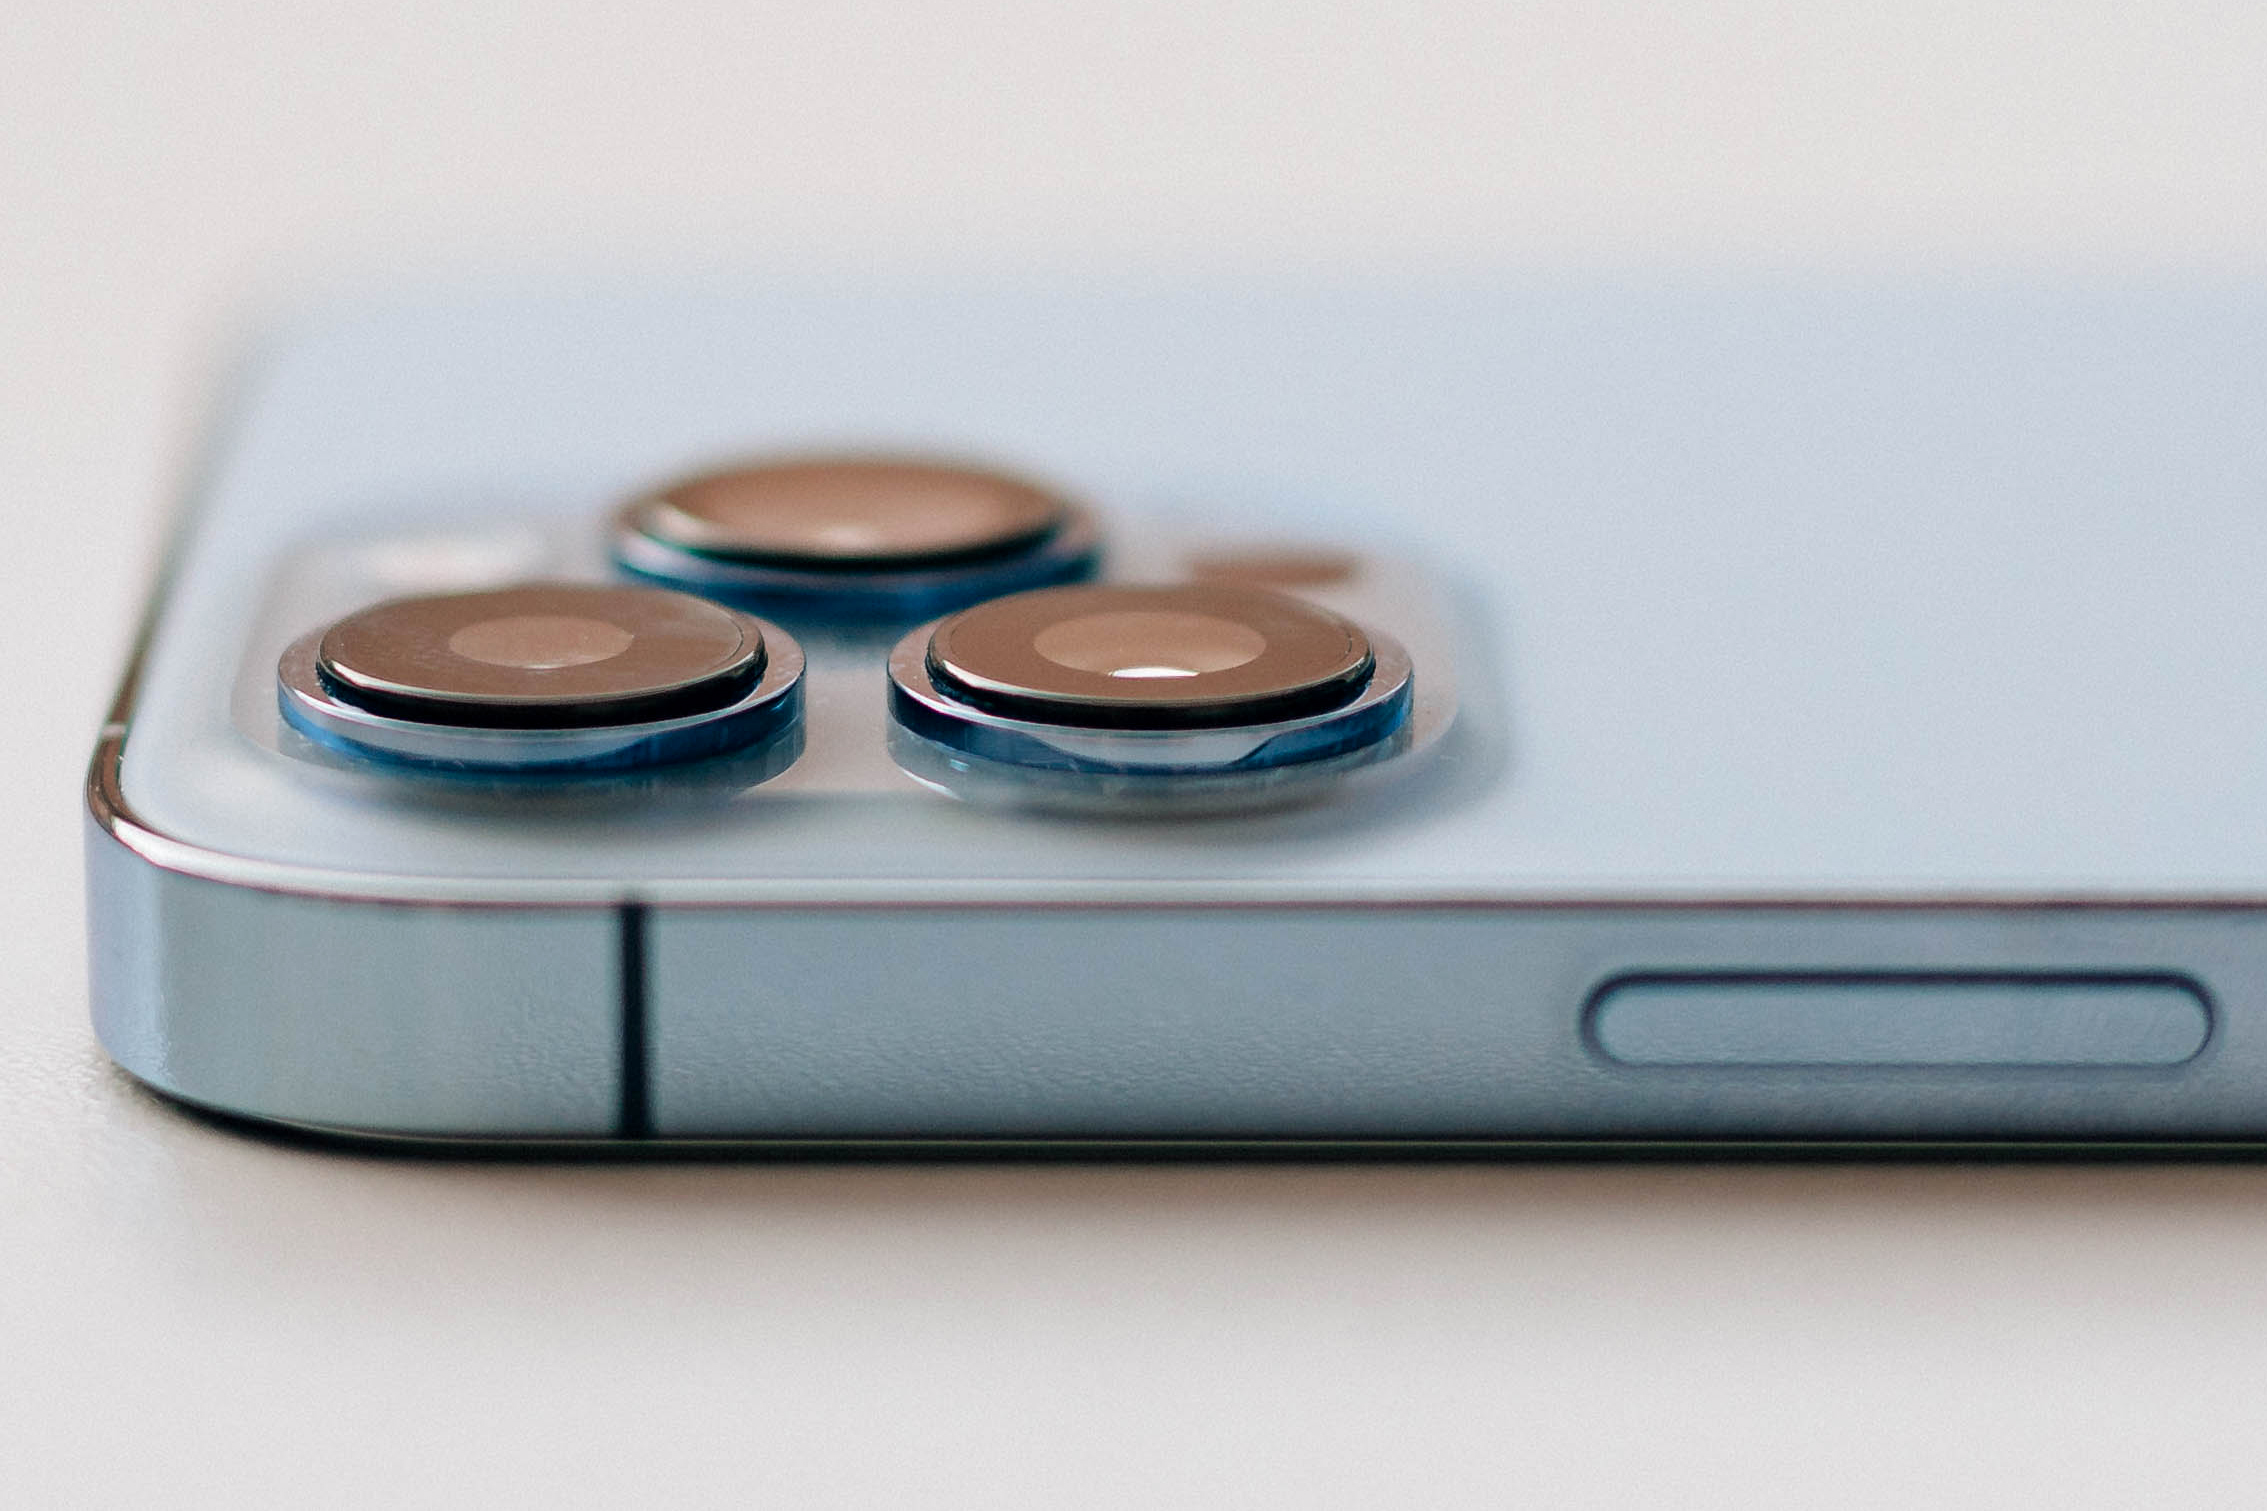
We took photos in the new Apple ProRaw format and standard JPEG. We took pictures with the top-of-the-range iPhone 12 Pro. Then we subjected the resulting images to the basic principles of image processing, and now we want to share the results of our experiment with you.
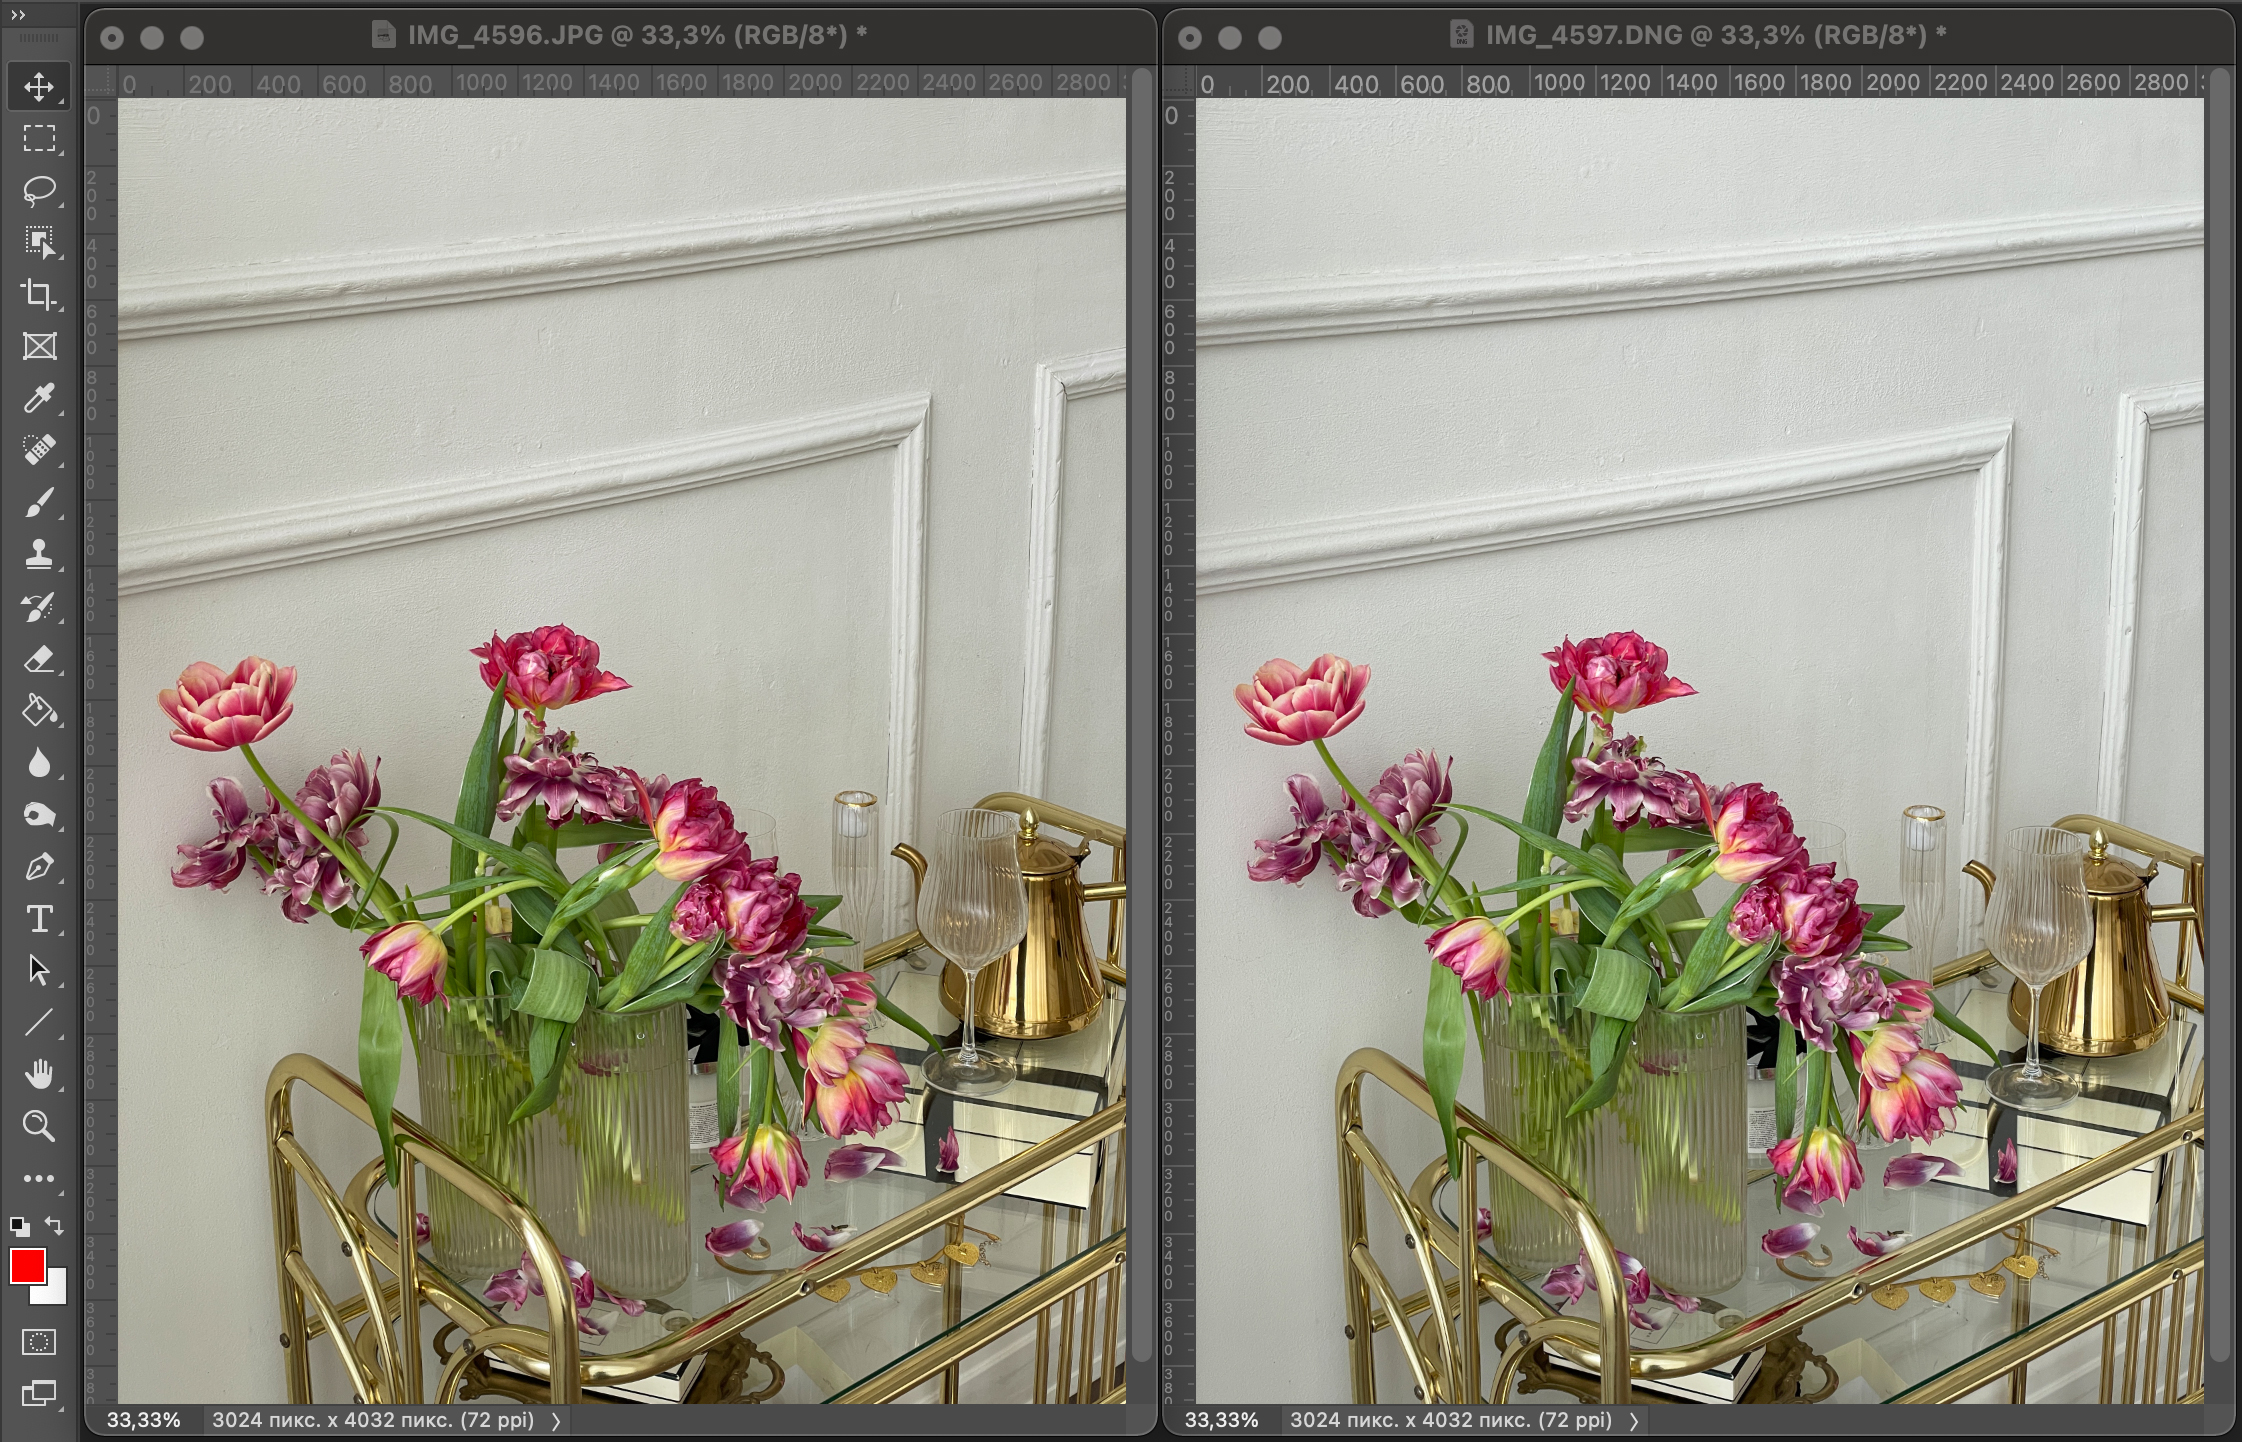
So, in this example we can clearly see that the source with Apple ProRaw activated allows for greater detail during post-processing. Note the outline of the petals and their texture, as well as the plaster on the wall. Both shots have exactly the same settings: Contour Sharpness with an effect of 65 and a radius of 2.7. At the same time, we didn’t do any colour manipulation: as expected, the original JPEG is slightly more lush and warmer.
Left – JPEG, right – DNG (Apple ProRaw).
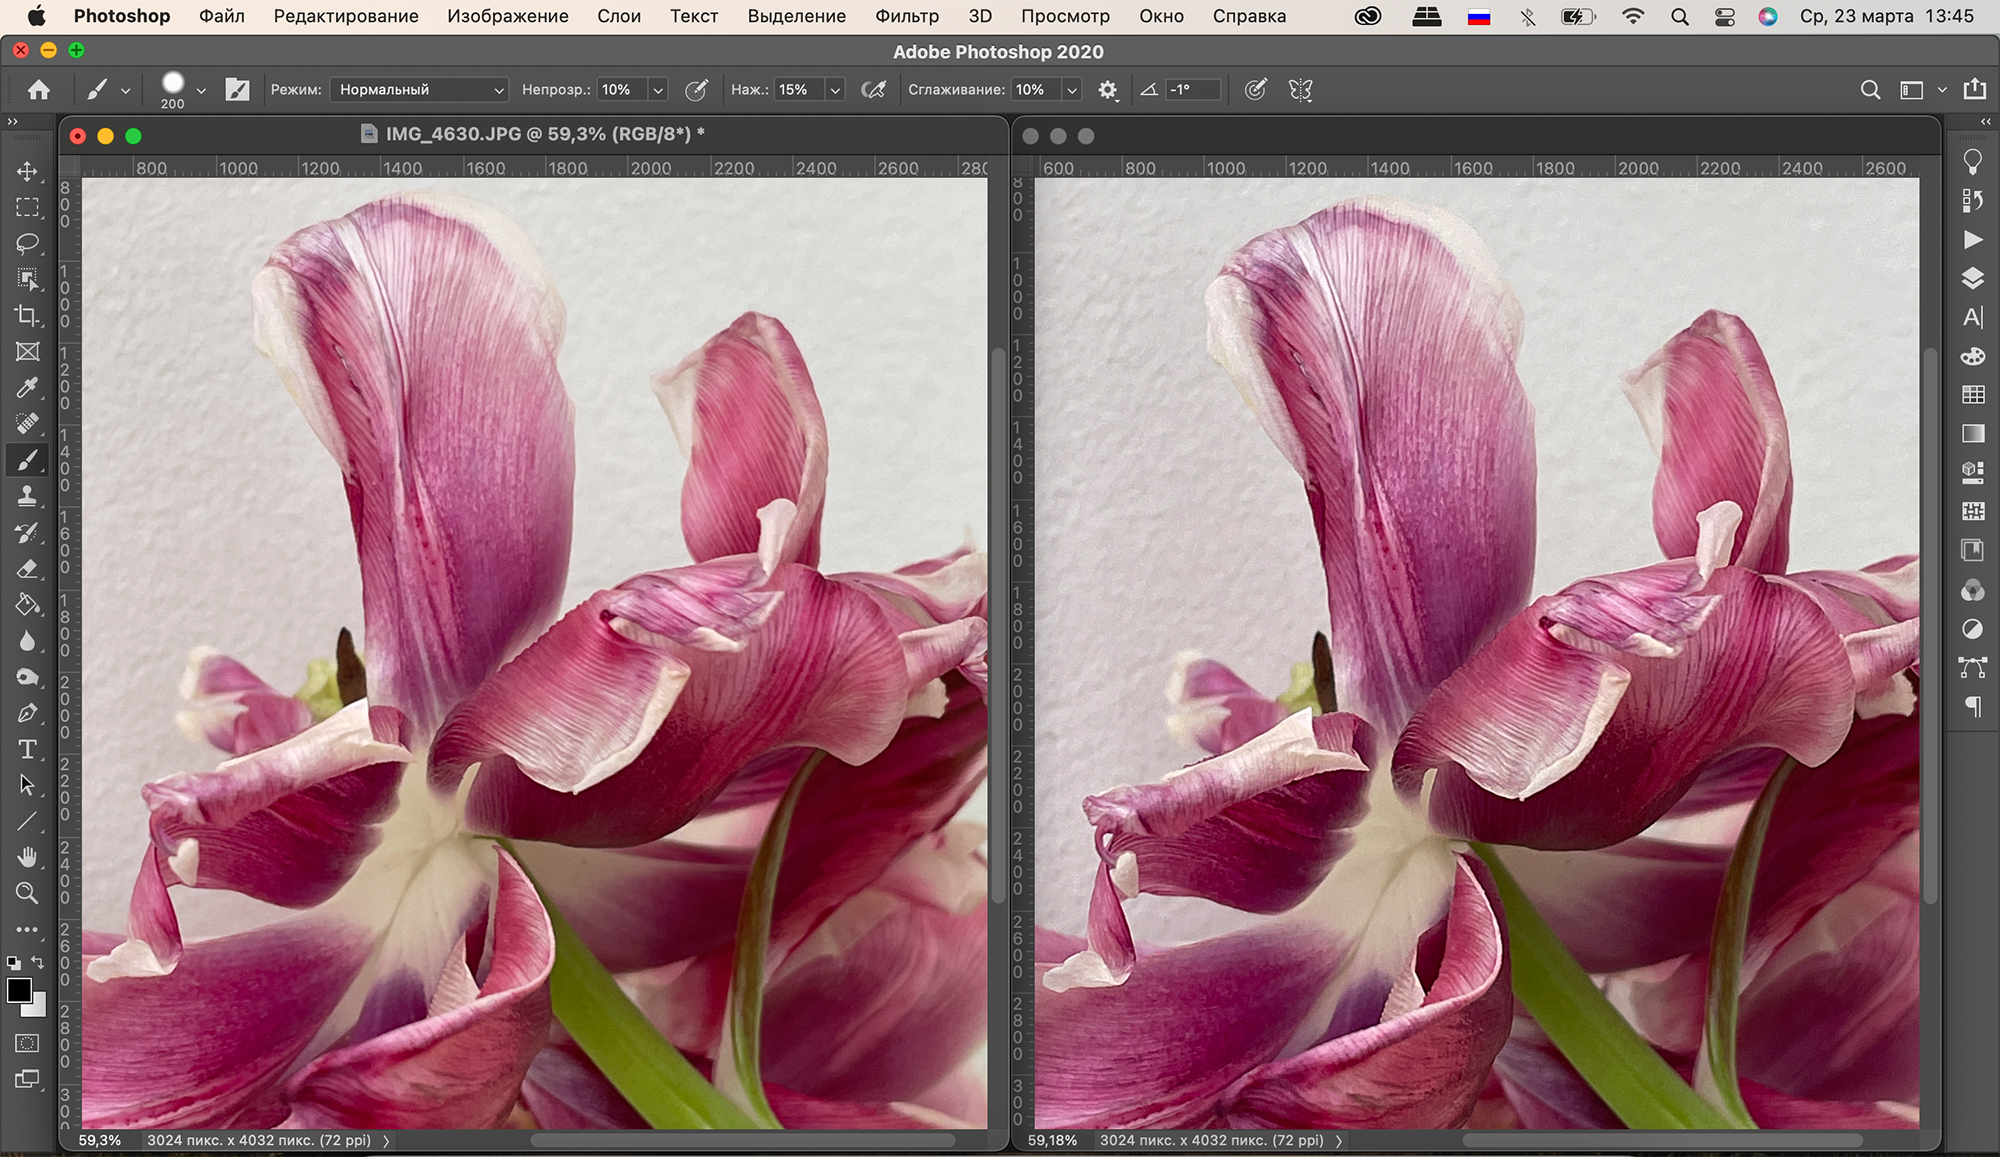
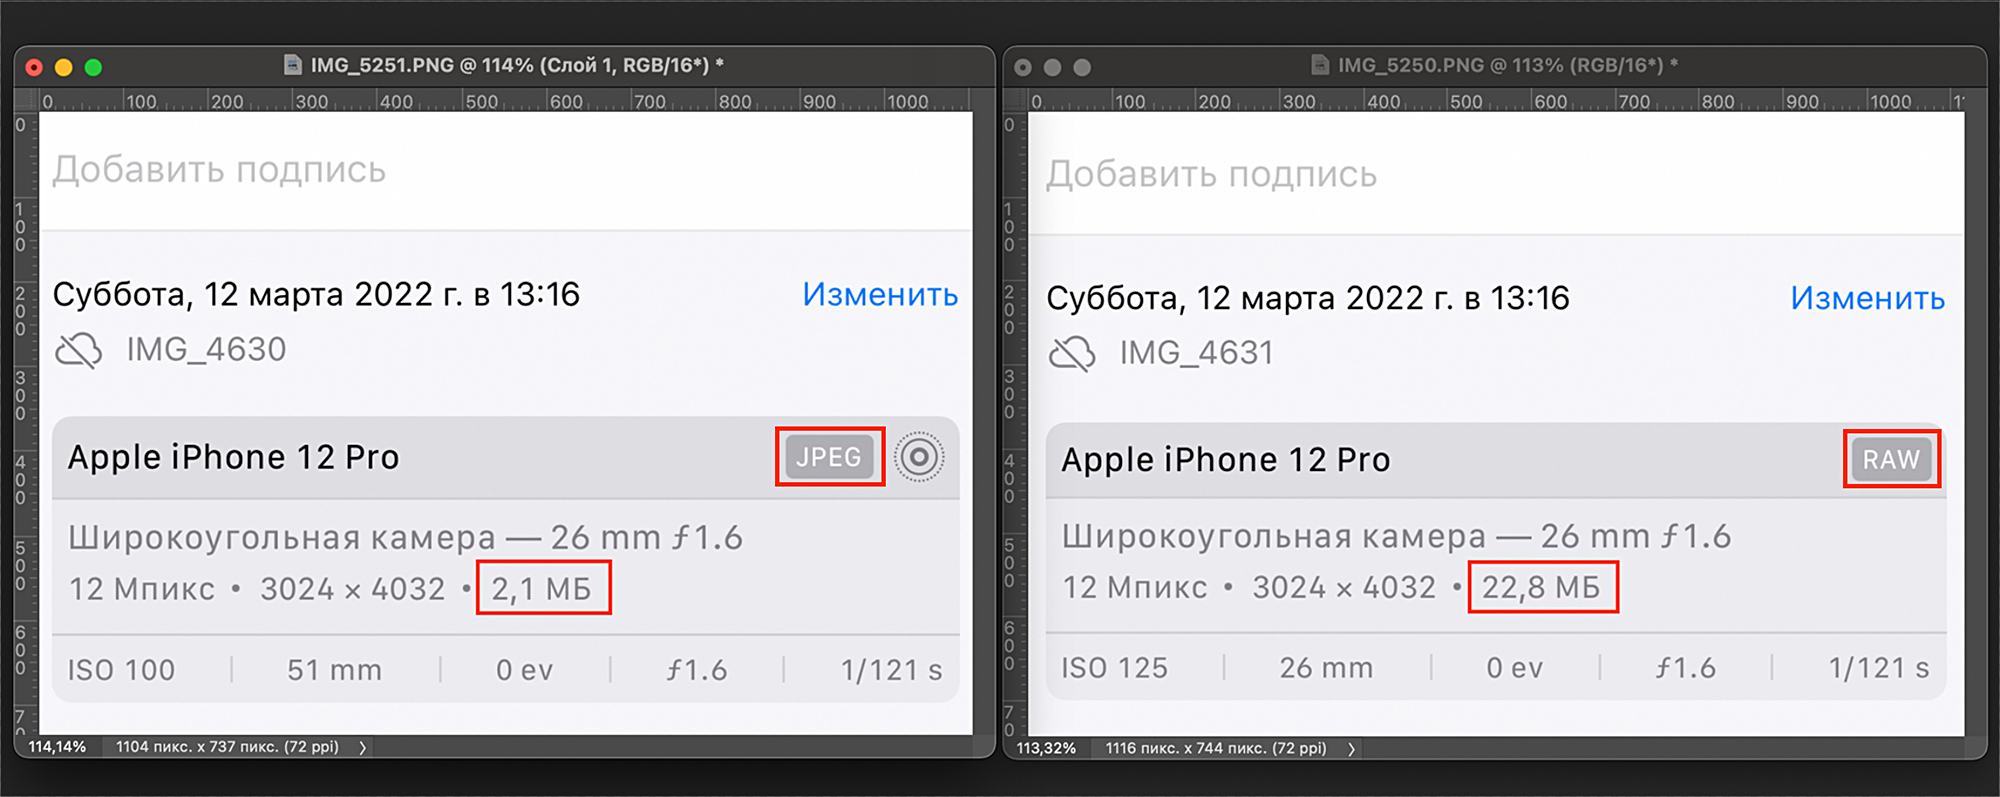
Also note the weight of the files: since Apple ProRaw holds much more valuable information, it is considerably ‘heavier’ than JPEG.
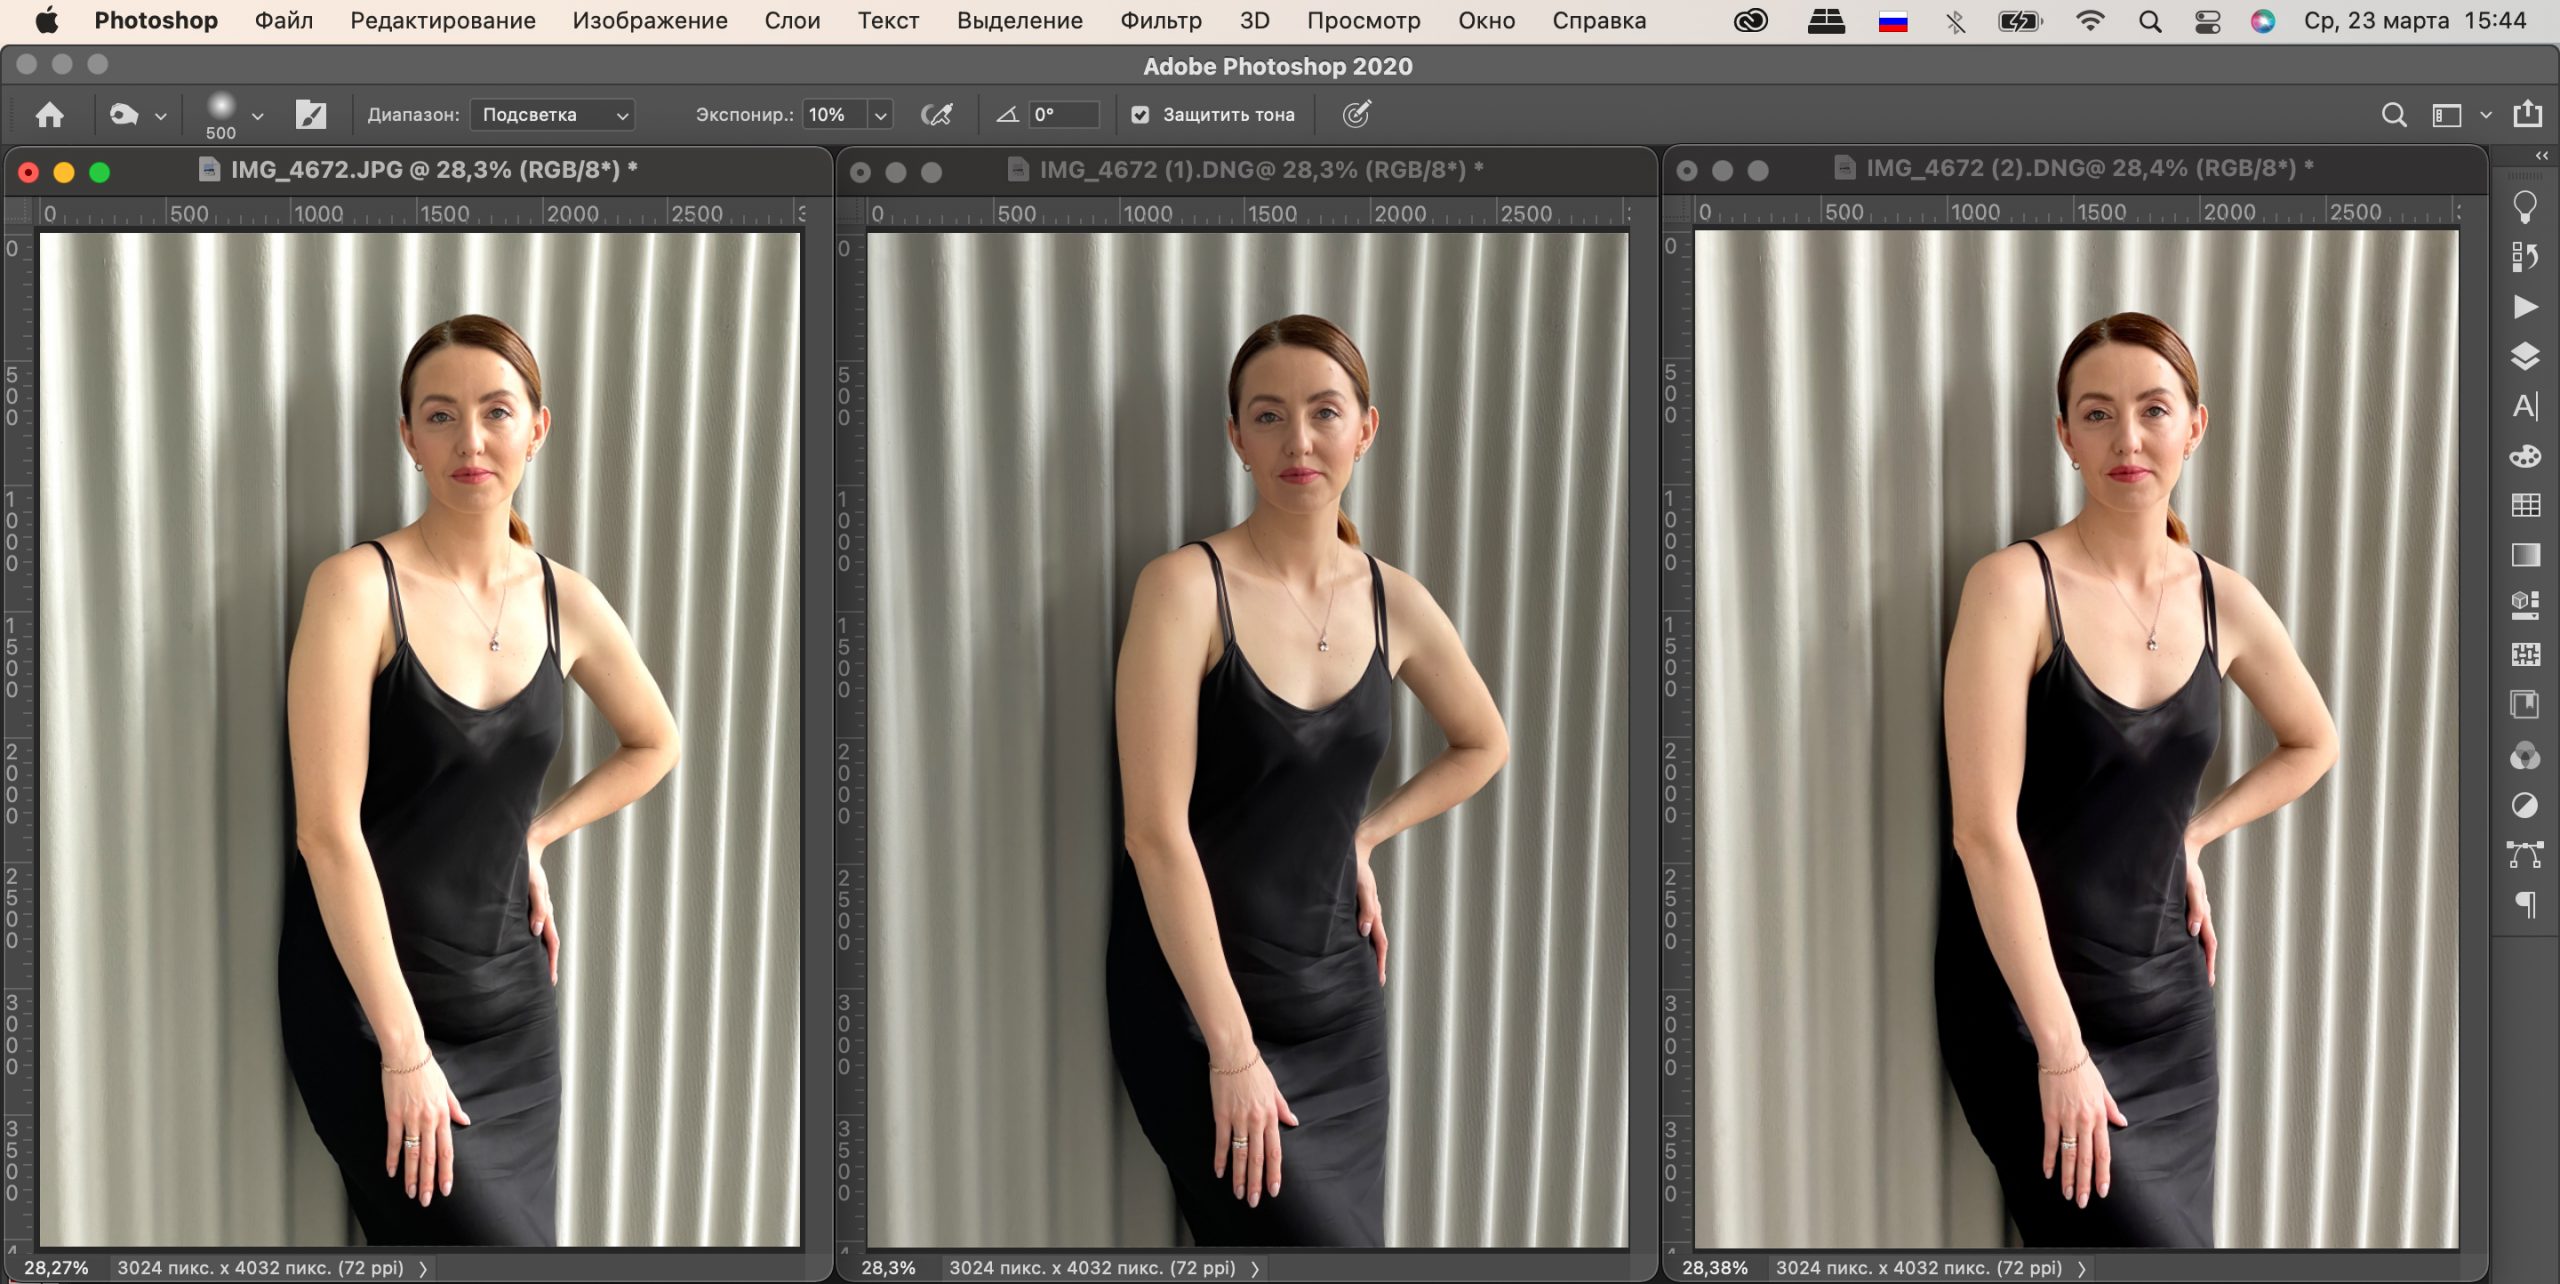
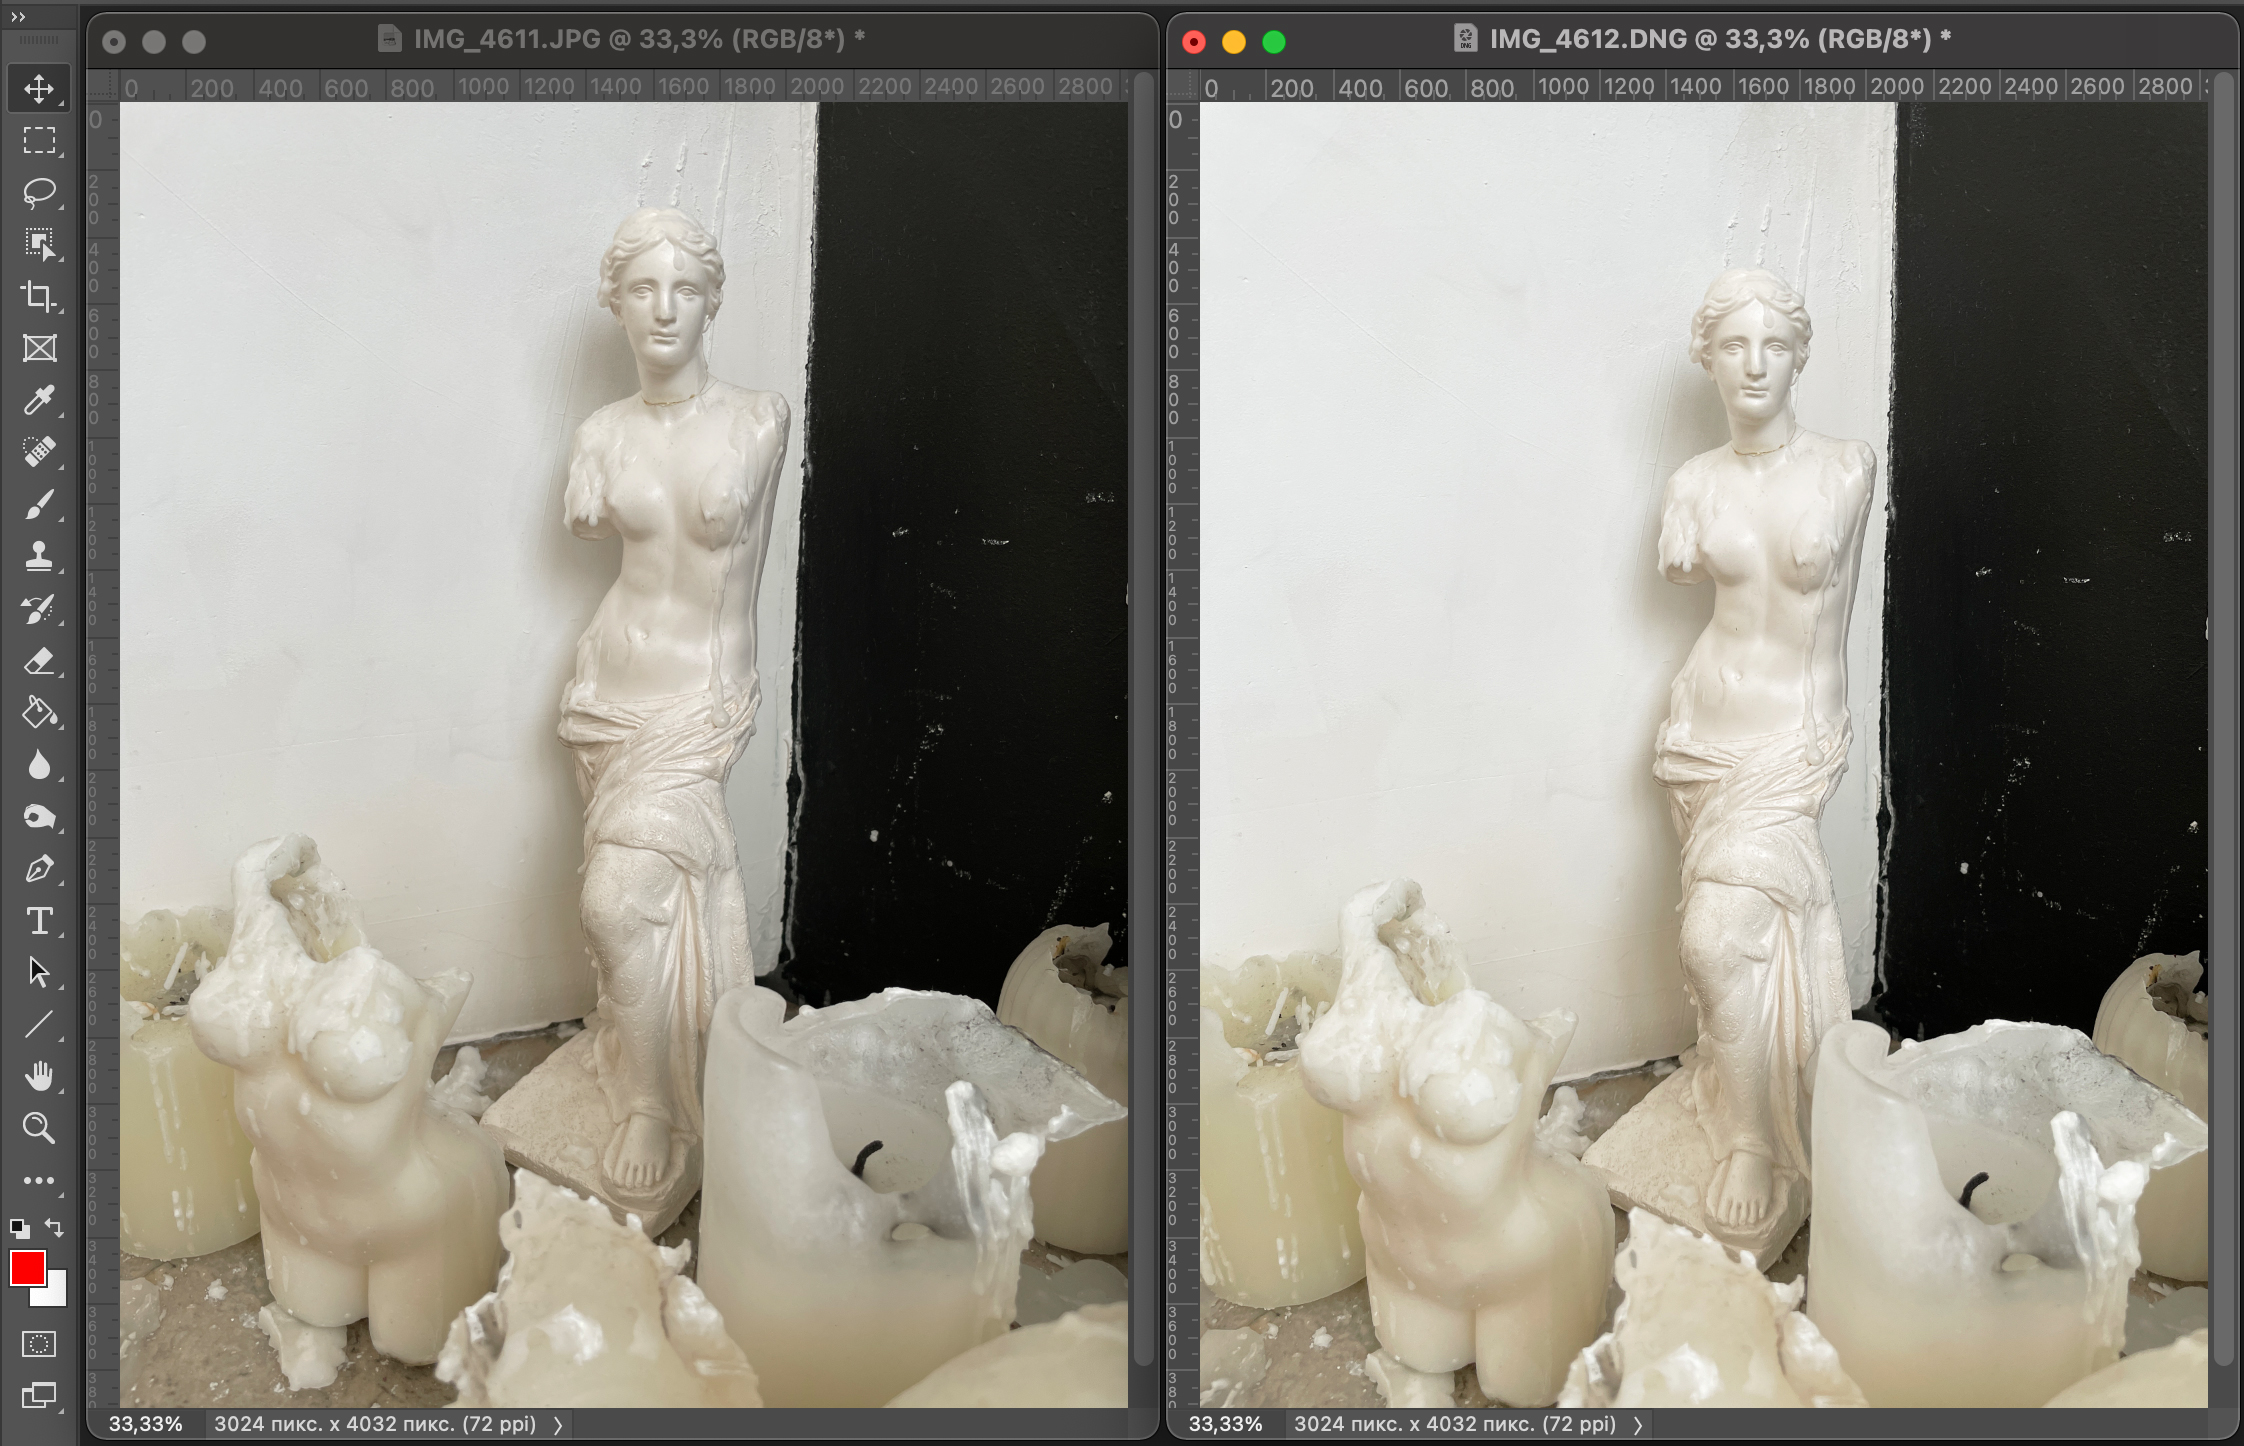
And this example shows us how great the Apple ProRaw format is at handling difficult lighting. Our model is standing in a black dress against a neutral gray wall by a window with bright sunlight coming in. This created a strong contrast and overlight, you can see it on the unprocessed JPEG. ProRaw, on the contrary, is slightly darkened. During processing, we needed to achieve harmony in the frame: preserve the information in the shadows, but bring back the highlighted details.
On the left is the original JPEG, in the center is the original Apple ProRaw, and on the right is the Apple ProRaw with basic processing.

Below you will see some more examples to compare JPEG and Apple ProRaw. The photos were taken under different conditions: the sun was no longer bright, the daylight was approaching evening. They have been equally corrected, i.e. the values for brightness, white balance and sharpness are exactly the same.
At first glance, nothing special. But an experienced user will immediately notice an important detail: the Apple ProRaw is cleaner, while the JPEG goes into yellow and green shades. So if you’re good with the photo editor on your iPhone or Mac, you’ll be able to turn Raw into a real eye-catcher!


Where do I process photos in Apple Pro Raw?
You can process Apple ProRaw files on a Mac, iPad or iPhone.
In terms of convenience and mobility, it is of course best done on an iPhone. Shooting, like photo processing on an iPhone, is currently only available on the Pro and Pro Max versions of the 13 and 12 models. For correction, use the built-in Photo app. Beyond that, you can download from the App Store and test the functionality of VSCO, Snapseed, Darkroom and, for example, Adobe Lightroom – these are the most popular photo processing apps.
However, the most in-depth processing you can do on a Mac. If you’re a professional photographer, you probably already own a Mac. It’s probably one of the Pro models on the M1 chip. The MacBook Pro 14.2, for example, has plenty of processing power for big files. The screen’s diagonal size allows you to see all the details on your screen without making the Mac look bulky. So you can stay mobile and travel light.
Your photos will be stored in iCloud Photos. To do so, make sure you have macOS Big Sur 11.1 or later installed on your Mac. Also, make sure that the “Upload Originals to this Mac” option is enabled in the Photos app on your computer. To do this, go to “Photos” – “Settings” – “iCloud” – “Download originals to this Mac”.
To work with photos in this format, download one of the following image editors to your Mac: Adobe Lightroom, Adobe Photoshop, Phase One Capture One, Raw Photo Processor (RPP).

How do I enable Apple ProRaw?
It’s easy enough.
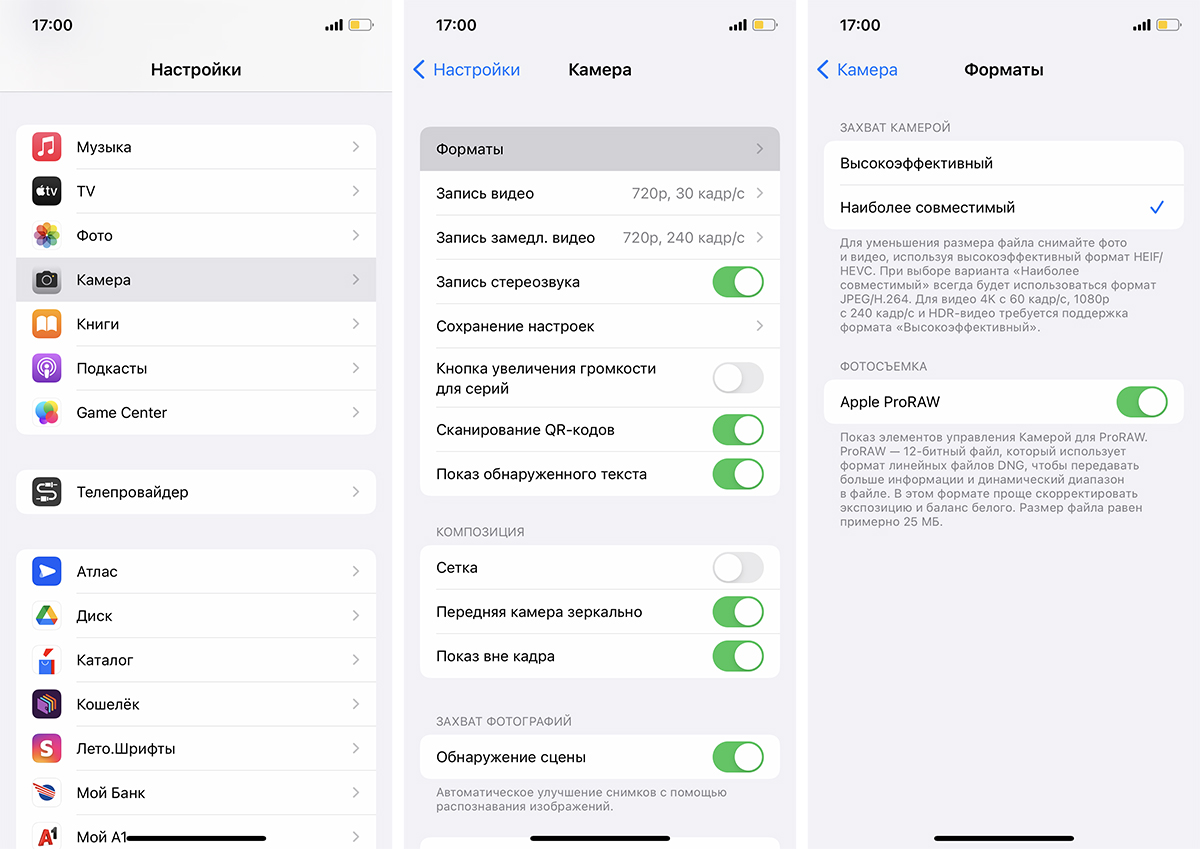
- Open Settings on your iPhone.
- Swipe to the end of the list and go to “Camera”.
- Go to “Formats.”
- Activate the Apple ProRaw option by toggling the gray toggle switch to green.
- Open the built-in camera app on your iPhone.
- In the window that opens, locate the icon and tap it.
- Take a photo.
To deactivate Apple ProRaw, tap the icon again. You can switch between your usual format and the new one while taking a photo.

As you can see, Apple ProRaw can be activated in just a couple of seconds. This means there’s no need to keep it on all the time: remember, files in this format weigh a gigantic amount.
Briefly: everything you need to know about Apple ProRaw
- The name itself suggests that only iPhone Pro-version owners will be able to shoot with it.
- Apple ProRaw can be shot on the latest generations of iPhones: iPhone 13 Pro Max, iPhone 13 Pro, iPhone 12 Pro Max и iPhone 12 Pro.
- Photo capture in the new format is available to those who have updated to iOS 14.3 or later.
- Apple ProRaw files weigh 10-12 times more than JPEGs and HEICs: an average of 30MB versus 2MB for HEICs and 6MB for JPEGs. If you shoot a lot in Apple ProRaw, you’ll need very roomy storage in iCloud.
- Color depth is higher than standard: 12 bits versus 8 bits.
- Apple ProRaw is supported by all cameras, including the front-facing one. The only limitation is that you can’t take a picture in this format in Portrait mode. That said, Apple ProRaw’s Night Shot mode algorithms work correctly.
- You can transfer original Apple ProRaw photos (i.e., unedited original files) to your Mac, iPad and other iPhones using AirDrop, or by uploading files from iCloud on any of your devices. Edited files in the Photo app or other editors will take on the JPG format.
Conclusion: who is Apple ProRaw for?
If you run your own blog, shoot reviews or are in constant need of quality visual mobile content, then Apple ProRaw is a very useful tool for you.
But remember, it’s not a magic wand that does everything for you – you’ll still have to edit your footage. But the source in Apple’s ProRaw format is more “flexible”, and therefore gives full freedom for creativity.
Does all this mean that the iPhone will replace professional DSLRs and mirrorless cameras? Let’s be honest: it will not do it completely. Raw photos taken with a camera and ProRaw photos taken with an iPhone will be different.
But mobile shooting in Apple’s ProRaw format is a great alternative for those who don’t have a camera or can’t carry one around all the time. You can’t pack a backpack full of gear in your pocket, and it’s hard to keep out of sight. The iPhone, on the other hand, lets you create high-quality visual content while remaining mobile and responsive.
Always be aware!
Subscribe to the newsletter and be the first to know about new promotions and special offers